Ronen Bekerman is an industry leader in Architectural Visualization who hosts in-depth tutorials on his specialist blog.
David Santos is no stranger to the “Art of Rendering” series, with a very popular article already posted before — The Making of Lake Lugano House. Today he is sharing the process behind making the Sarmiento Museum project in his studio. To recreate this National Historic Monument in the northern suburb of Buenos Aires, Argentina, David and his team used SketchUp, V-Ray for SketchUp and the new Skatter Plugin for SketchUp for scattering all the vegetation in the scene. Follow David in this article as he takes us from start to finish on this one. Enjoy!
Introduction
First of all, I would like to thank Ronen for the opportunity to participate in his blog once more. I’ve been a huge admirer for some time now, and I’ve gained a lot of knowledge about modeling processing and most importantly techniques. Also, I want to admire the big effort that Thomas and Ronen have done with such an amazing software that Skatter is. Without them, this project could not be possible.

One of the final renderings for Sarmiento Museum
After the Lake Lugano House Project, I always wanted to do another project that would take advantage of all the new tools that SketchUp and V-Ray for SketchUp are offering. In my recent travels to Argentina, I discovered an amazing place that contained a “caged house.” I was so intrigued to find such an interesting structure right beside a river, it immediately called my attention.
The Sarmiento House Museum is a historic house preserved in a crystal cage. It’s the creation of architecture to preserve architecture. Once I got back home, I immediately started the project with my team. The project demanded a lot of vegetation, which worked perfectly with SketchUp’s new Skatter plug-in.
About the Project
Sarmiento House is a National Historic Monument in the northern suburb of Buenos Aires, Argentina. It was built as a residence in 1855 by the seventh President of Argentina. In 1966, it was declared a National Historic Monument, and it’s presently a museum.
References
It’s always important to gather good references to be able to start a project. The photos that I was able to take from the site were a great start. Some important information to take into consideration:
- Dimensions
- Type and density of vegetation
- Shadows and lighting conditions
- Glass materials and the color of the water on-site
- References (Collage)

SketchUp and 3D Modeling
The next step to develop a SketchUp model was to locate the site on Google Earth to confirm dimensions and view the project’s context. Up next, we’ll display a breakdown of the final SketchUp model.

The context

The pier

The exterior lights

The internal bridge

The house

The exo-structure

The glass enclosure
It was very important to give special attention to the details of the model to make it realistic:


Skatter
The most challenging step in this project was the incorporation of the vegetation because it was such an important part of the site re-creation process.
In reference to the type of vegetation that we found at the site, here are the proxies used in the project:

Once we decided on the proxies, we started to find various ways to distribute it and get a dense vegetation. Here’s a top view of the tree types of vegetation as placed in the scene:

The tool we used the most to distribute the vegetation was the Skatter plug-in, as we mentioned before. Here are some settings used for our process:


Proxy materials are different depending on the type and general layout:

After we finished modeling, the next step was applying materials. You can check out all the settings for the materials here.
The “crystal cage” materials are basically standard materials with a reflection layer. The wood is a mix between BRDF and standard material, depending on the detail it requires. The stonework is composed of a BRDF with various levels of detail. Other materials used were two-sided materials for exterior lamps, roof tiles and water.
Lighting
The lighting process also has three important steps.
Exterior lighting was created using small globe lamps, with a two-sided material and a sphere light on the inside of them. Two of them were placed in the entrance, and the rest are randomly placed in the model.


Interior lights are mainly sphere lights:


The reflectors lights that are inside the crystal cage are the main lighting of the scene. They are a mix between Spot Lights, Rectangular Lights and Emissive Material.


Final lighting setup …

Global Illumination was achieved with a V-Ray Dome Light loaded with an HDRi (1957 Dusk Clear by Peter Guthrie):

Composition and Rendering
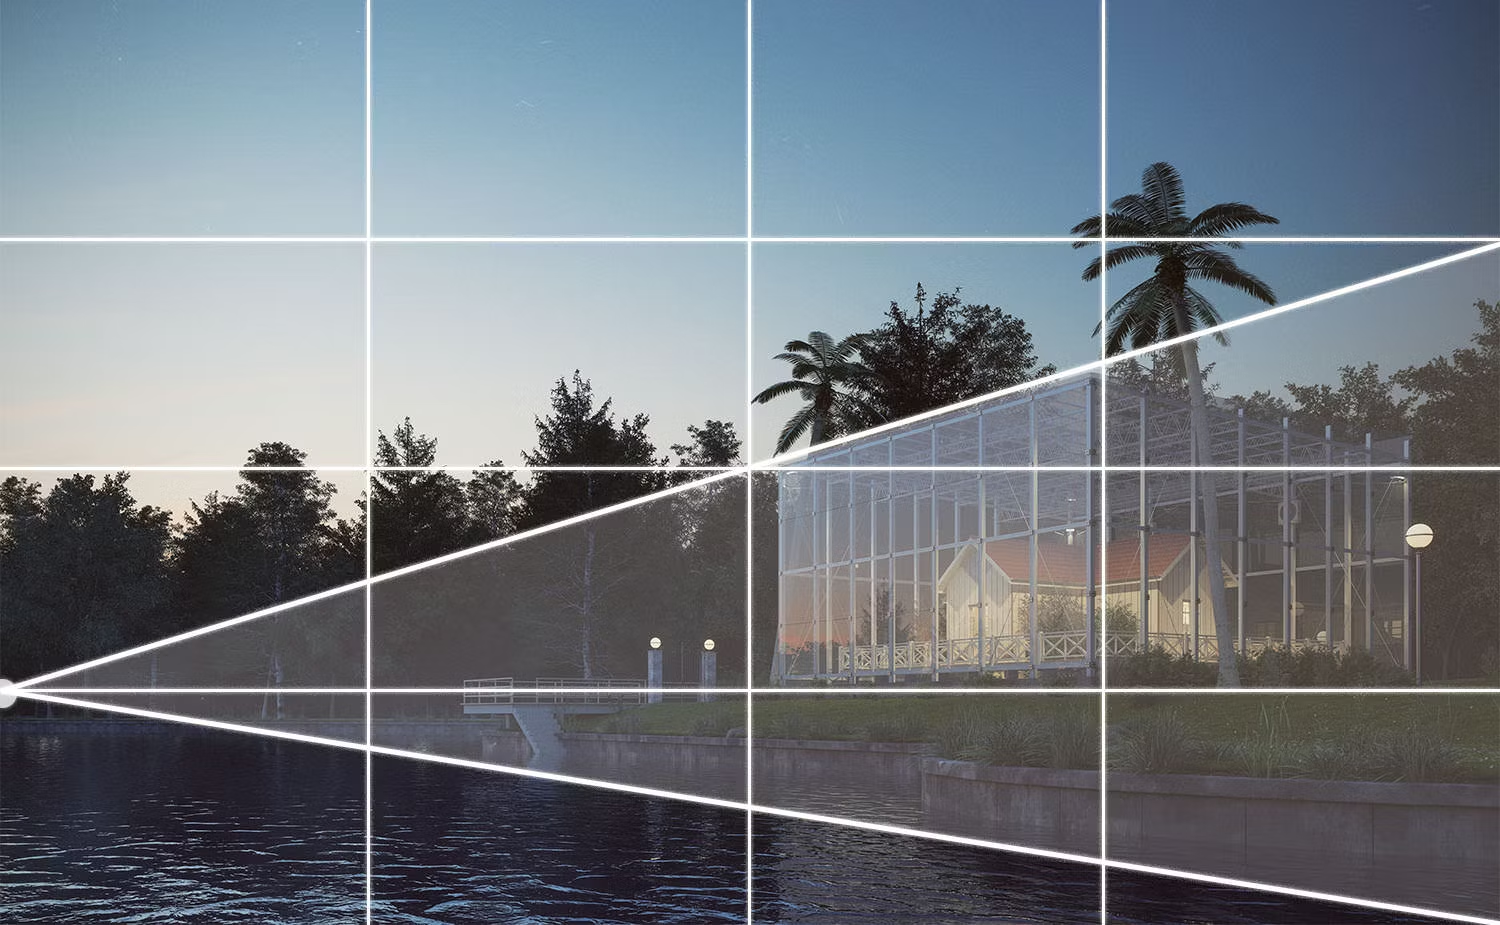
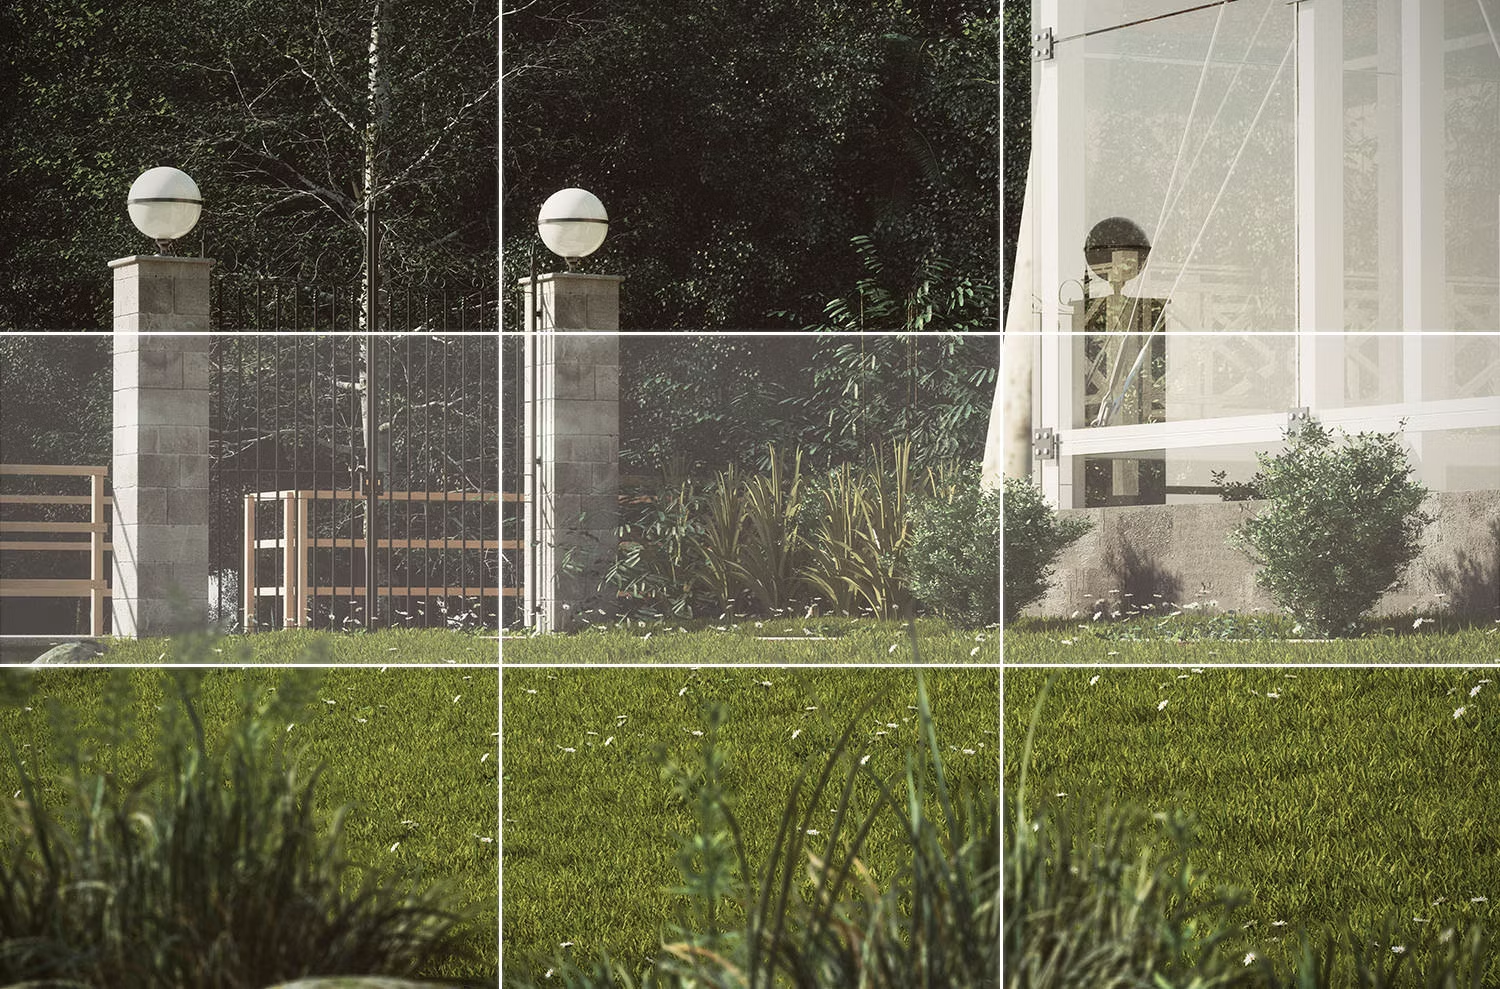
As always, framing is a fundamental aspect of an image composition. Below, you can see the process for framing the final images:


The V-Ray rendering setup for daylight and dusk images can be viewed here.
Post-Production
V-Ray VFB channels:

Stages of the Post-Production:
1. Photoshop compositing (Screenshot layers)
2. Correcting rendering errors (RAW render)
3. Color correction (Comparison)
4. Levels and brightness (Comparison)
5. Color vision (Effects)
6. Photographic effects (Finishing image)
Complete set of screenshots for these processes can be found here, but here are the final post-production stages for night and day:


To give a vintage look to the image, we used NIK software to apply film, dirt and vignette effects:


Before and after post-production:

Final images:


That’s it! I would like to thank everyone in the Lab Visualización Team that collaborated to make this project: Alex, David, Jessica, Francisco and Esteban.
David Santos
Be sure to check out Ronen Bekerman’s best renderings of the week and his in-depth guides to all things ArchViz.
Architizer’s Tech Directory is a database of tech tools for architects — from the latest generative design and AI to rendering and visualization, 3D modeling, project management and many more. Explore the complete library of categories here.


