
Former OMA and BIG employee Bennett Oh is the creator of Archi Hacks, the popular Youtube channel dedicated to Architecture visualization, portfolio and design tips and tricks for students and professionals.
The history of scaled physical models is as old as the practice of architecture itself. Initially invented as a tool for experiments and communication, it has yet to find a contender for its role; perhaps VR can change that. Materials for physical models have evolved over the years, however, and have nearly defined certain practices: Antonio Gaudi with rope and sand bags, Frei Otto with fabric models, and Rem Koolhaas with blue foams.
With the evolution of computer-aided 3D modeling, it has become common for designers to take advantage of precise and fast digital tools for their explorations, all the while, some argue that digital models can never replace the visceral qualities of physical model. Whether this be an evolving discourse of architectural model-making or a degeneration is an intensely debated topic for our generation. Perhaps as a by-product of this dilemma, one of the latest rendering trends dresses digital models to look like physical models.
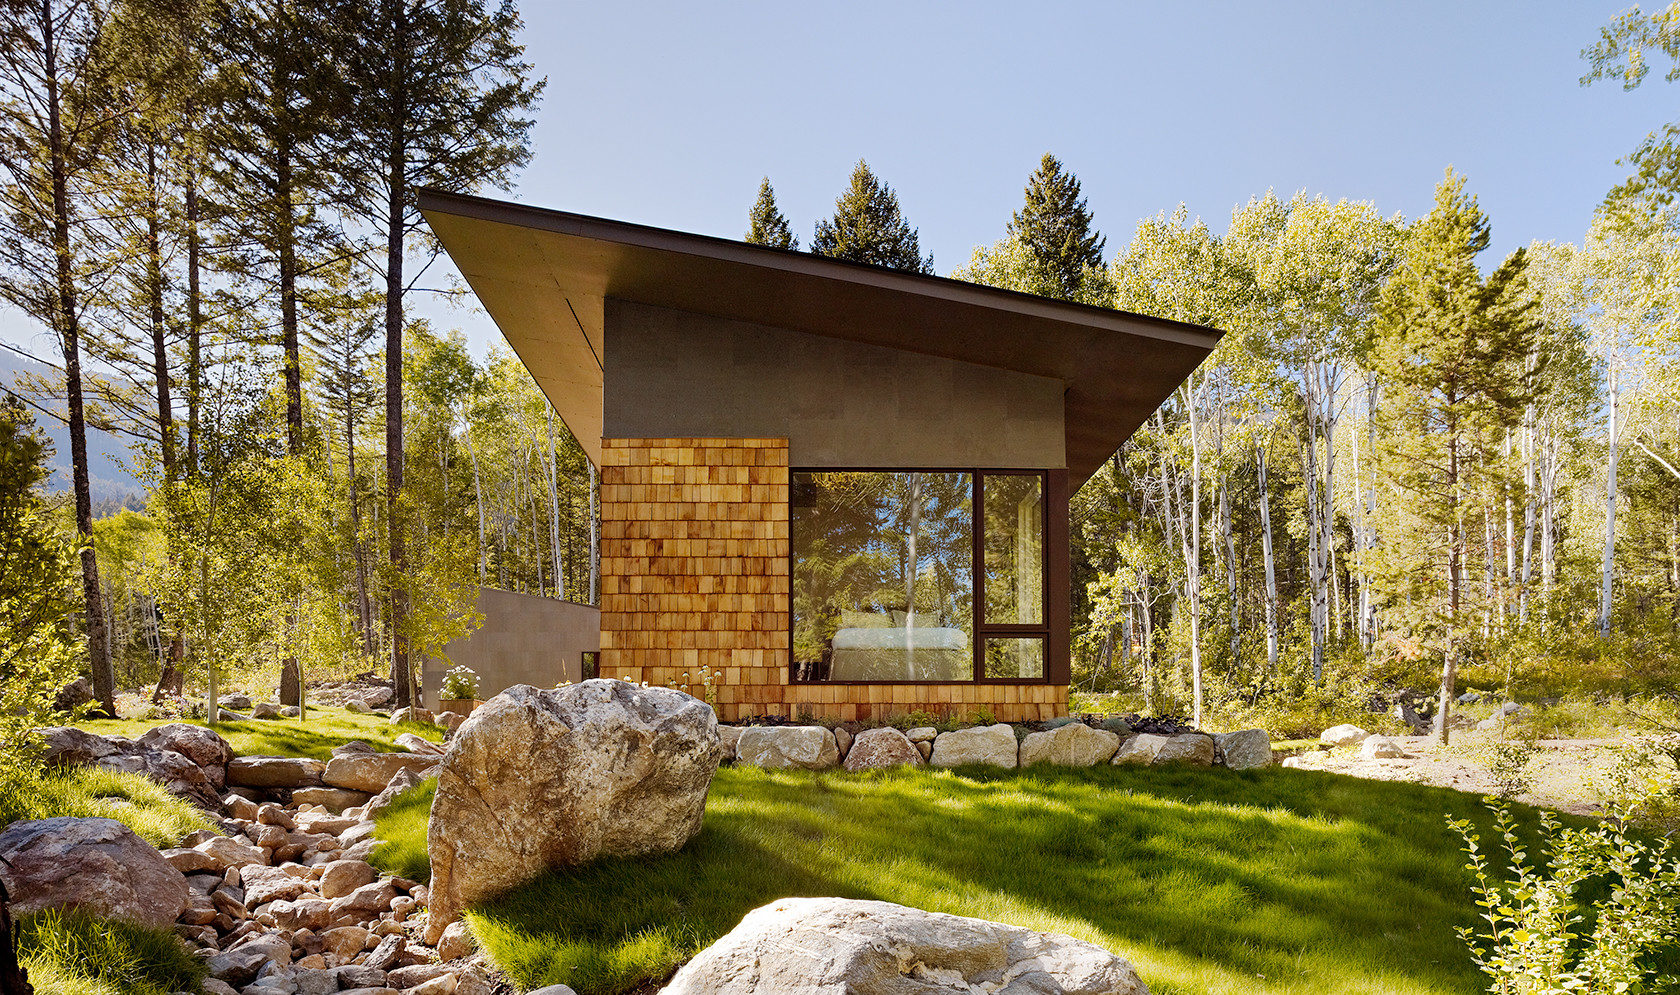
Practices such as Studio Precht demonstrate how we can combine precision and speed of digital modeling with the appearance of craftsmanship and detail in that of physical models. This tutorial reveals the process behind the scene.
What you’ll need:
- 3D model
- Site plan
- 3D software and render engine of your choice (this demonstration uses Rhino and V-Ray)
Step 1. Prepare 3D model and 2D line work
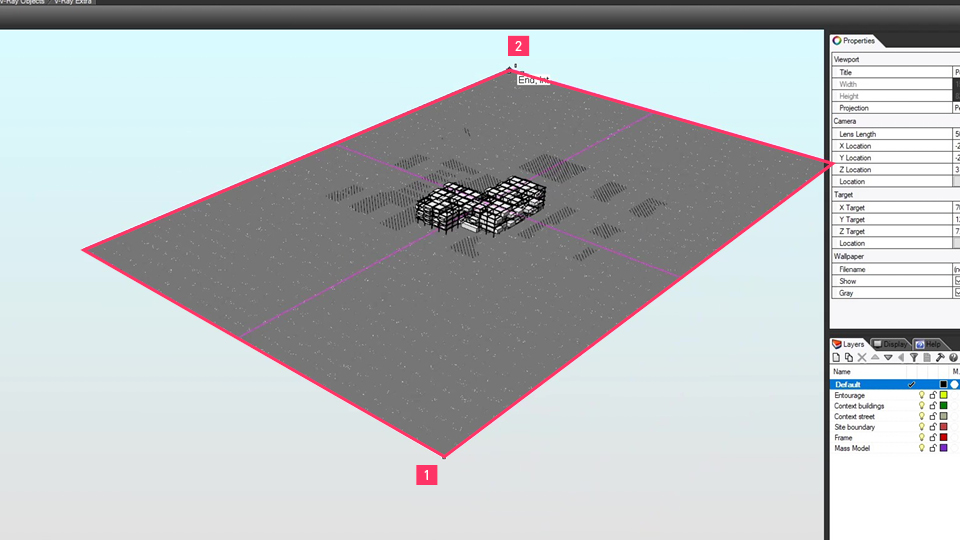
1. Open your 3D model and align site plan with the model.
2. Scale down all elements to desired scale. In this demonstration, I’m using a 1:1000 scale.

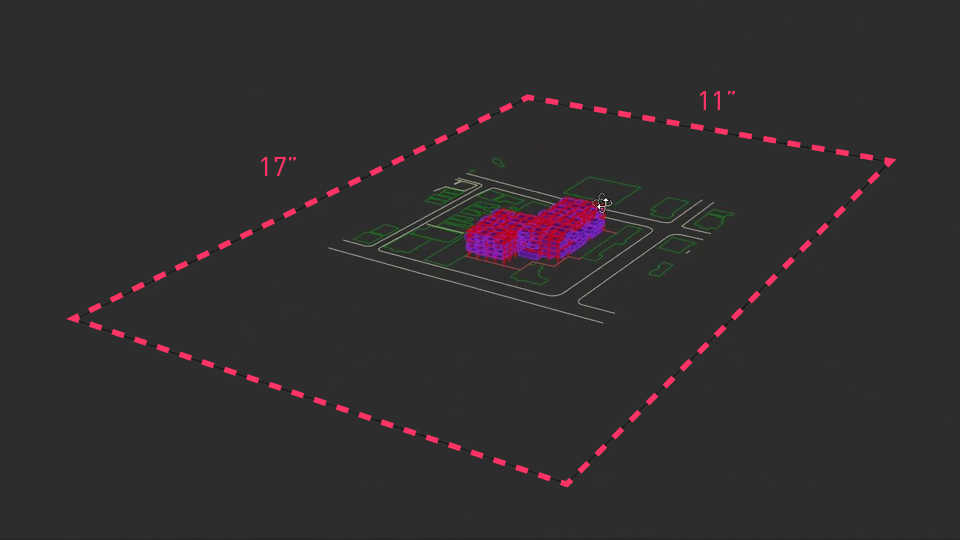
3. Create a plane that will work as a reference in the coming steps. I’m going to create one that is 11×17” (tabloid)
Step 2. Turn site plan into texture (you may skip this step if you already have a scaled site drawing)
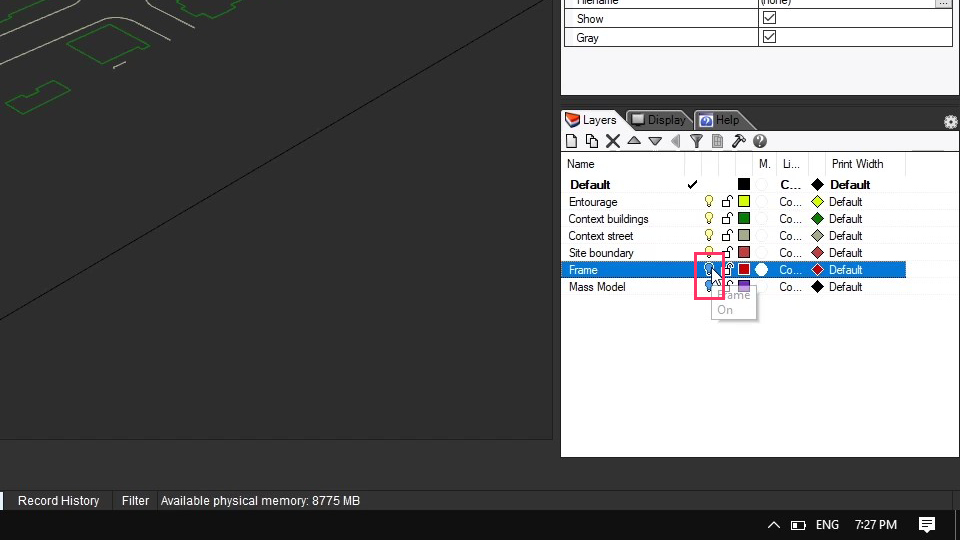
1. Turn off the 3D model and isolate site plan lines. Cleanup unnecessary lines and add hatches as necessary.
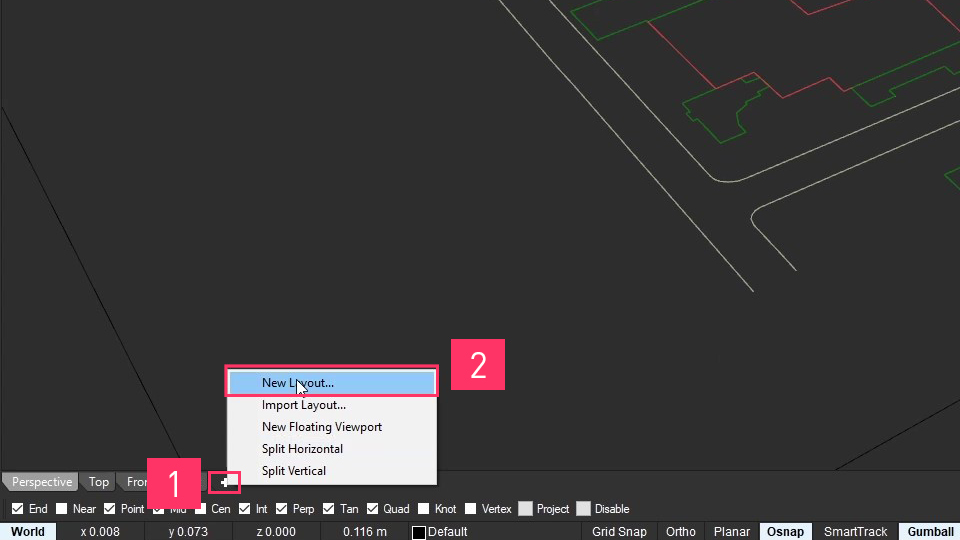
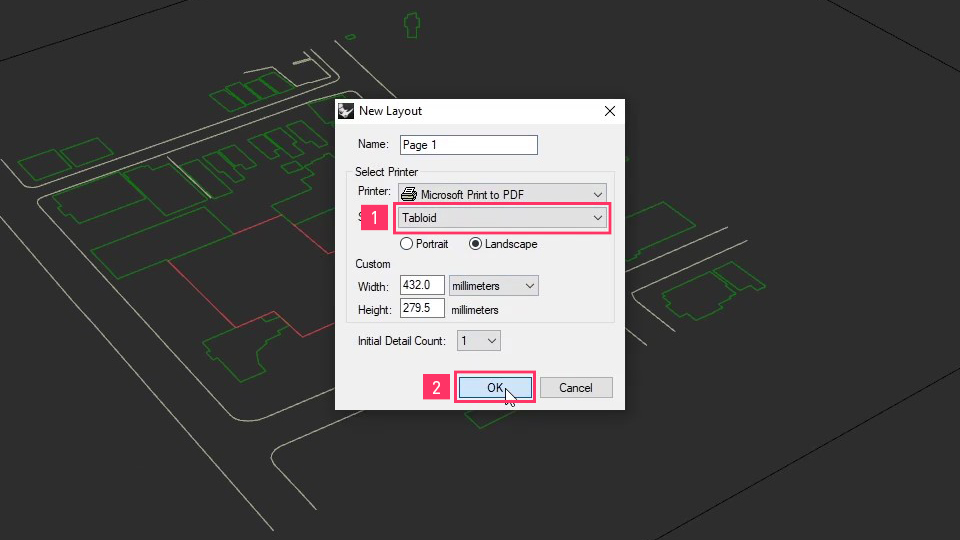
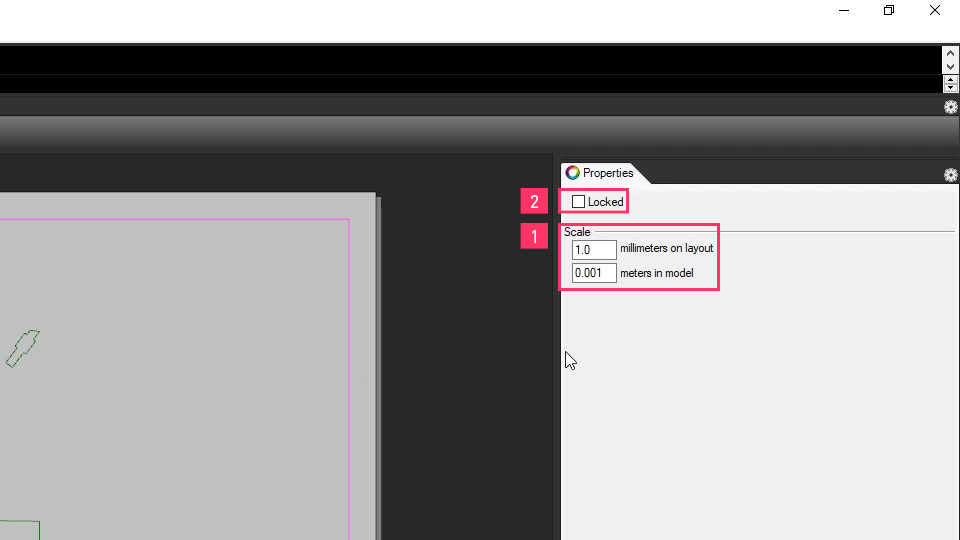
2. Create a new layout that is the same size as the reference plane we created in the earlier step.
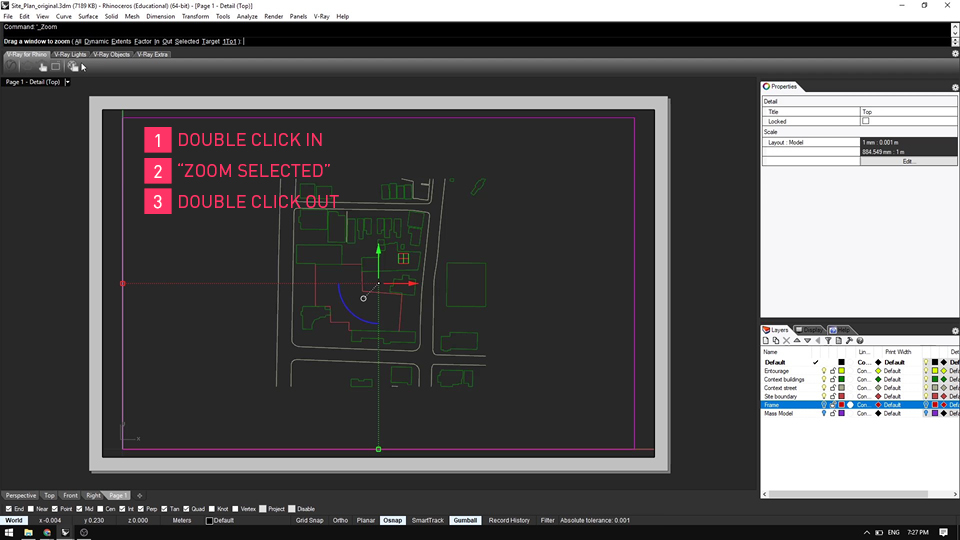
3. Center and scale the site drawings in layout view.
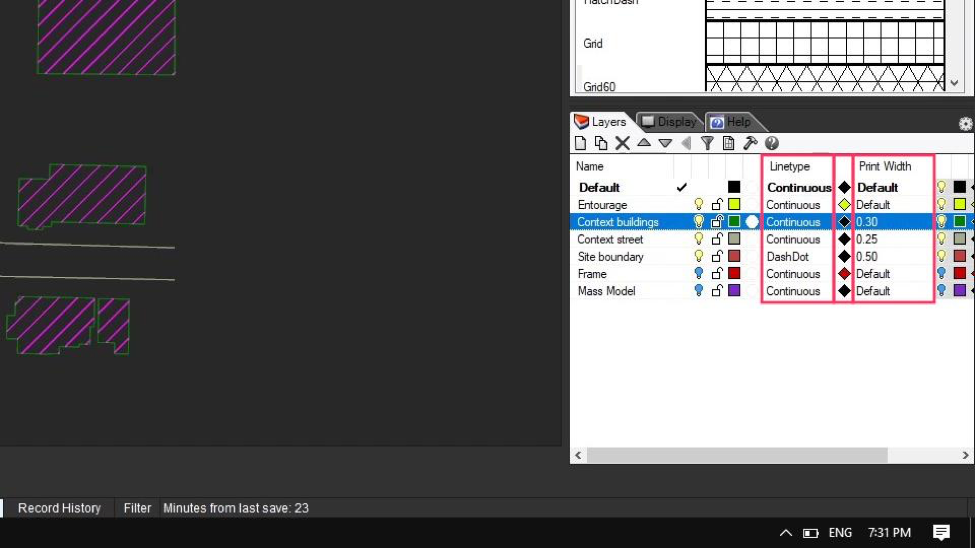
4. Setup line types, colors and weights.
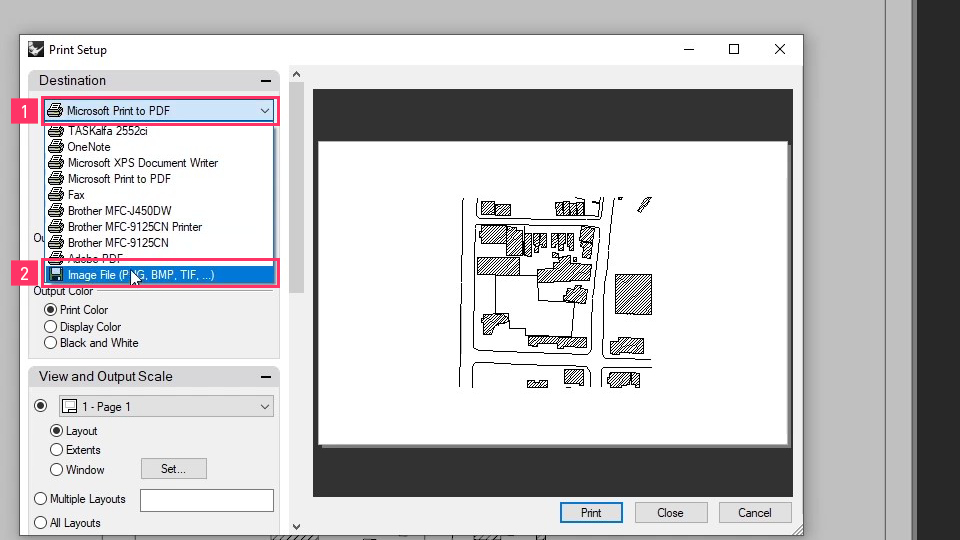
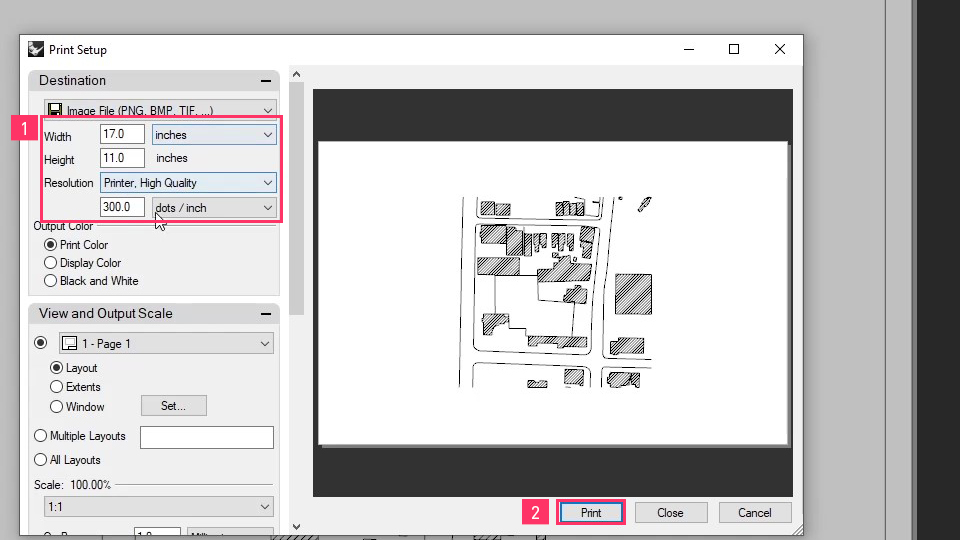
5. Print to JPG in 300 DPI (or more if plans turn out pixelated).
Step 3. Creating advanced V-Ray material
1. Create a new generic material and choose grid for diffuse.

2. Put in the settings and add another grid as the fill color.
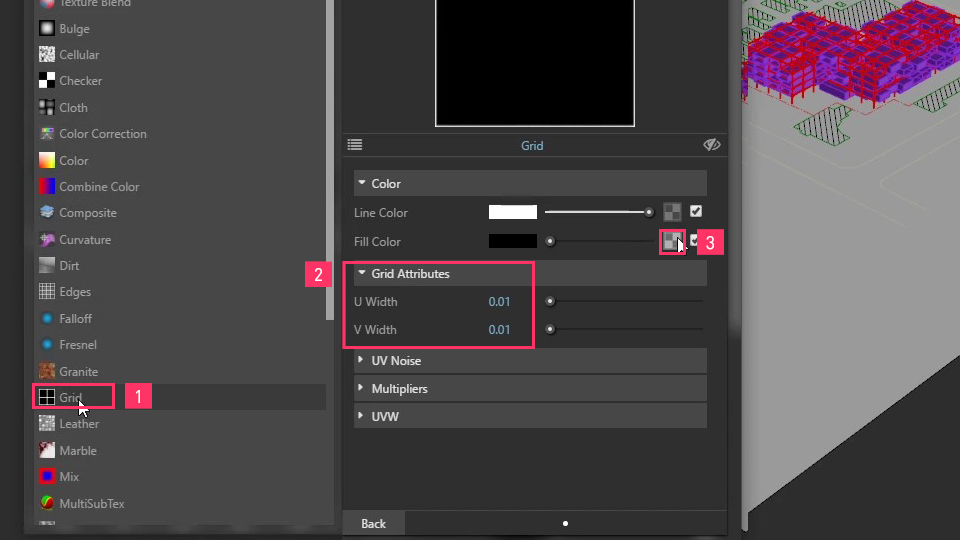
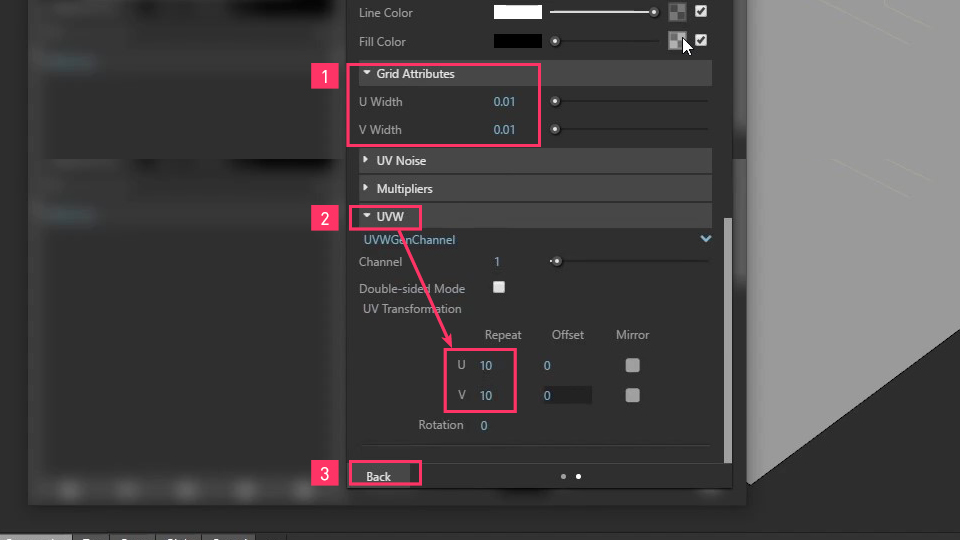
3. Use same thickness of lines, but this time, increase repeat texture by 10 times.
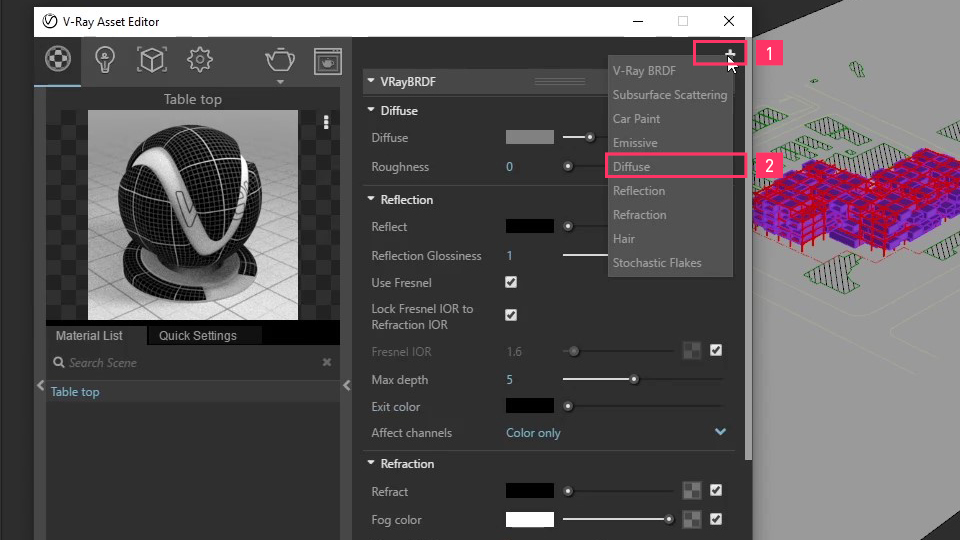
4. Once returned to the base material, add a new diffuse layer.
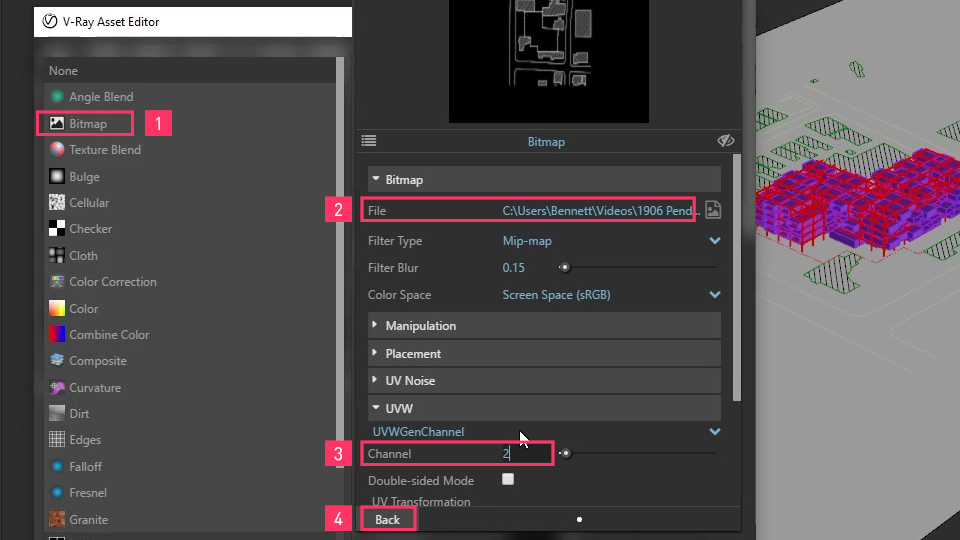
5. In the newly created diffuse layer, make diffuse color white, and edit texture for Transparency.
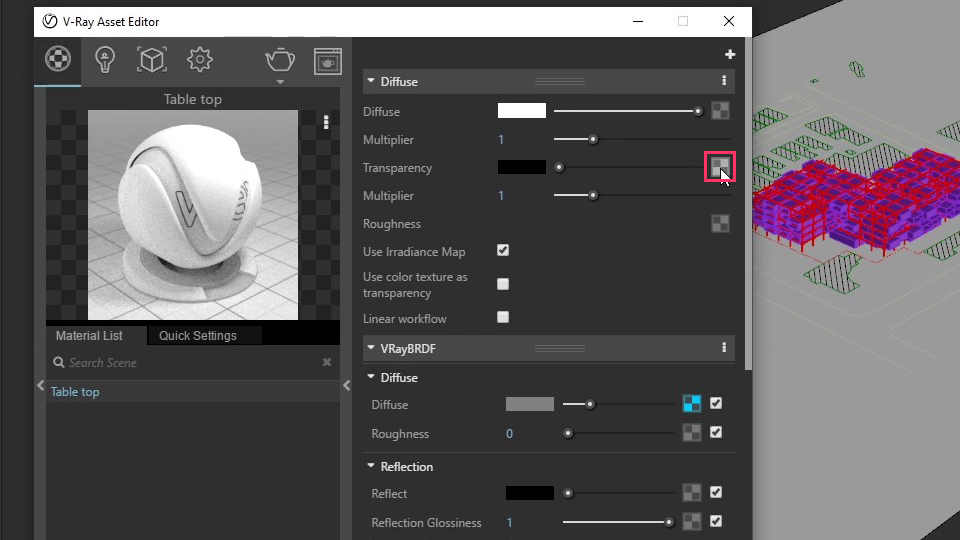
6. Choose plan image from previous part. Make sure to set the channel number to 2.
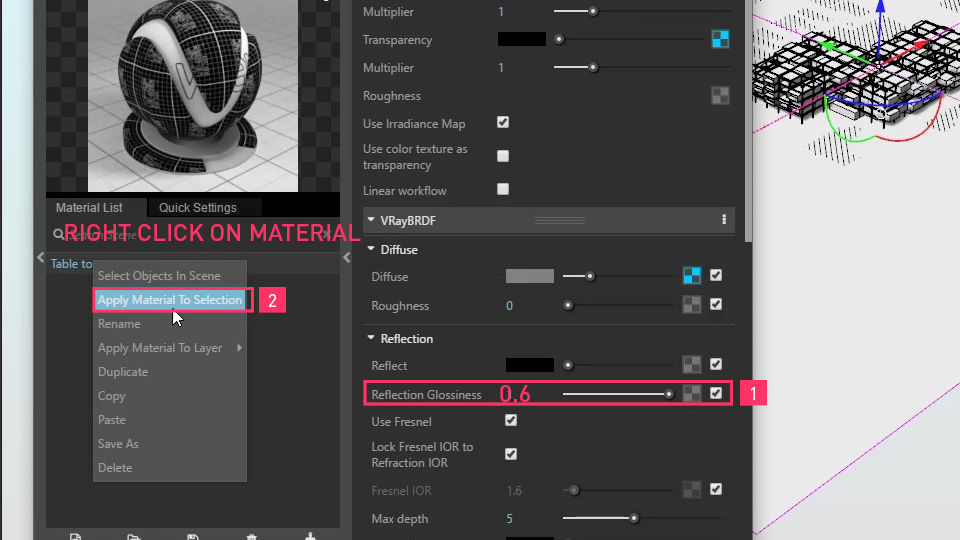
7. Set base material reflection glossiness to 0.6 to make matte looking surface, and apply the material to reference plane.
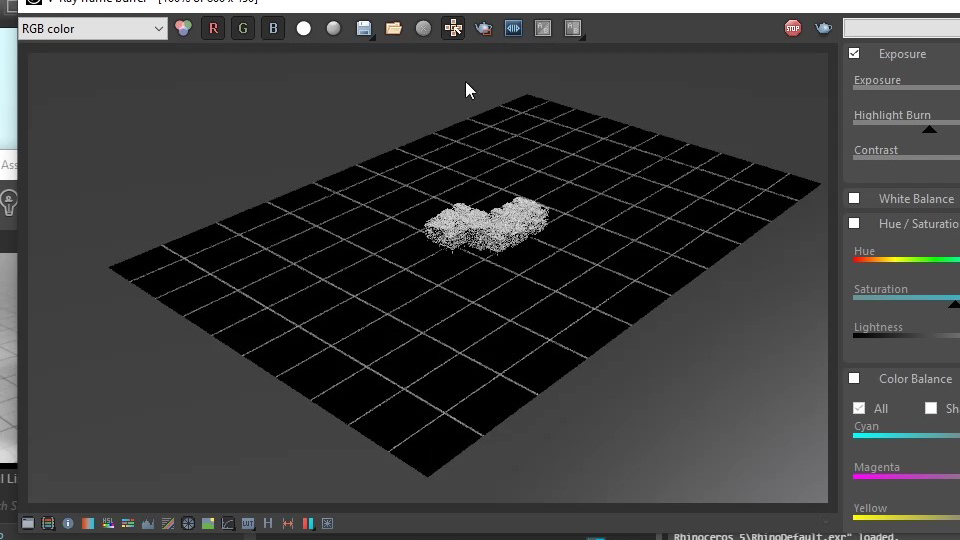
8. Render to check that material is applied. Mapping is to follow in the next part.
Step 4. Multi-channel mapping
1. In properties tab, choose planar mapping.
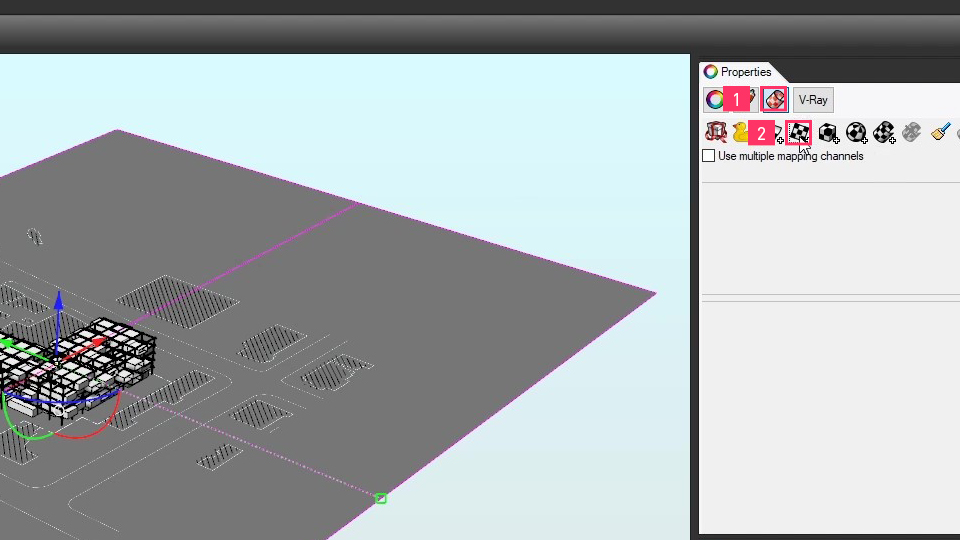
2. When prompted, draw a 10mm by 10mm UV plane which represents the grid — this may differ depending on your scale. Check ‘Use multiple mapping channels’ option, and add a secondary planar mapping.
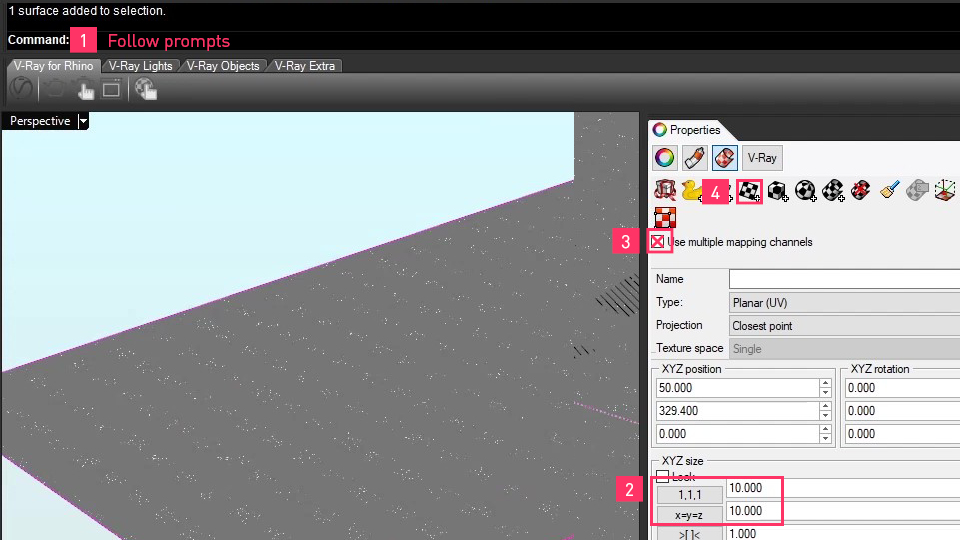
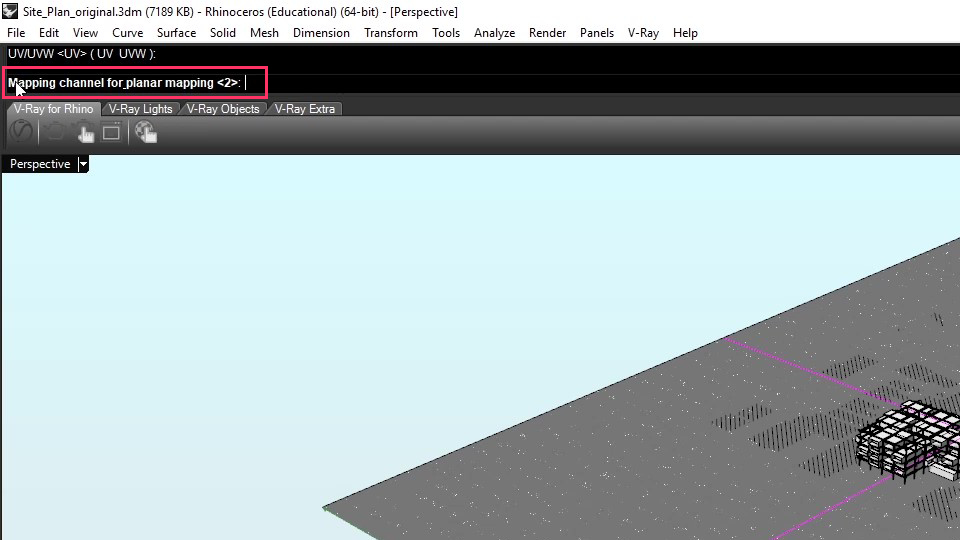
3. When prompted, draw the UV plane across the reference plane.
4. Make sure to choose 2 for channel.
5. Hit render preview to make sure textures are well mapped. Adjust UV mapping settings in the previous steps until you find the right size for each texture.
Part 5. Animate the scene
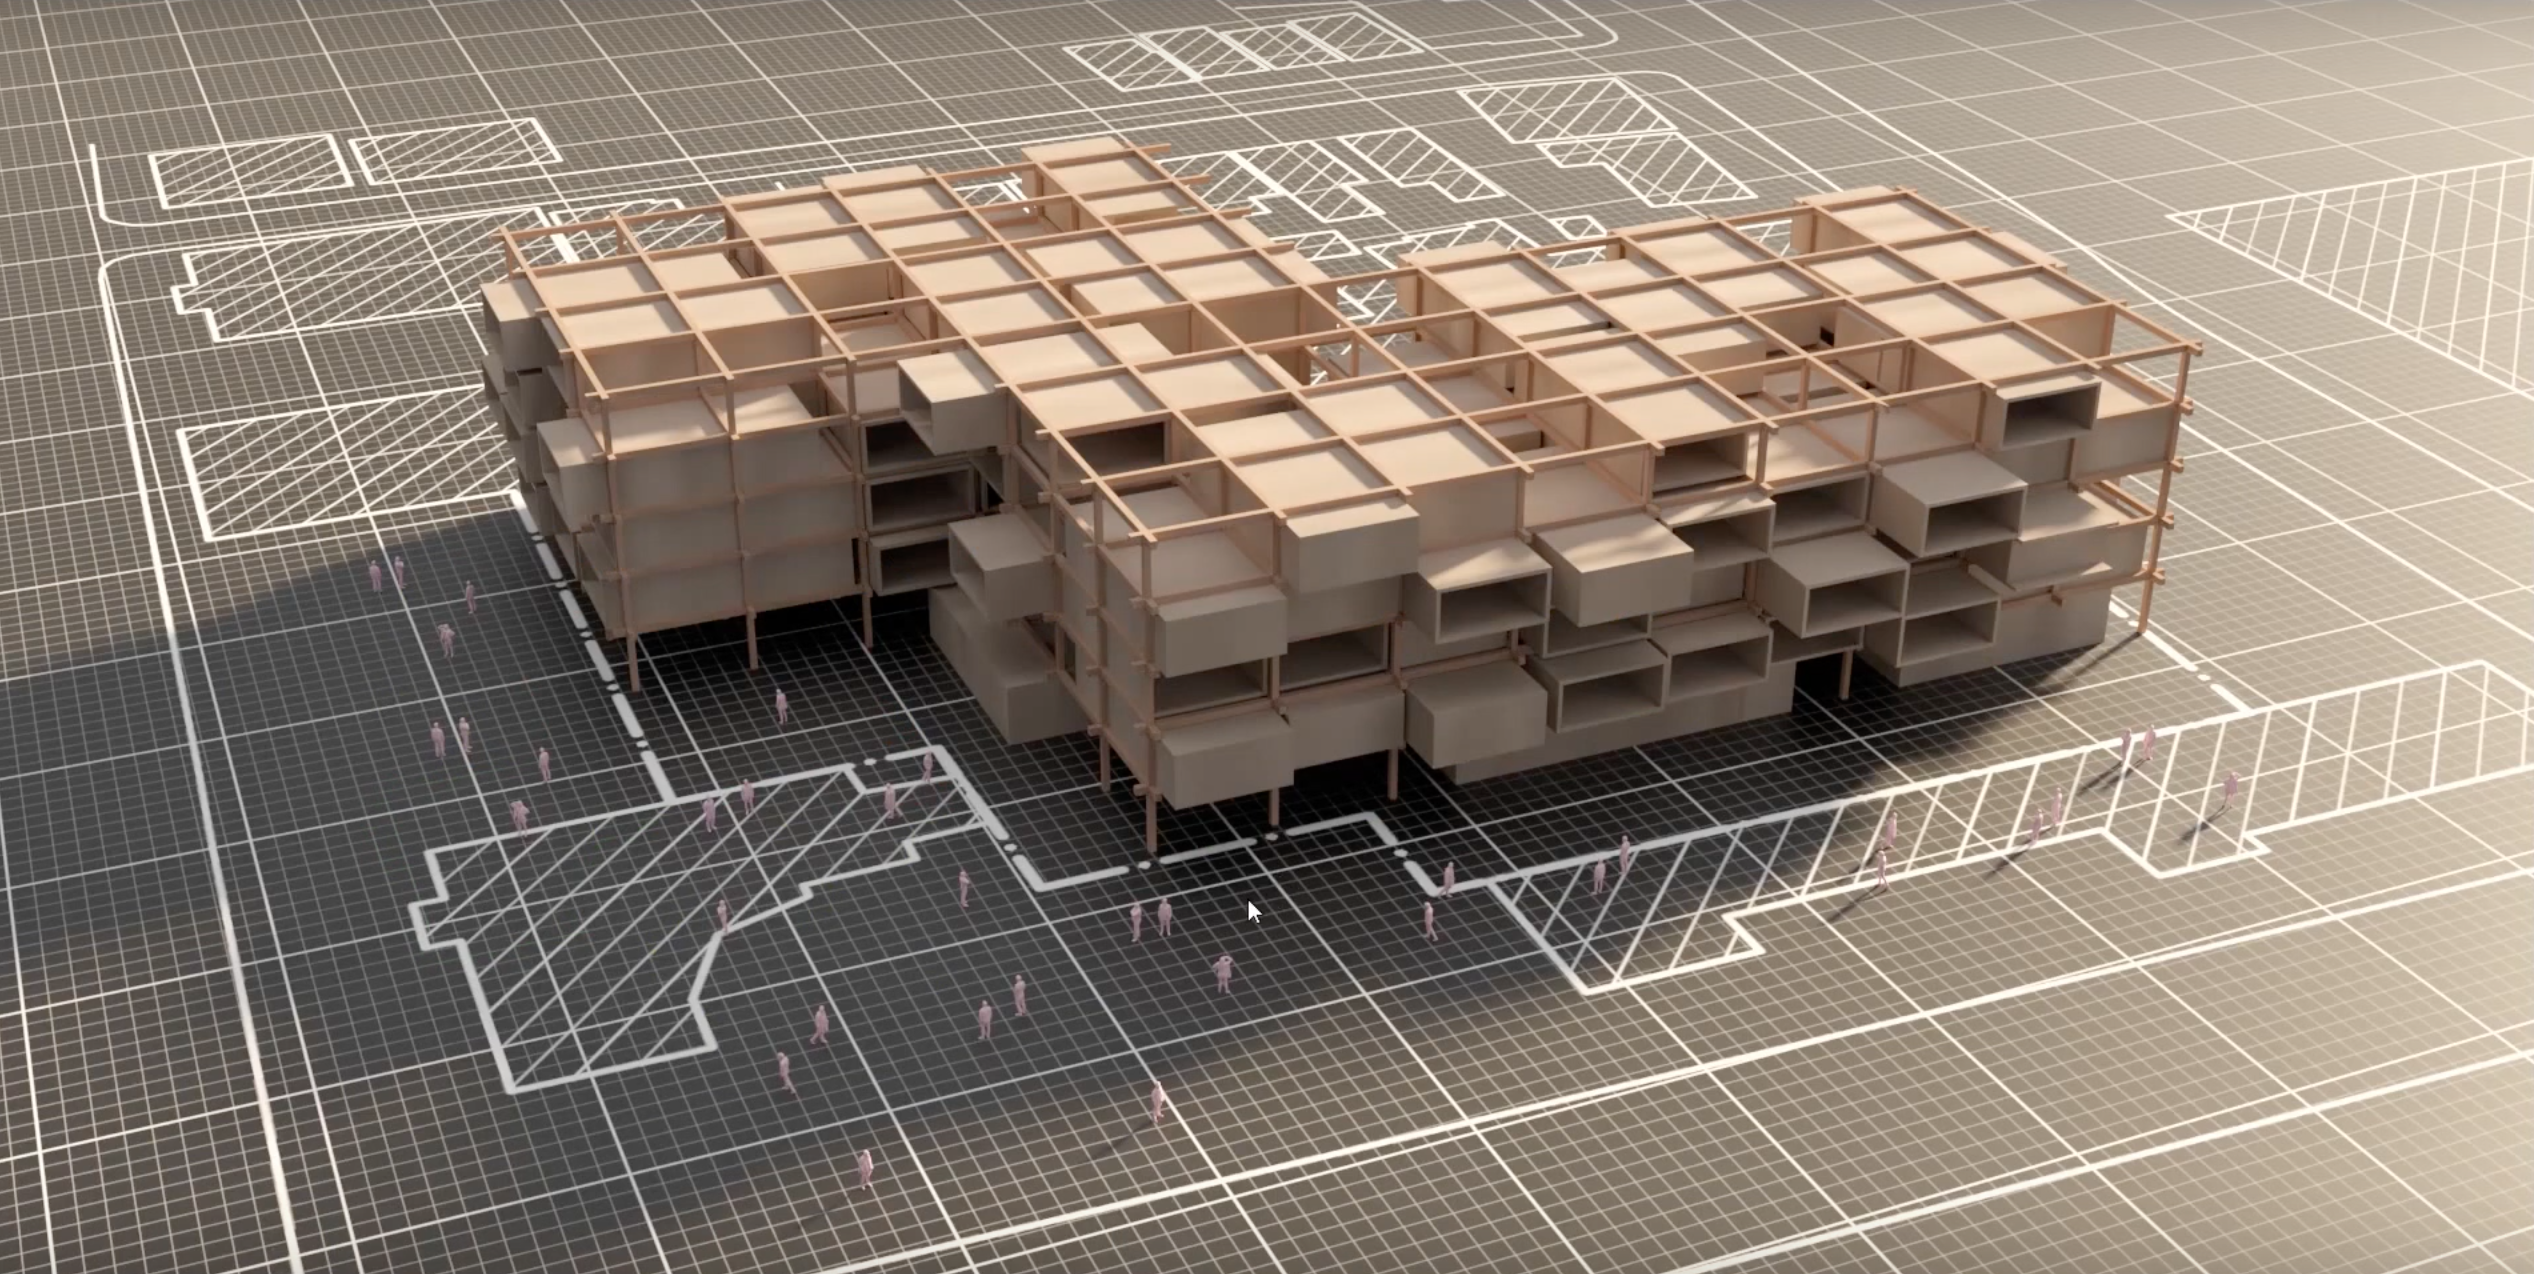
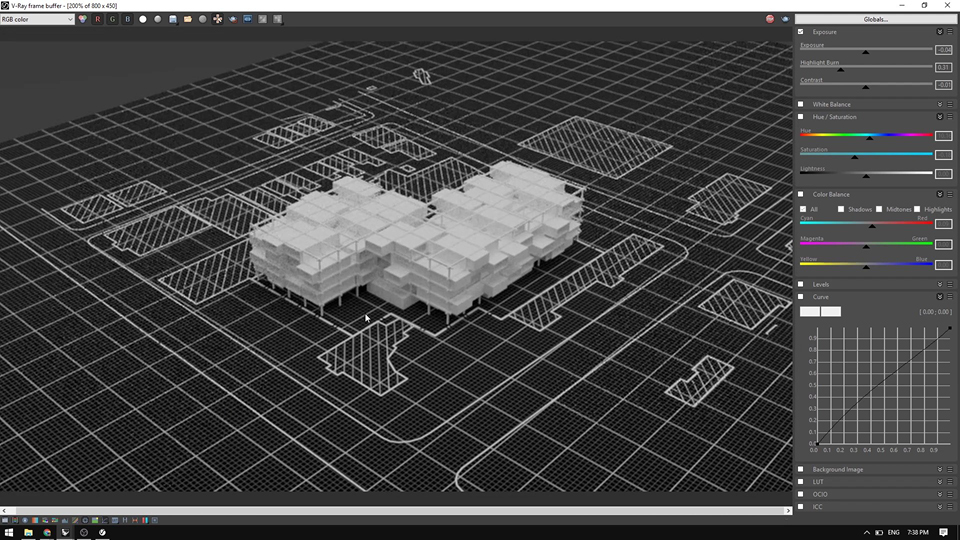
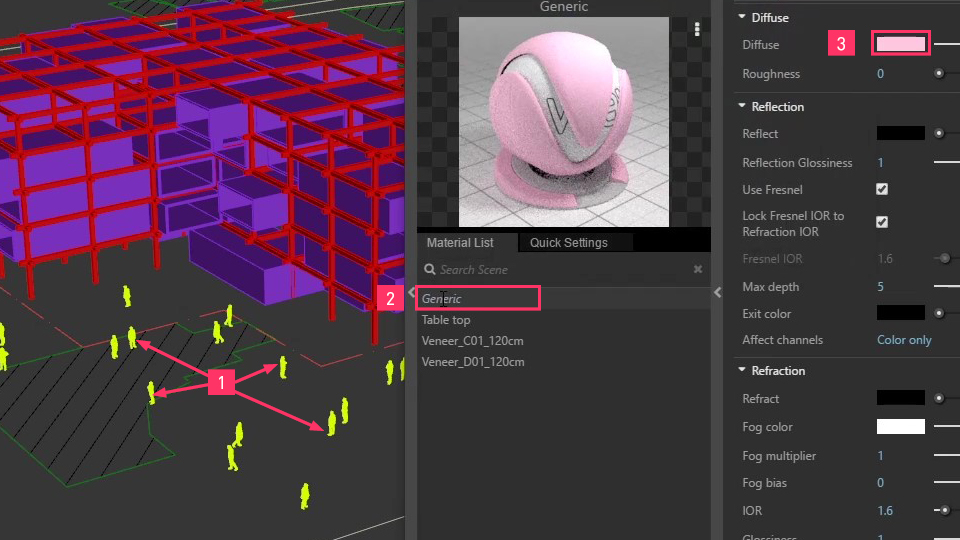
1. Add 3D entourage (download) and texture the scene. In this example, we are going to make the figures pink.
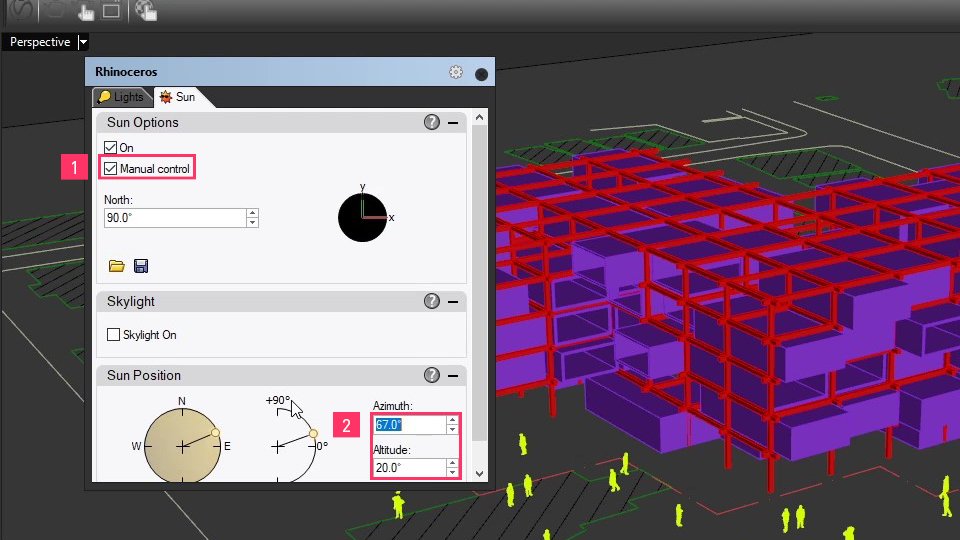
2. Use _lights command to add a document sun, and choose desired light angles.
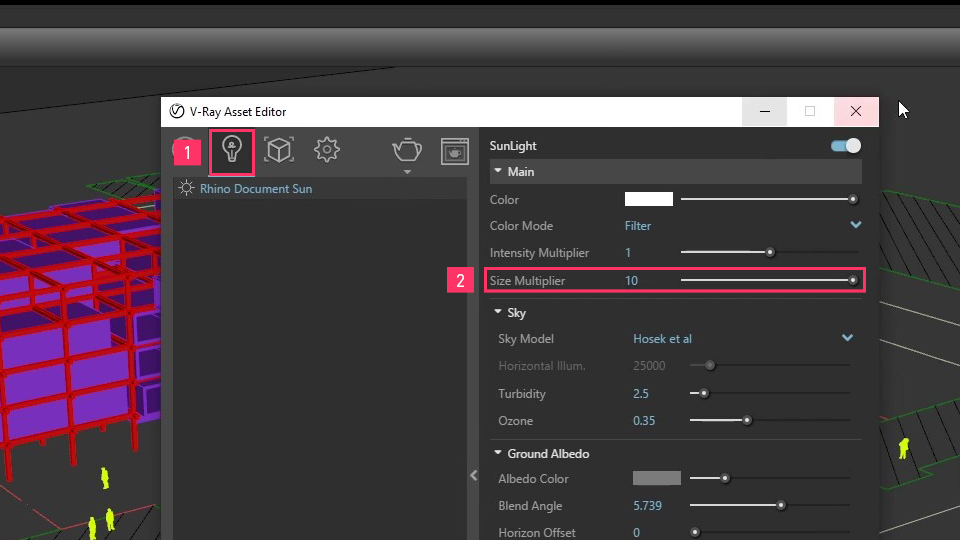
3. In V-ray asset editor, objects tab, choose the Rhino Document Sun, and set the size to 10, which makes the shadows a lot softer.
4. Adjust camera exposure, highlights and others in post production until the desired effect is achieved. There you go!

Subscribe to Archi Hacks on YouTube for future content. Follow us on social media for the latest tips and tricks that may not make it to YouTube!