ArchiHacks is an online resource for architects dedicated to architecture visualization, portfolio, and design tips and tricks for students and professionals. This article was written by team member Tommy Minh Nguyen.
With the closure of workshops and in-person meetings, physical models became less effective during the pandemic. Nevertheless, there is a sense of completion and achievement that comes out of having physical models occupy real space. Today’s article will walk you through adding a 3D model into a photograph to fabricate a situation where a digital model can occupy “real” space. Unfortunately, not everyone will be able to utilize this tutorial, but it could still offer an alternative to achieving the same goal! Remember, design will always have more than just one solution.
Here’s what you’ll need:
- 3D model
- Rhino + V-ray *You can use any 3D software that supports V-ray
- Photoshop
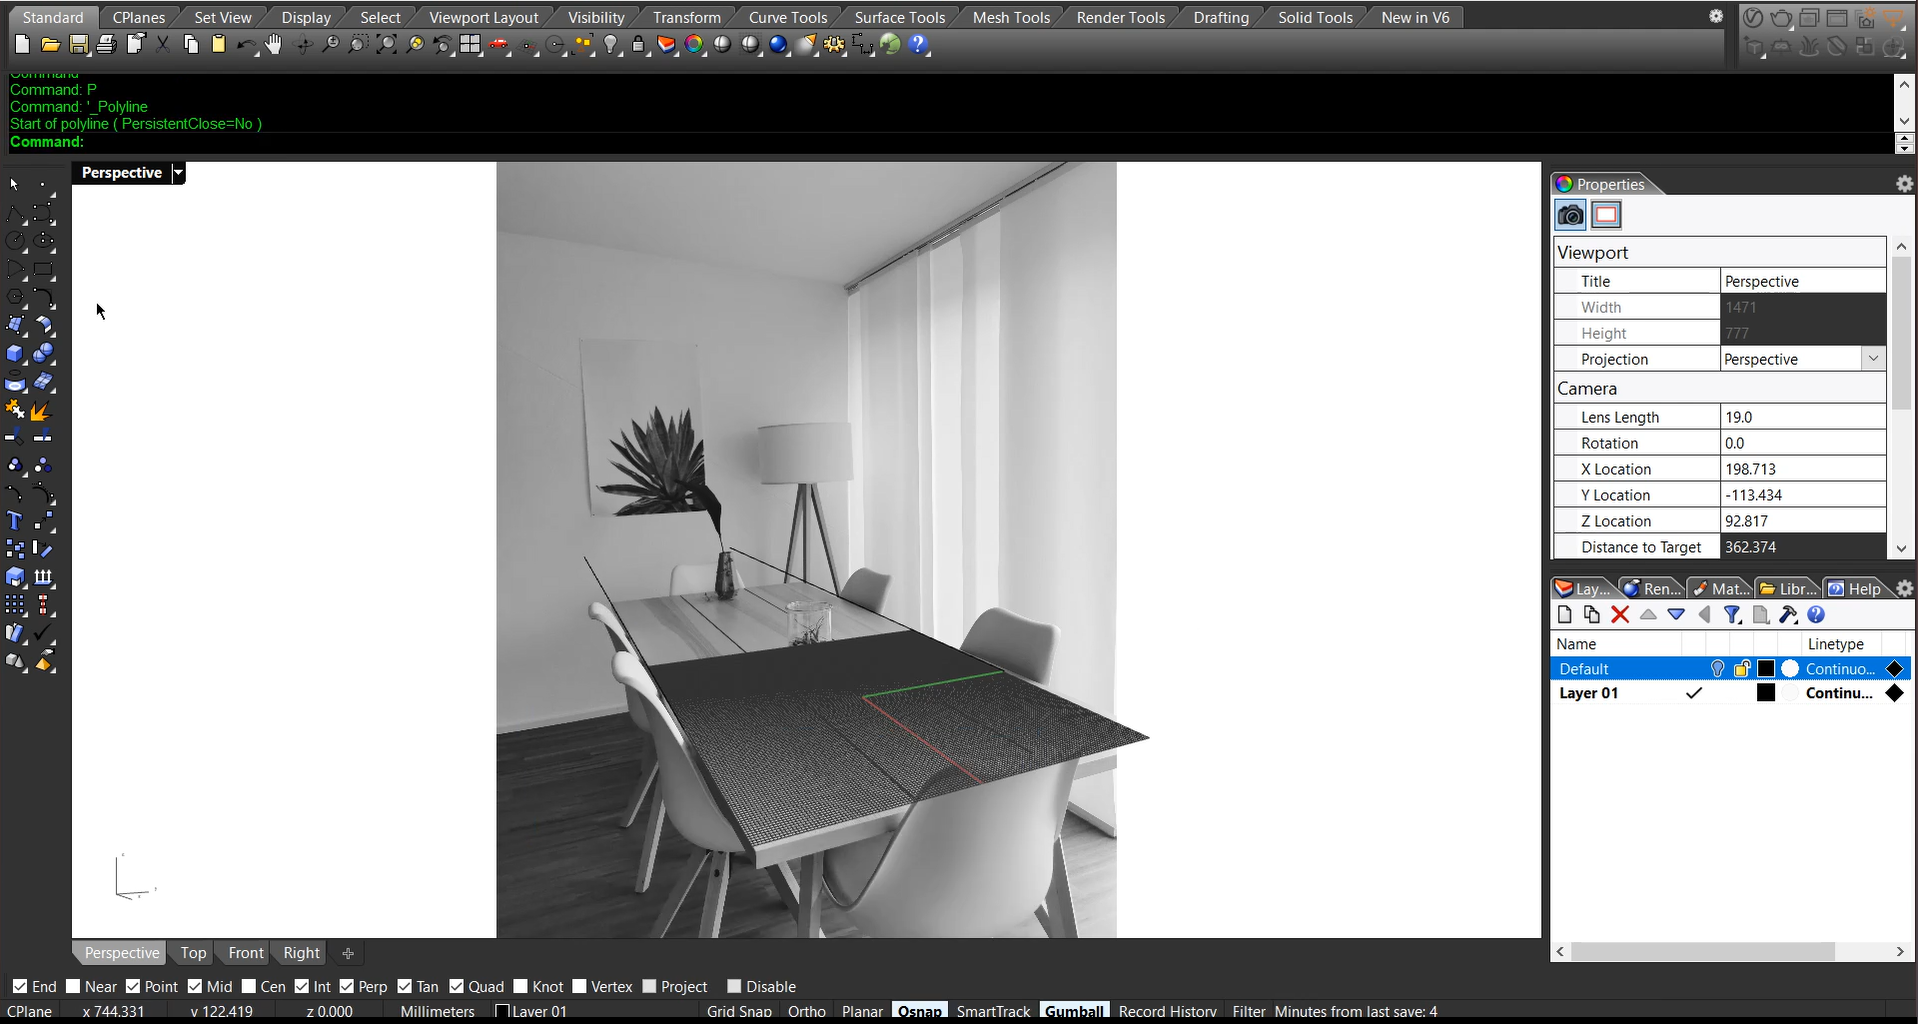
Step 1: Align Perspective
This is possibly the most tricky and frustrating part. Import the image into the background, and take your time to adjust the camera focal length to match perspective with the image. You might benefit from the video demonstration on our YouTube channel.
 Step 2: Setup Light and Environment
Try to replicate the real-world setup as much as possible, including lighting and other walls in the scene. In our example, we placed a rectangular light to the right side to simulate a diffused light from the window and blinds.
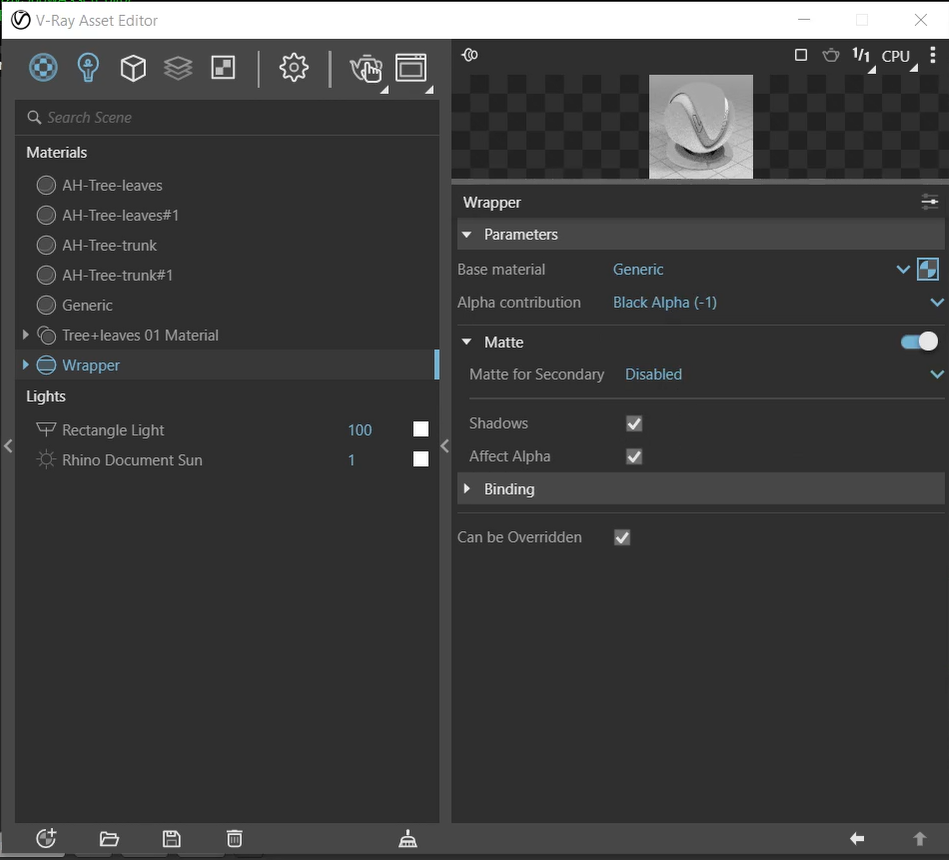
 Step 3: Shadow Matte
This is the magic material that will help us with the shadows. Create a generic material and a wrapper material. Use the generic material as the base, and use the following settings. Then you can apply the wrapper to the tabletop surface.
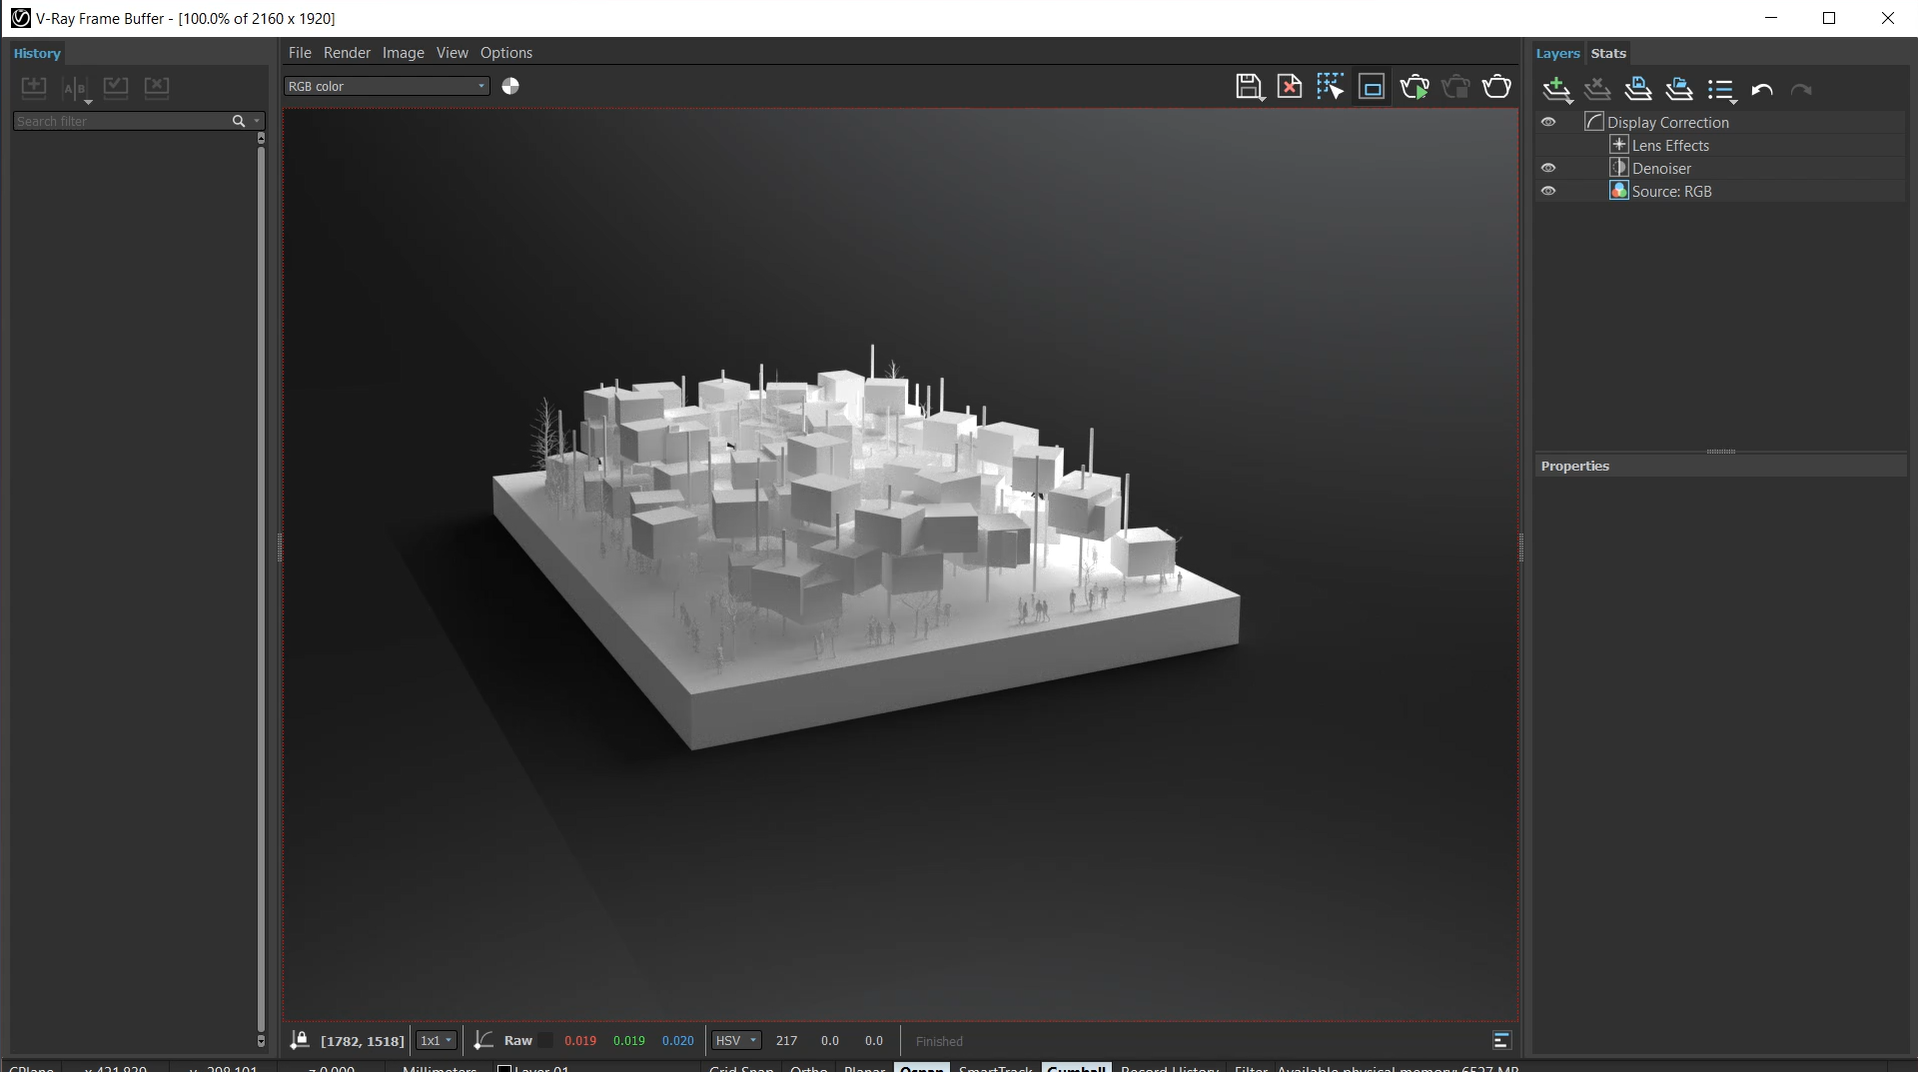
 Step 4: Render in High Resolution + Save
Make sure to save it as a .png file to preserve transparency and shadow!
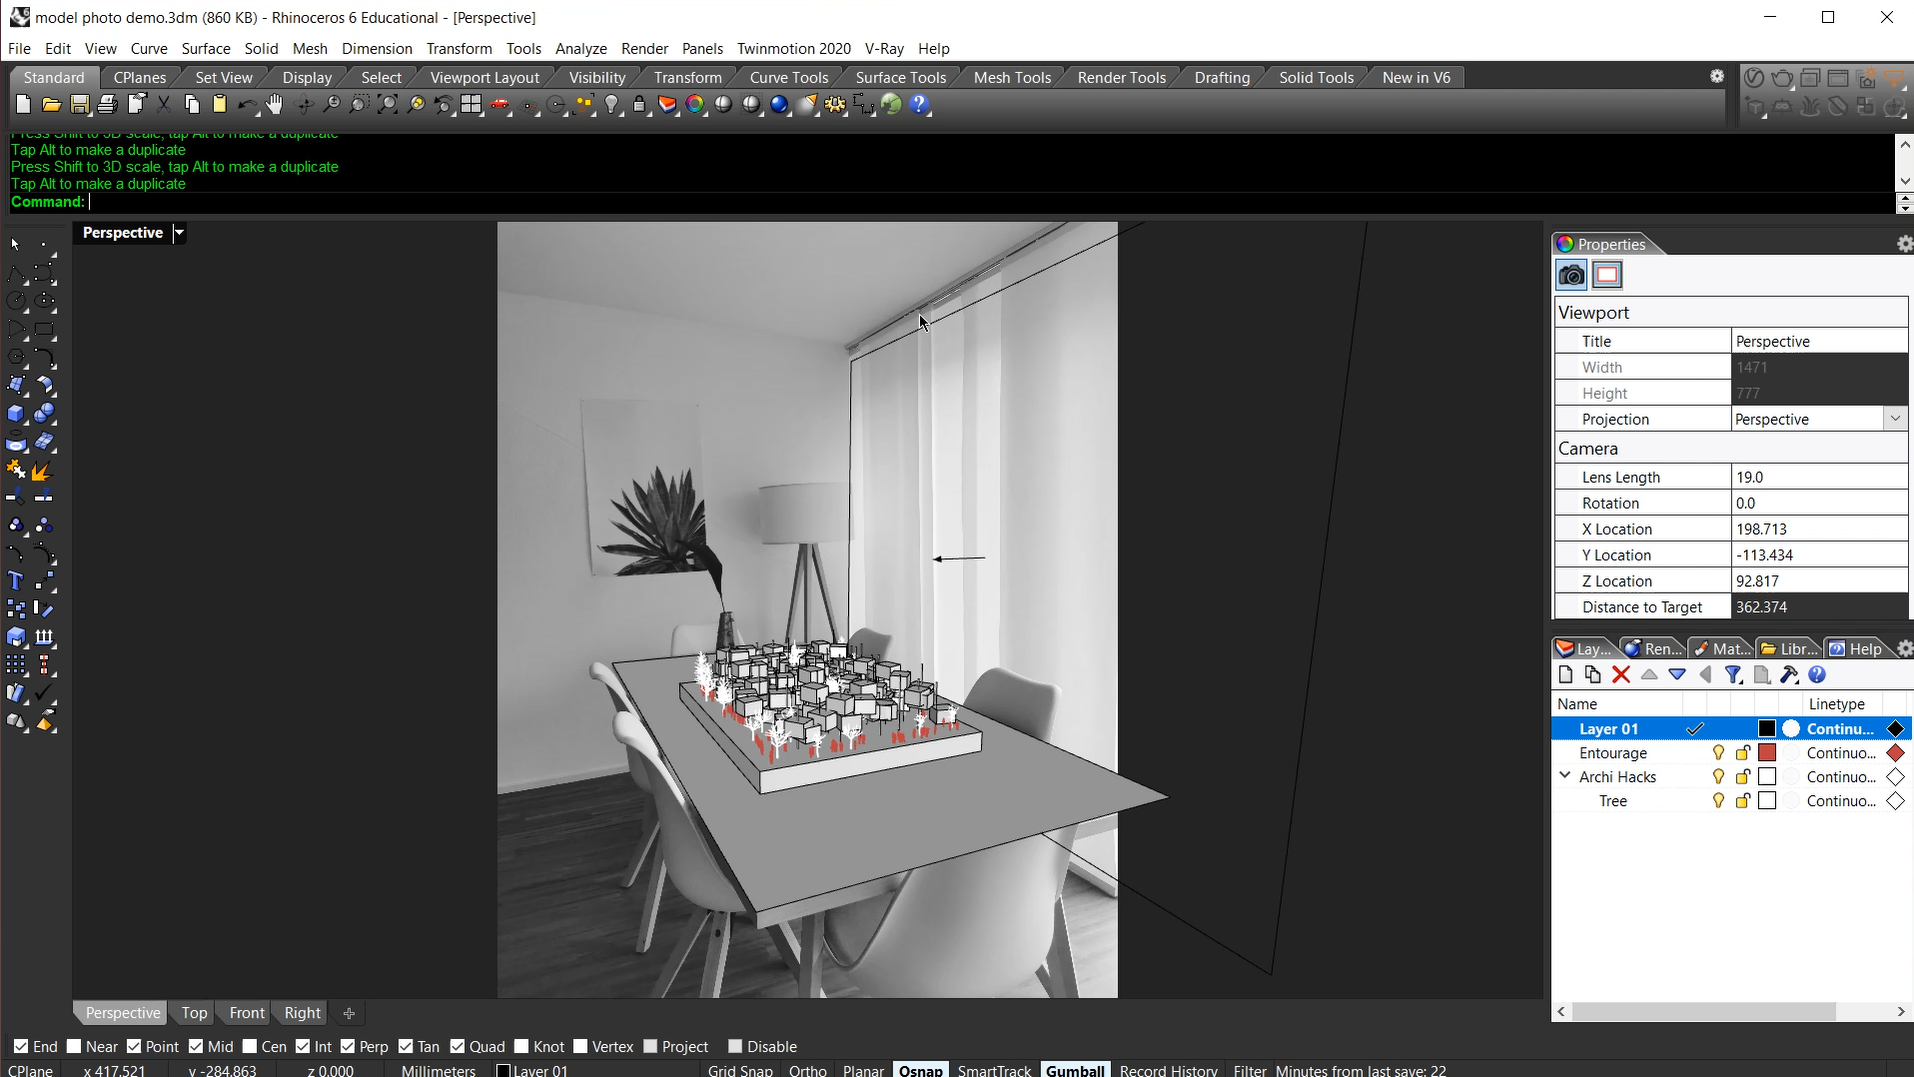
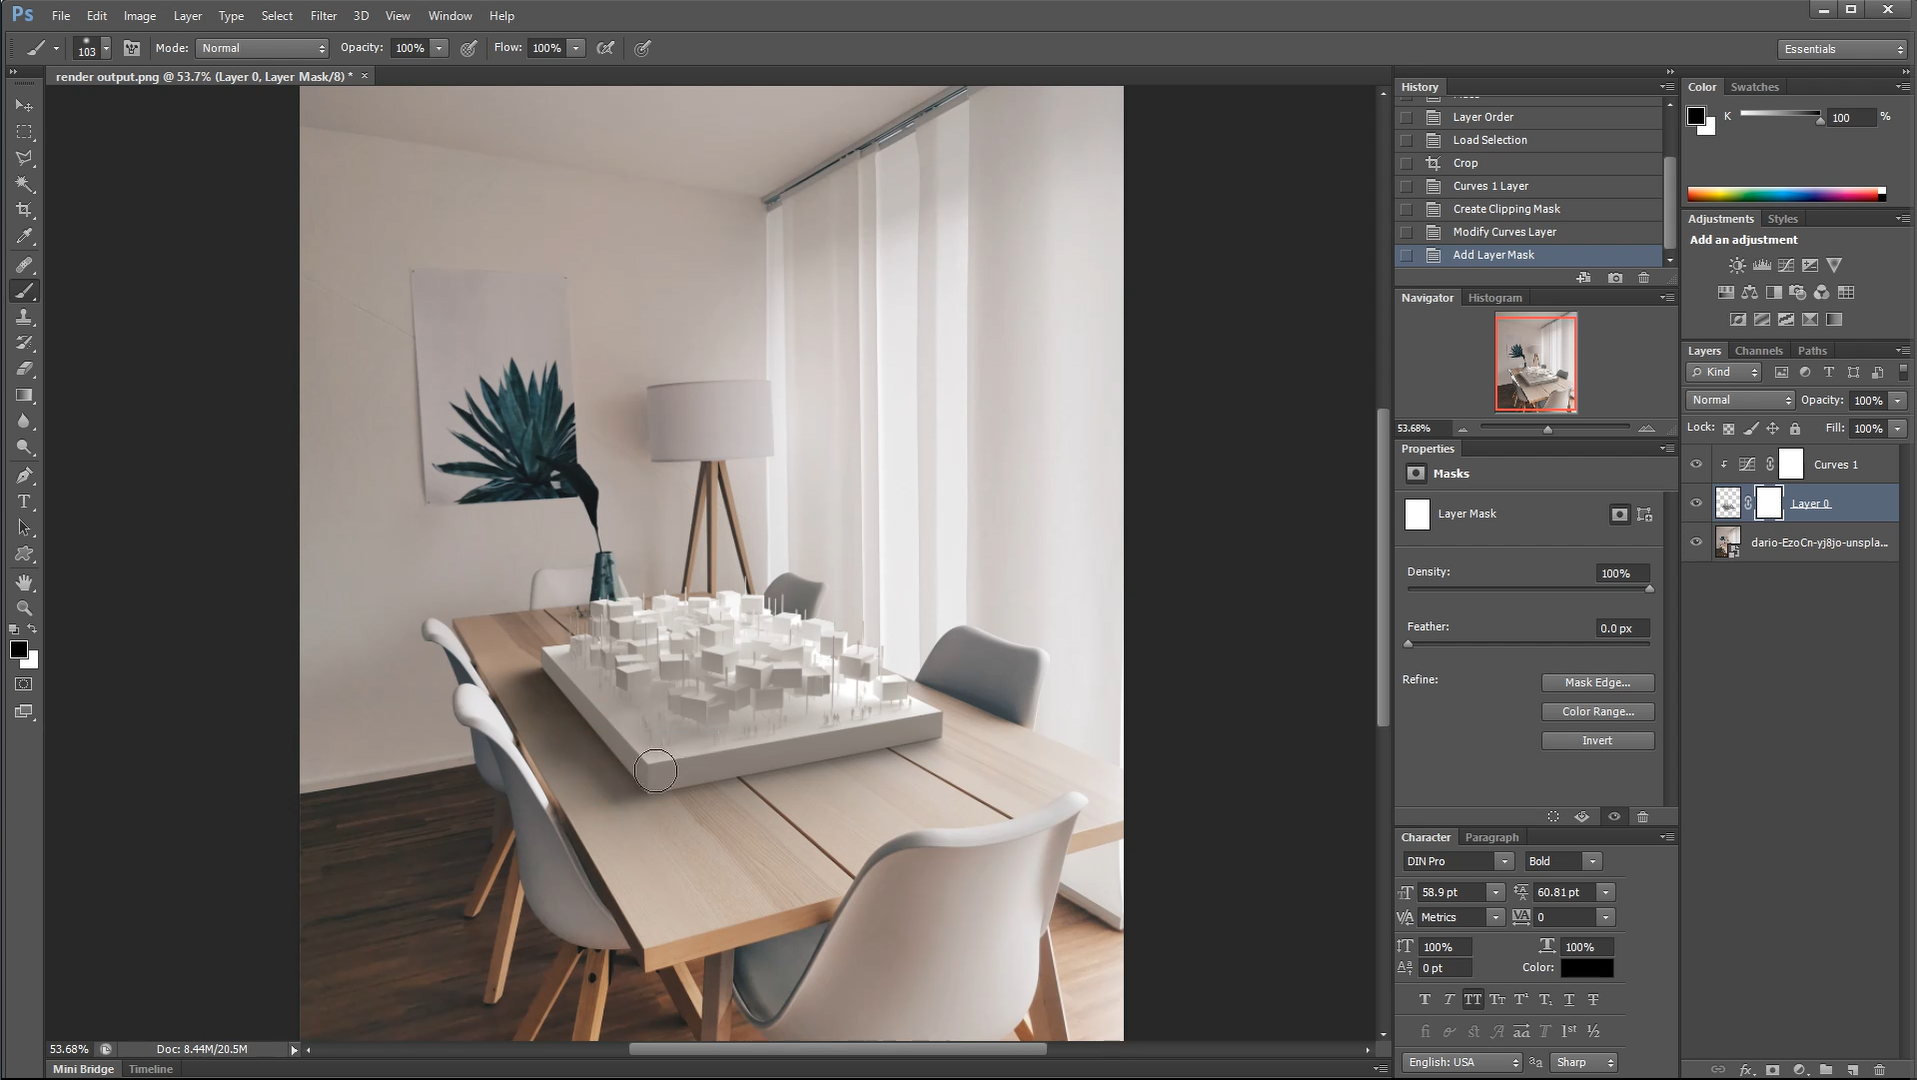
 Step 5. Combine Rendering on Top of the Background Image in Photoshop
Place the rendering on top of the base image and make adjustments to help it blend in. In our case, we added a bit of color correction.
 That’s all we got for today! Let us know how this came out for you and share it with our Instagram page by tagging @archi.hacks and #archihacks! I hope you found this article helpful, and if you have any tips for future students, please let us know in the comments below. Make sure to follow our YouTube and Instagram for more content!
Showcase your visionary architectural concepts: The 2026 Vision Awards features categories that reward UNBUILT projects presenting bold ideas for the future of architecture. Take advantage of early bird pricing before April 17th.