

Ronen Bekerman is an industry leader in Architectural Visualization who hosts in-depth tutorials on his specialist blog. Architizer is pleased to present a selection of these guides written by some of the world’s best rendering artists.
Nookta’s work was featured on the Ronen Bekerman Architectural Visualization Blog before with the making of the Mediterranean House, and today I’m happy to share the making of their latest project, “Arrival.” It is their in-house project based on architecture from the ’60s in California inspired by the Modernist movement and especially the creations of Richard Neutra, Donald Wexler and Pierre Koenig. “Arrival” describes the revitalization of an abandoned place — a place where time has passed and things were left behind. This image is the best I’ve seen from Nookta on many levels, and it is great to share the making of it here with you. Enjoy!
Introduction
When starting a project, it is very important to take our time in researching reference images. These images serve as a guideline for proceeding working steps. We can thus concentrate on the essentials and save a lot of time!
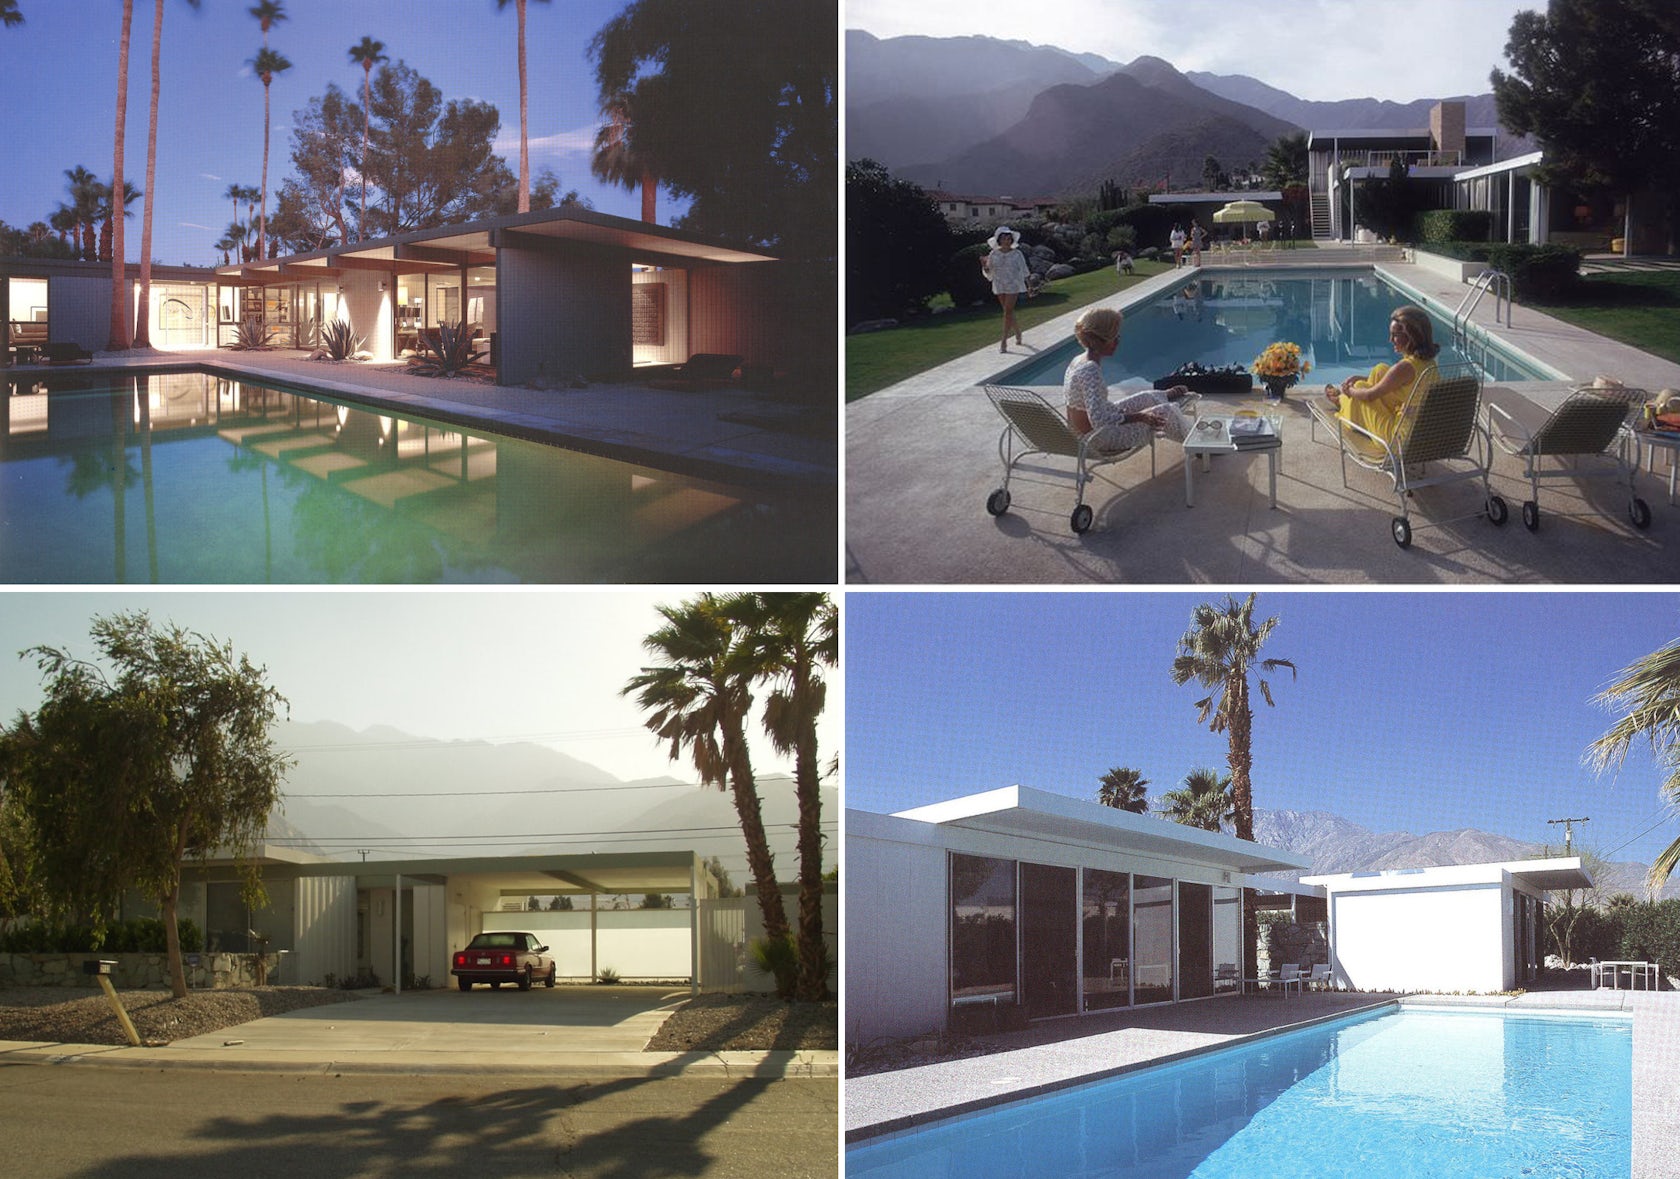
Precedent studies
Beside technical aspects, they also help us to mentally visualize a project.
Modeling
When doing our 3D modeling, we started from rough cubic structures on to tiny details. The functionality of the architecture did not have the highest priority while creating this image, thus enabling a free choice of layout. On the other hand, it is necessary to systematize an architectural model.
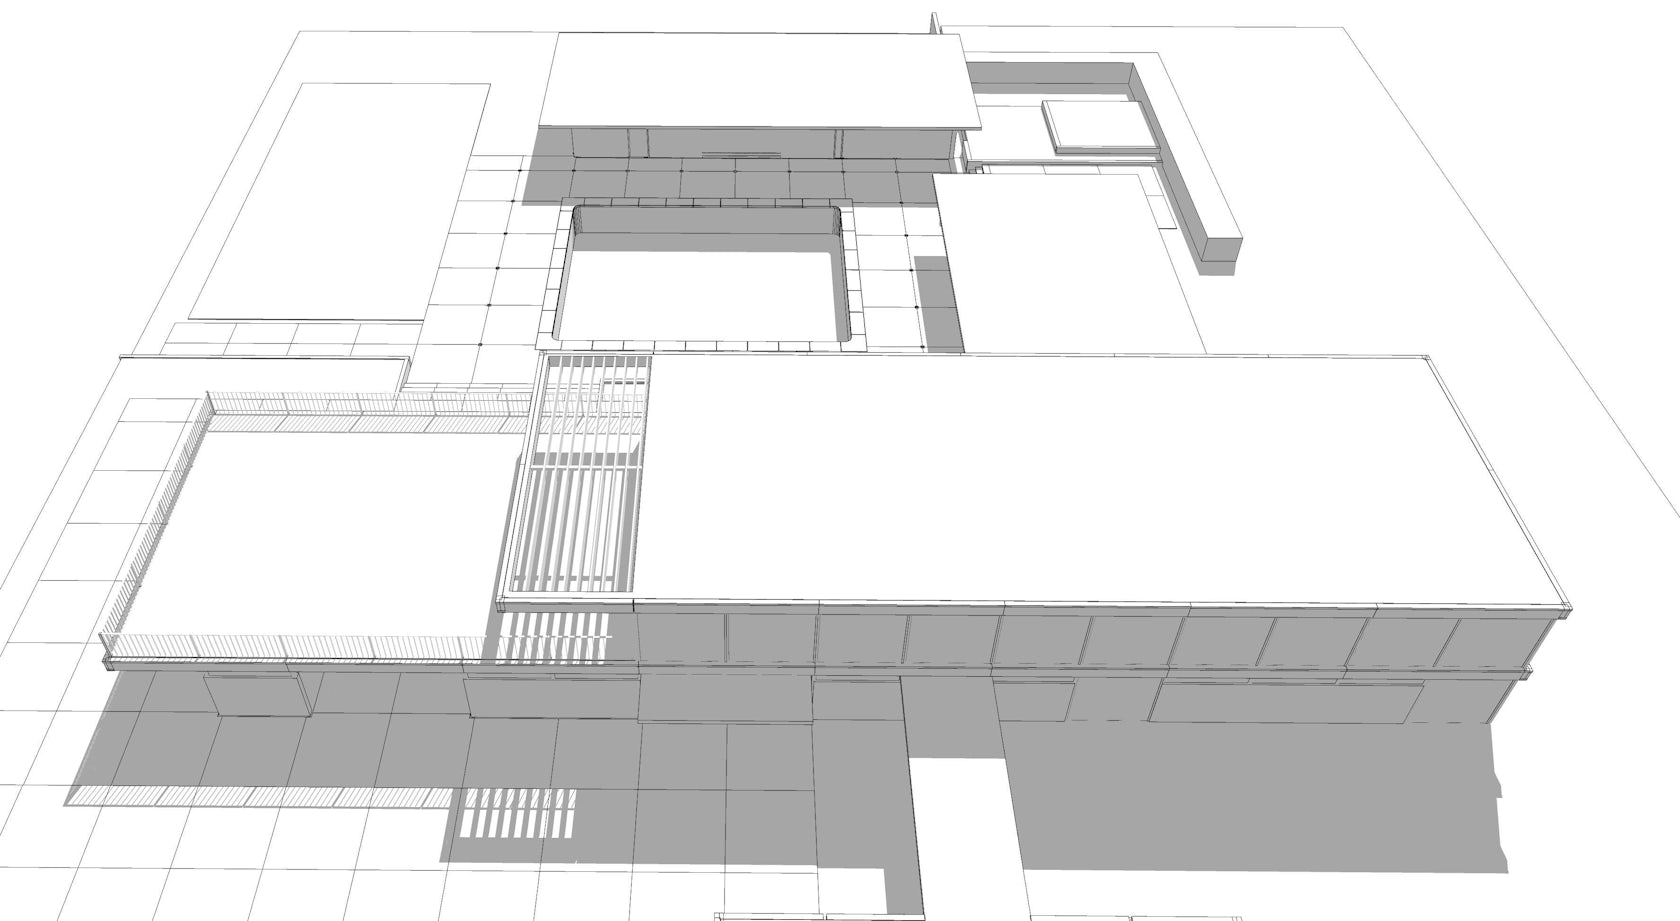
We therefore introduced a grid for the construction. For us, it was important to create an architecture that is modern, light and simple even though we used a rigid grid. In this process, we were inspired by modernist architects like Donald Wexler, Richard Neutra and Pierre Koenig.
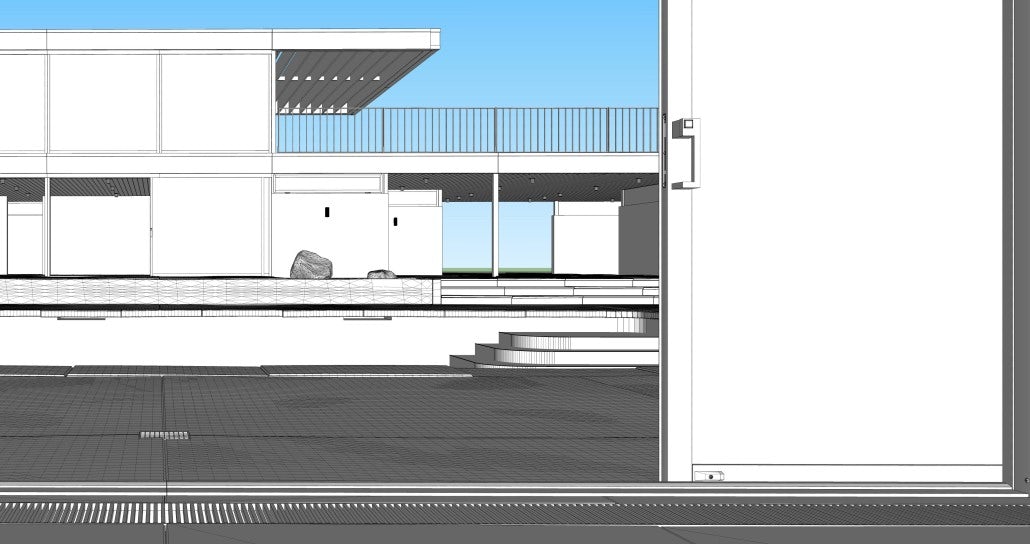
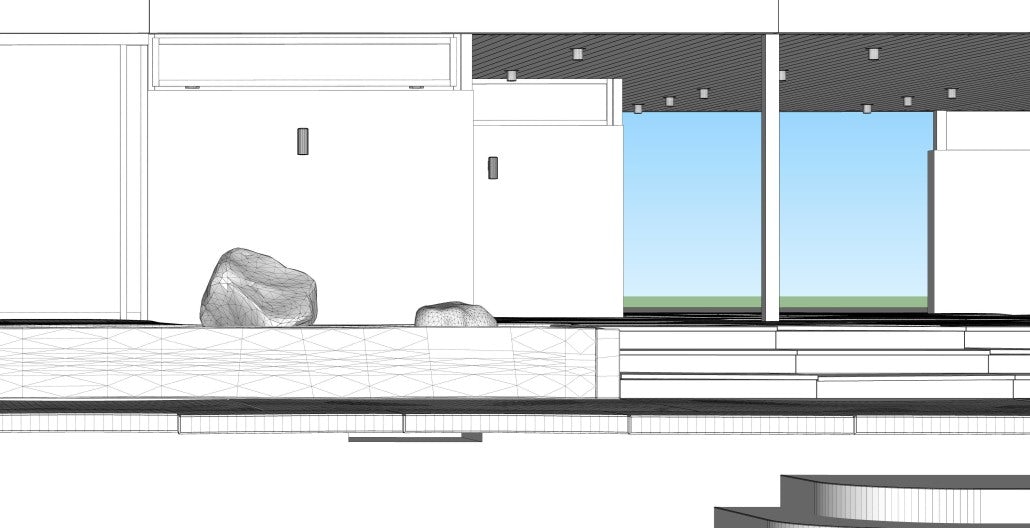
For this project, we wanted to go into high detail. Elements such as supporting framework, flooring panels, window profiles and lighting were taken directly from the reference images.
Tools such as “roundcorner” and “vertextool” greatly simplified our work:
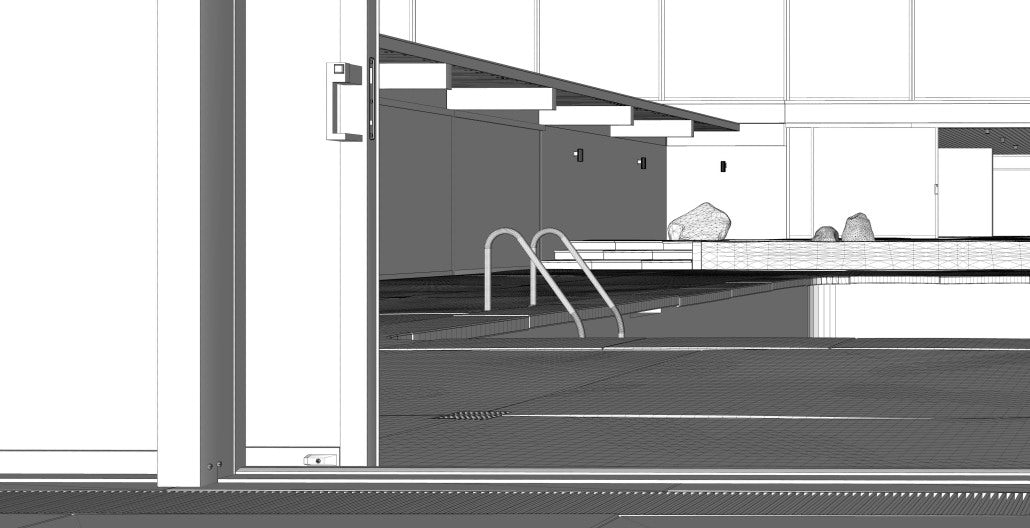
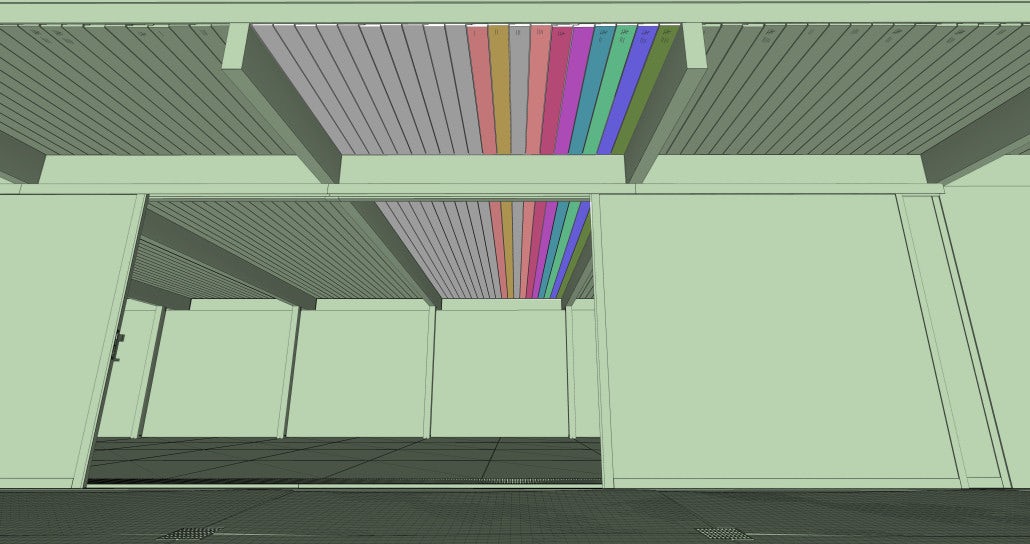
The following shows how we constructed the ground and ceiling panels.
We first compiled components with identical parameters. These were then made distinct. Further components with identical parameters were created, again distinct. This process was repeated several times until an irregular image was achieved:

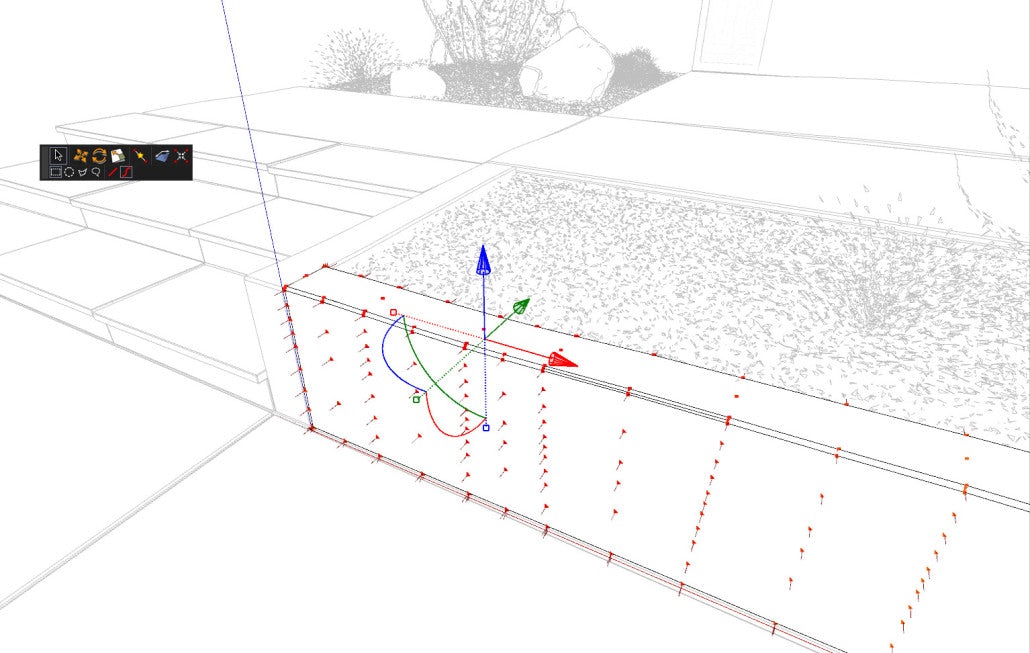
We then used Vertex Tools on the individual components for further irregularity of the panels. We divided individual panels into 5-cm grids and decided on the edges, and with a radius of 2 meters, we finally shifted the contraption in z-direction over 1cm – 2cm spans. Our flooring panels were thus deformed perfectly, almost like Floor Generator, only homemade.
Concrete walls and stairs were done similarly.

Deformation of ground panels
Deformation of walls
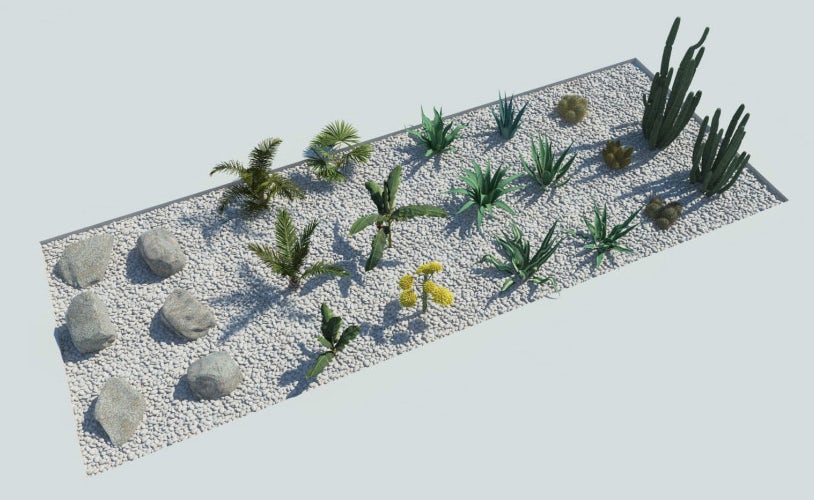
For the outdoor scene, we used several Proxies. Plants are from XfrogPlants (luckily we had desert plants included in the package). Palm trees were only used for shadowing. Our own 2D palms were more realistic.
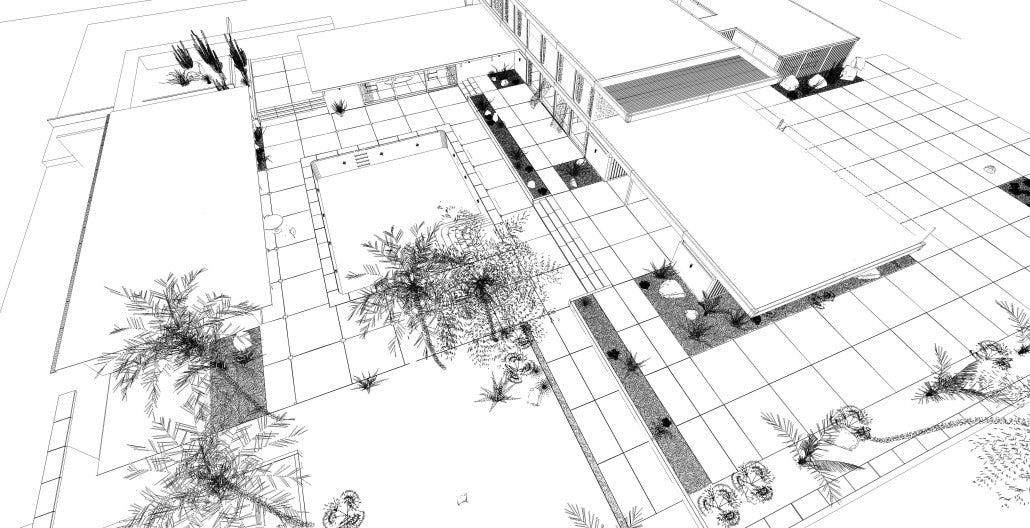
Curtains were done with Marvelous Designer. We exported V-Ray mesh data out of the curtains because their data was high poly. Further objects, like rocks and furniture, were taken from 3D Warehouse. Other furniture came directly from manufacturer pages and subsequently edited with the artisan tool.
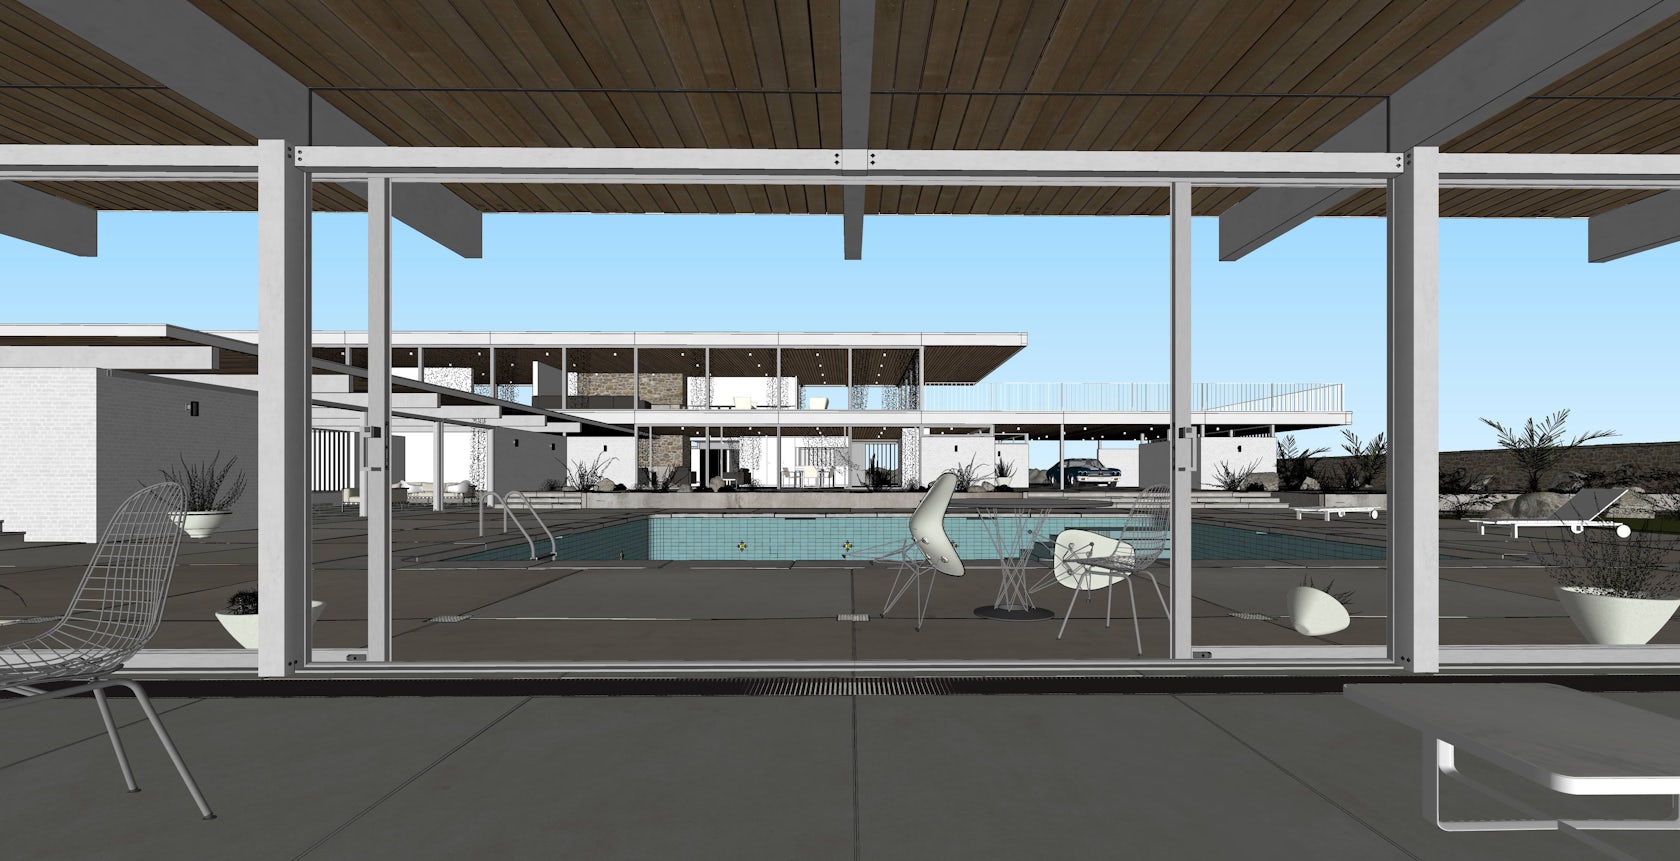
The Story and Final Process
We decided to portray a hot summer’s day, which for California would be quite appropriate.
SketchUp’s sun system is easy to operate. Light and shadow are precisely adjustable to our needs, which is why we decided to make do without a V-Ray Dome Light. Adjustments were kept very basic. For postproduction (using Photoshop) we also rendered these channels: Diffuse Filter, Raw Light, RenderID and ZDepth.
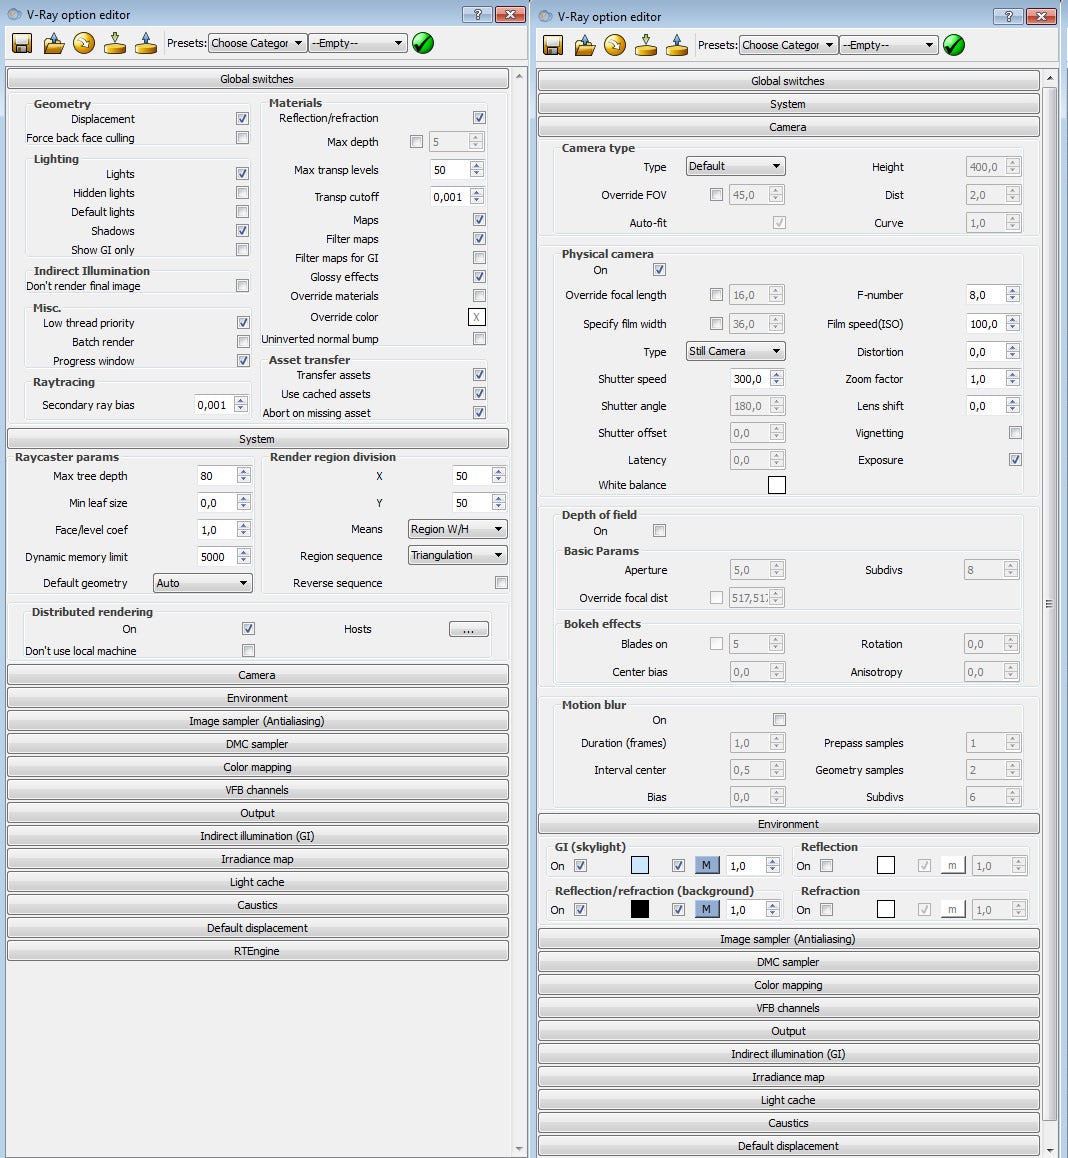
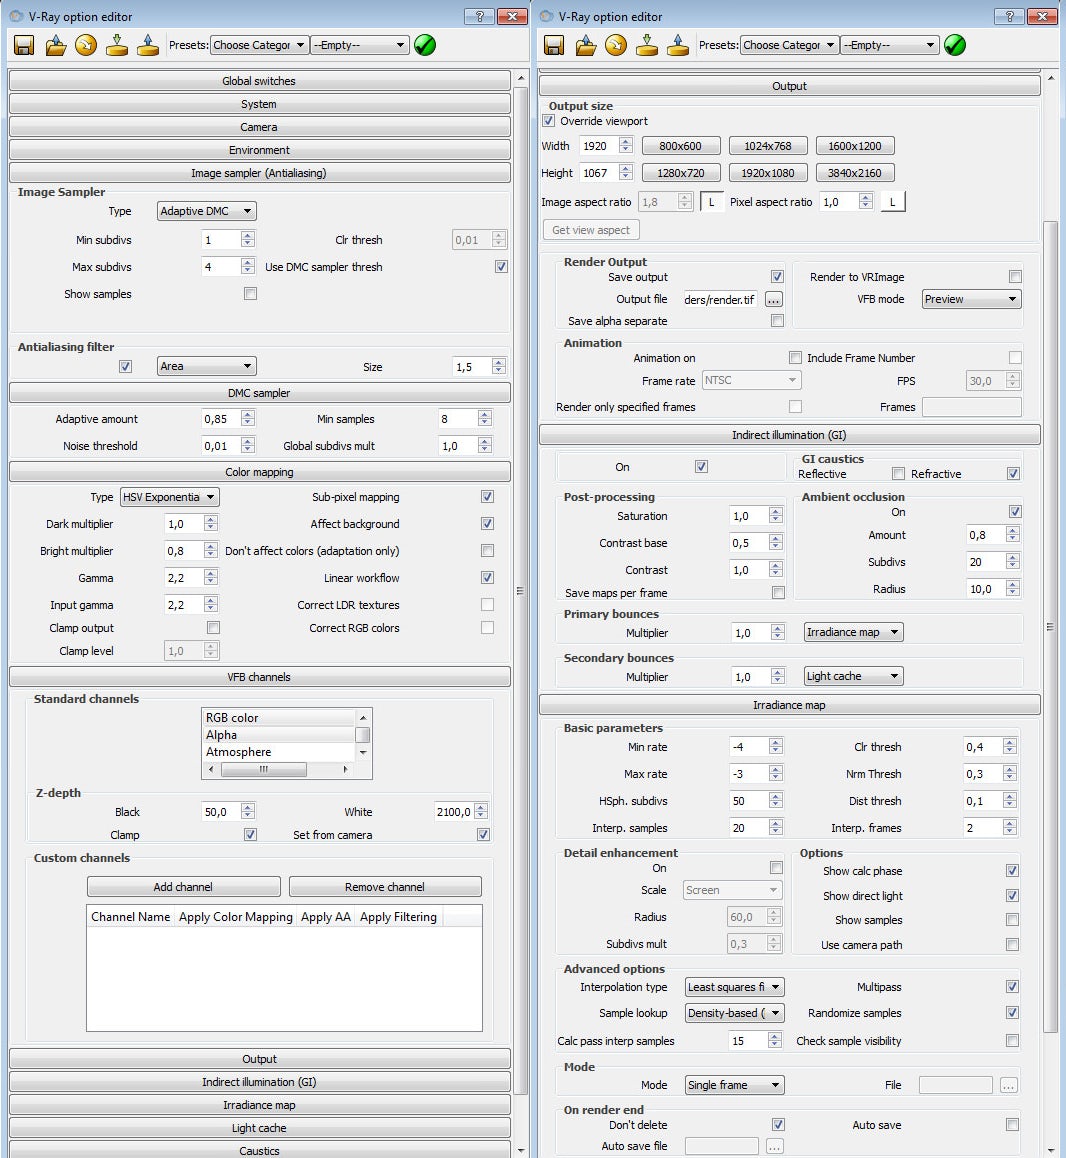
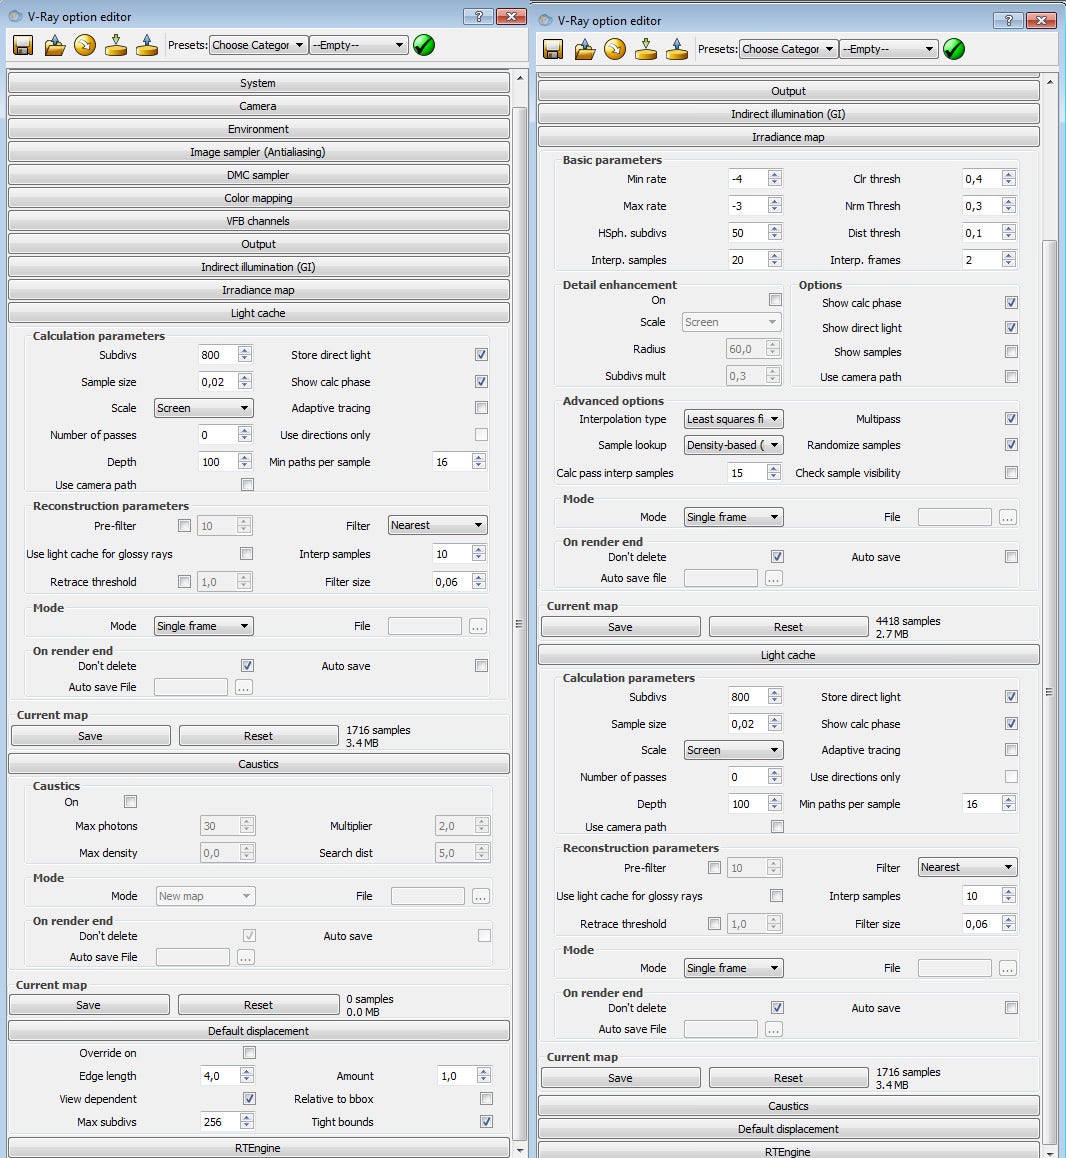
V-Ray settings (click to enlarge)
As you perhaps noticed, the position of chairs and diving board was rendered afterward. Unfortunately we have no screenshot of this as we failed to file the final adjustments to the model. Here, the positioning of objects is important, as we try, with these, to give the final image depth.
And now to the final lighting:
For creating material components, we took our time and experimented a lot. In fact, some of these were created quite accidentally by exchanging mappings. We subsequently decided to add dirt, dust and rusty spots in order to have more free choices for postproduction.
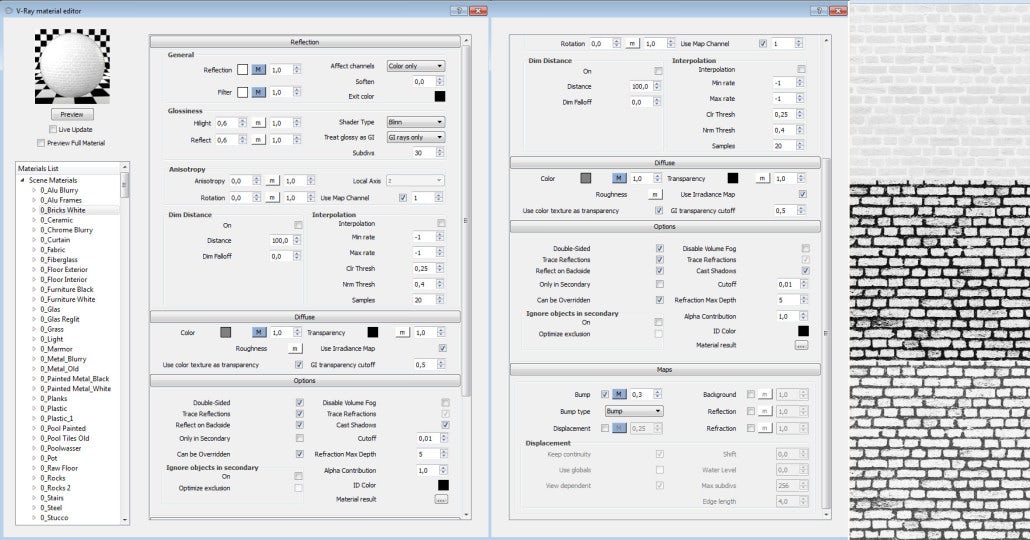
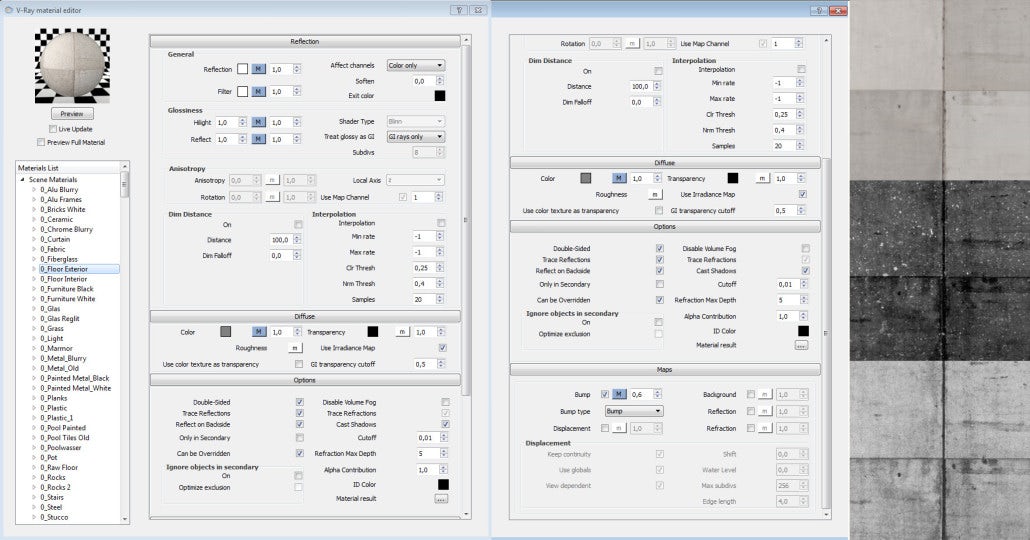

A sample of material settings from the model. For details on every material, click here.
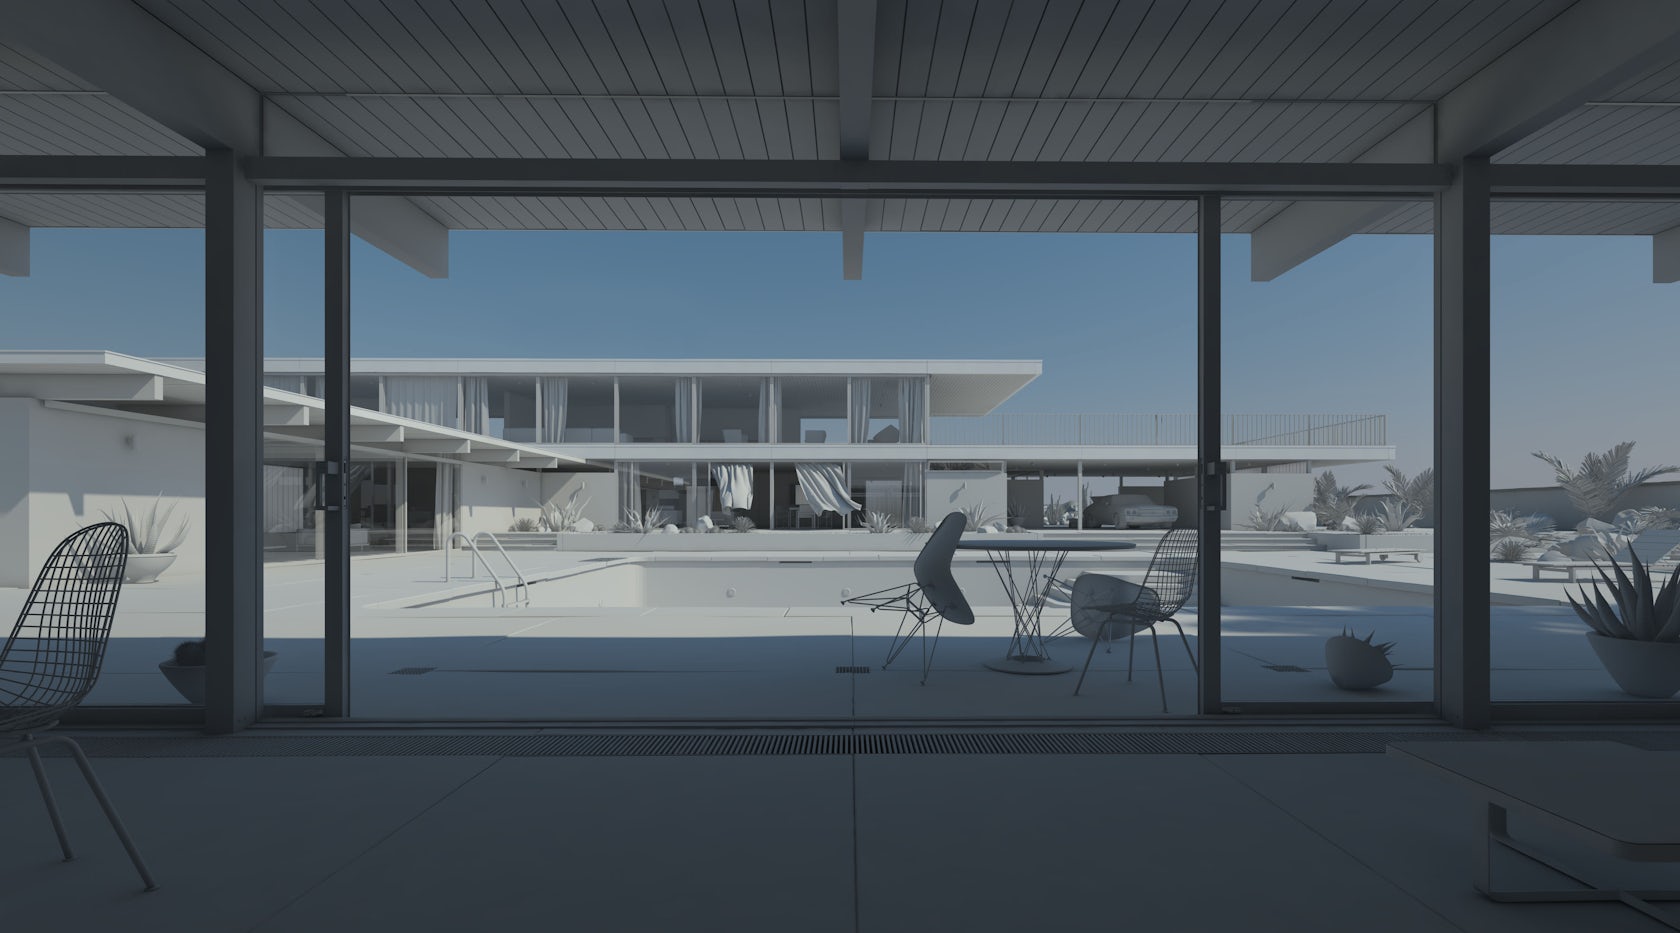
Final Rendering
Final raw rendering
The following are guidelines we referred to while keeping an eye on the production process.
In order to create image depth, we worked with FG, MG and BG elements. Framing was also used. The positioning of cold colors within warmer shades also added to image depth. The project theme “Table and Chairs” was positioned within the golden cut.
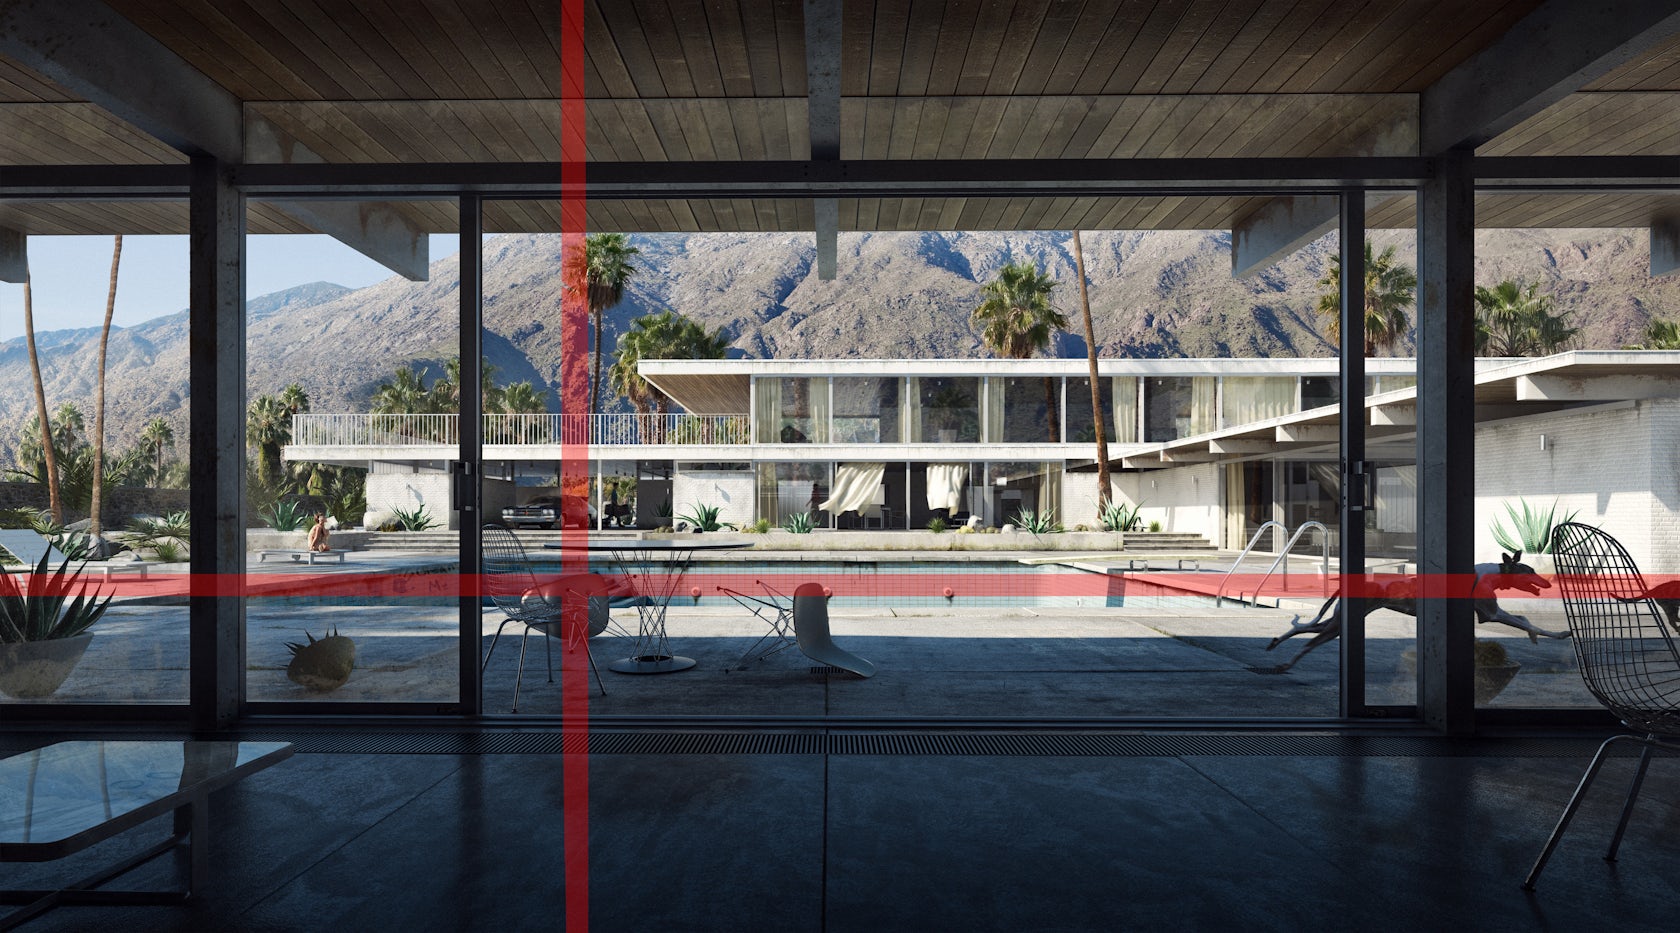
“Rule of thirds” composition selection
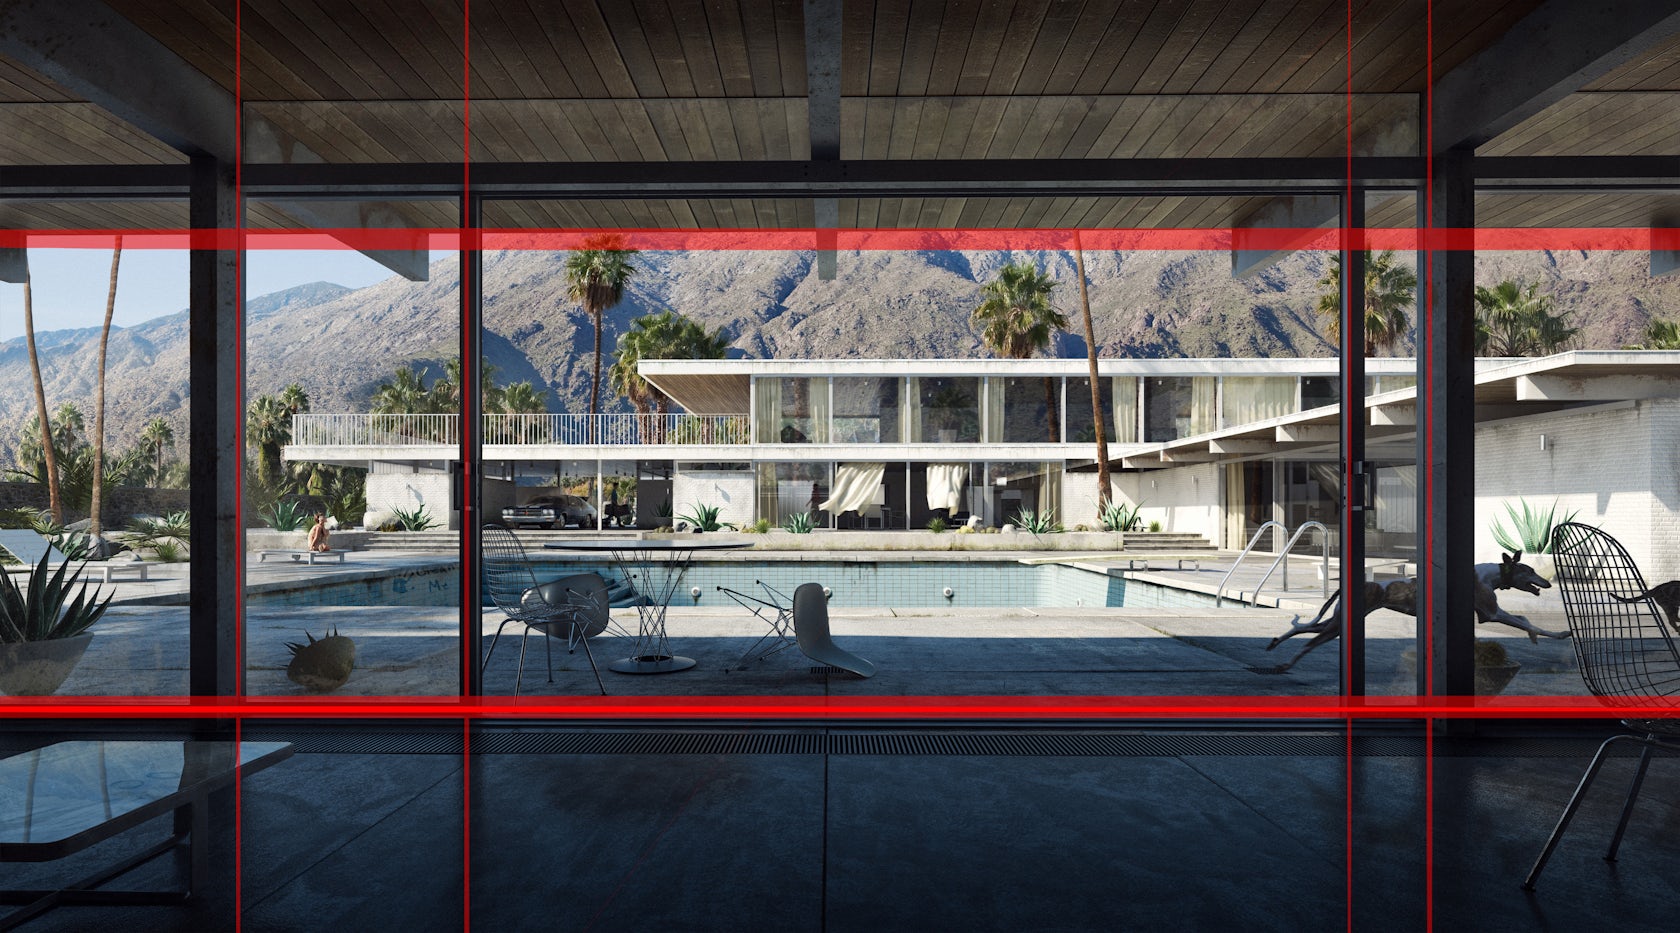
Framing composition selection

Composition color selection
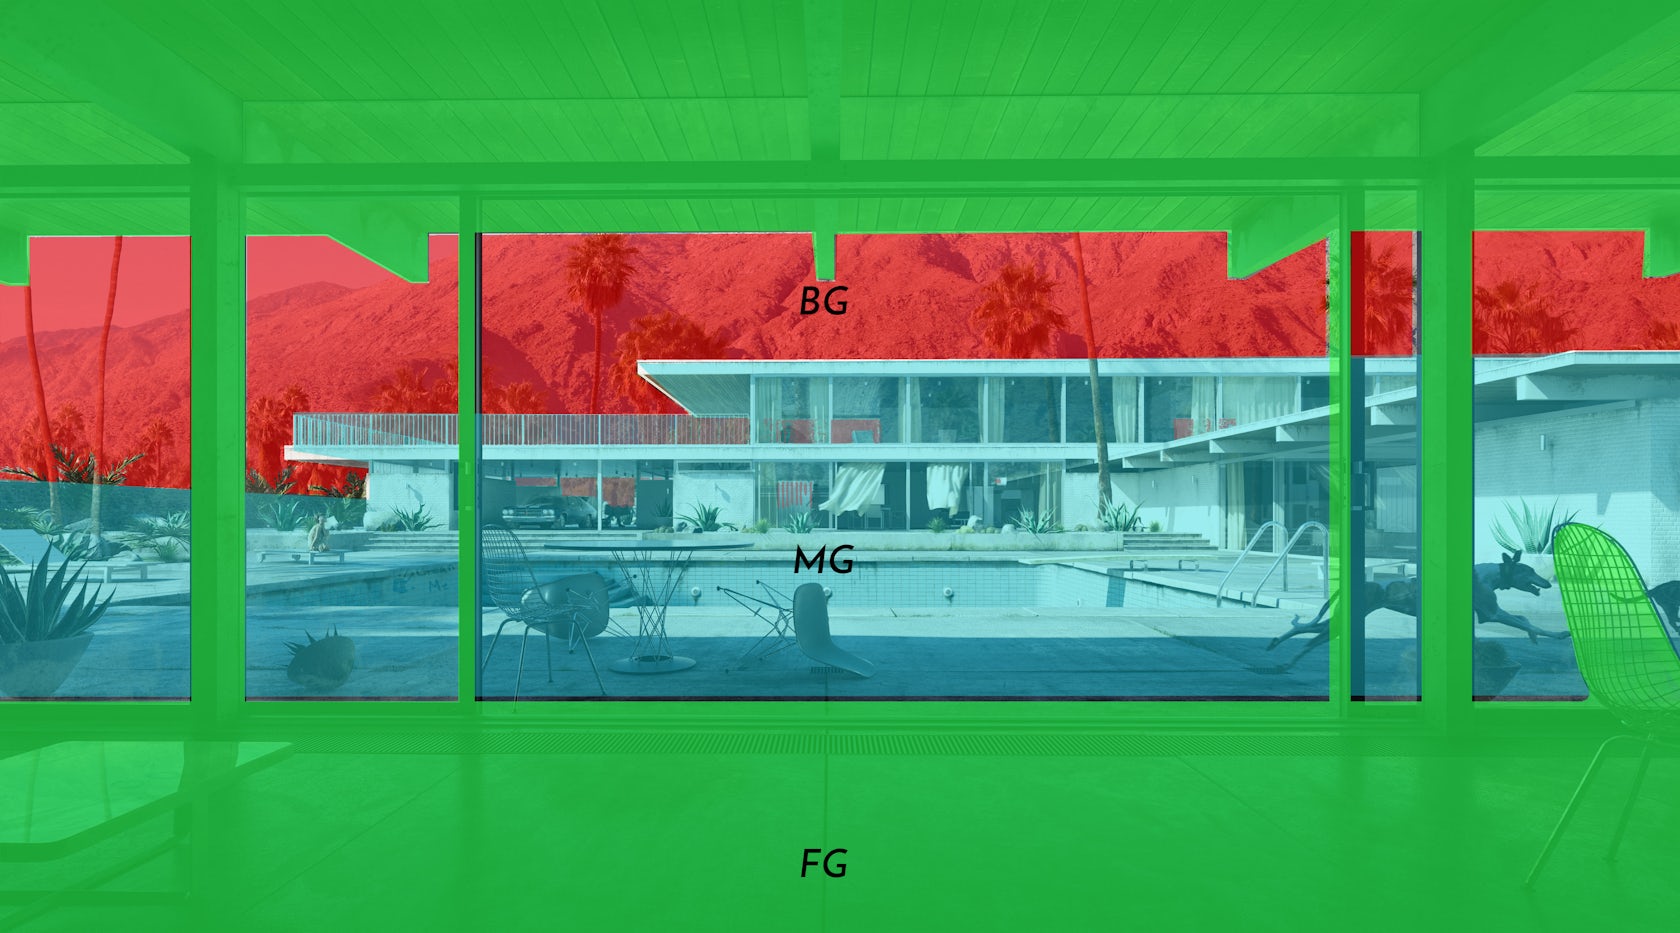
Composition hierarchy
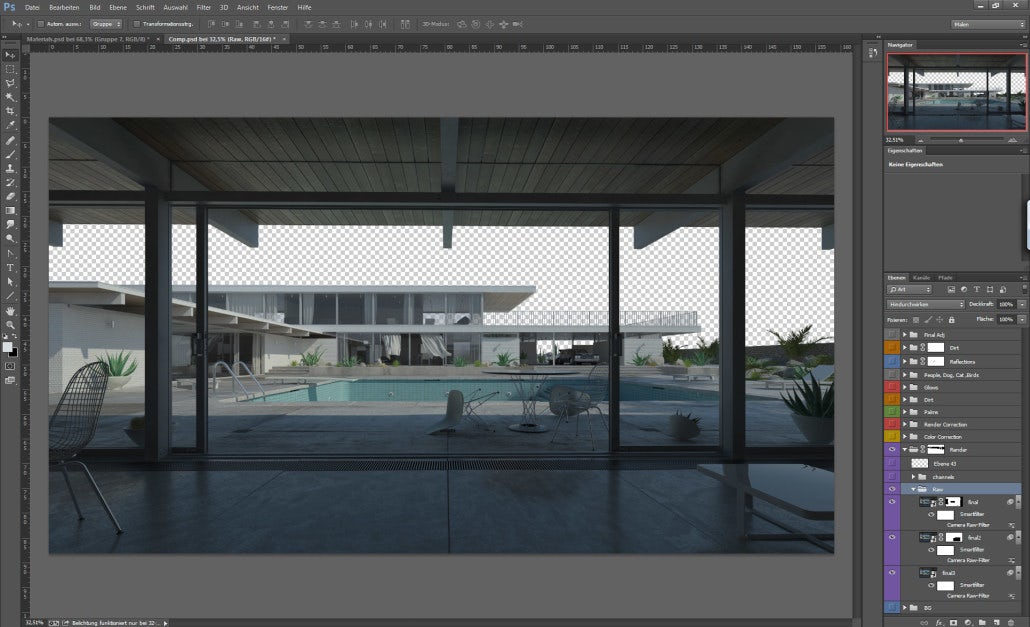
Before starting on the background, we edited the raw rendering with Camera Raw Filter to correct general features such as curves, colors, contrast and intensity. Because contrast and intensity are again edited during final adjustments, it is important to not have areas 100 percent black or white. One of the most important elements is BG, which lets the observer determine the scale and gives depth to the image.
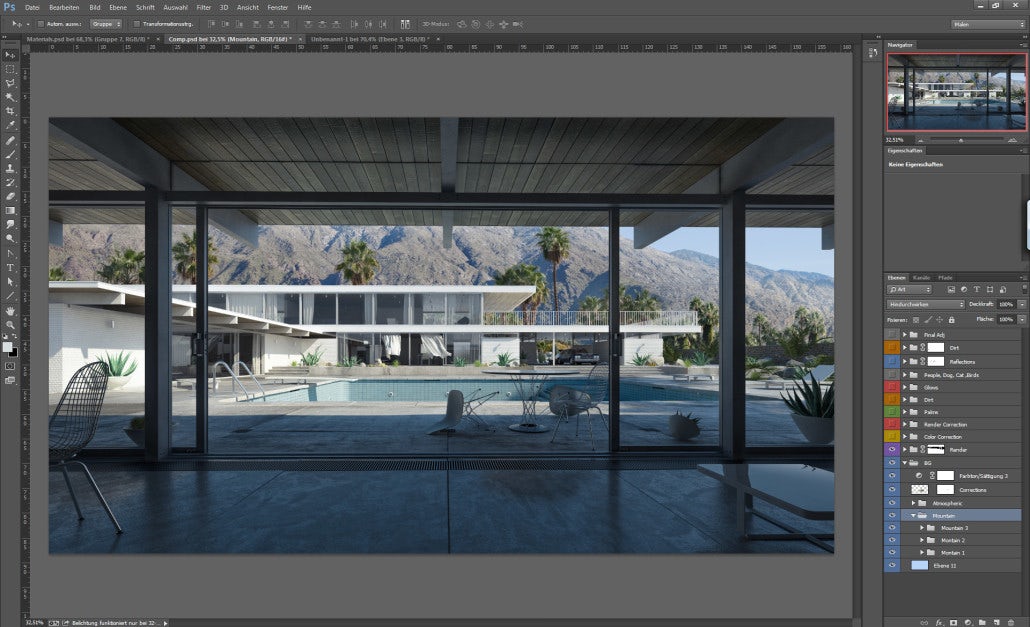
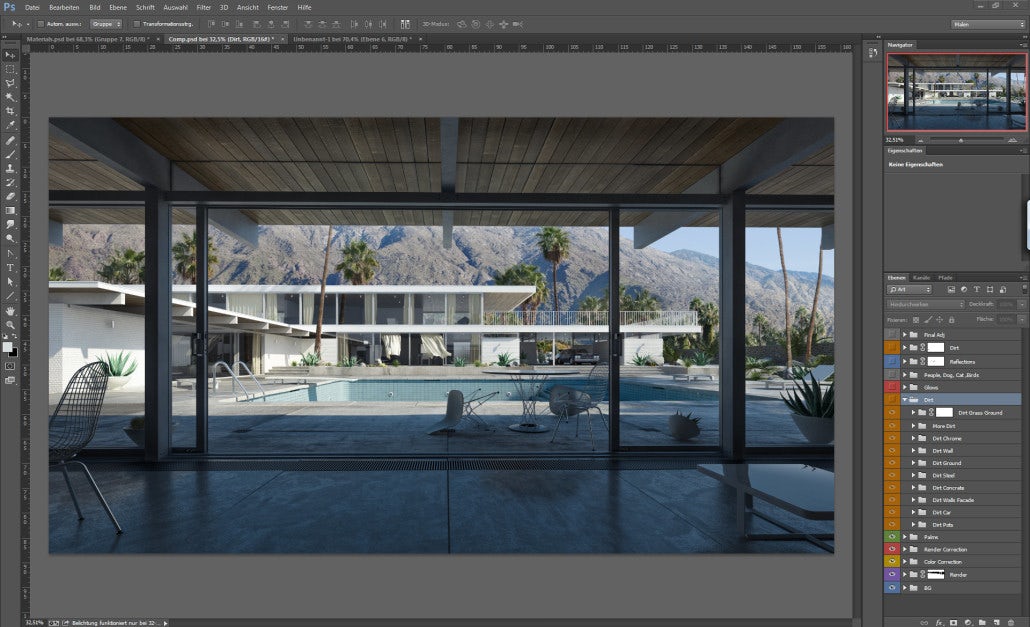
At this stage, we took our time to compile good reference images. The background is composed of several mountain segments, which have to have equal grain and exposure. We really enjoyed the adding of texture to the surfaces. In starting postproduction, it is helpful to have available all the masks for surface editing and to use them subsequently. On some surfaces we painted texture with custom brushes. Others were done with various blending modes.
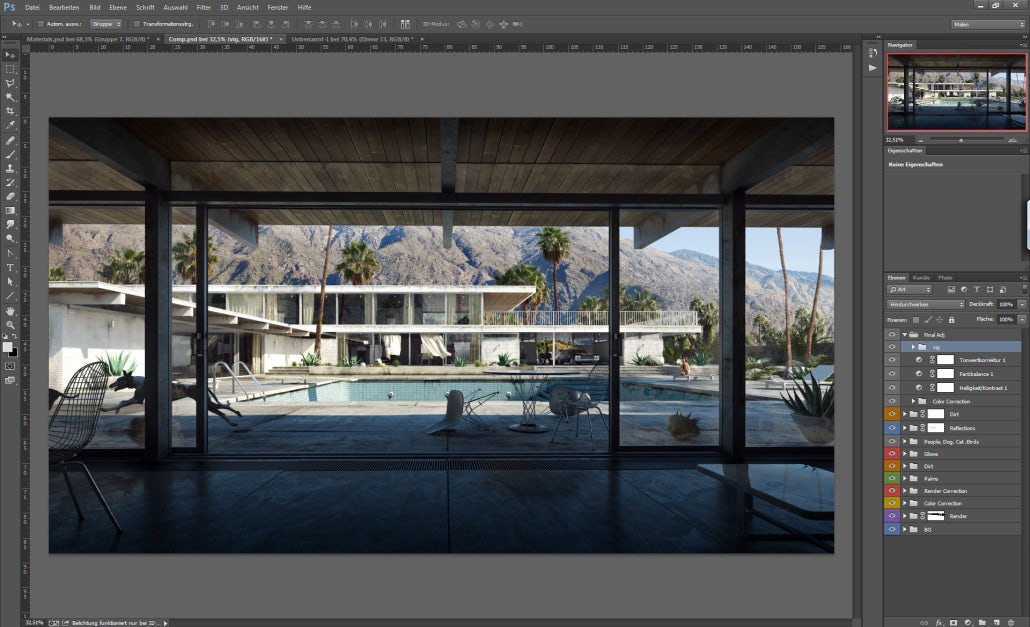
We made sure to achieve an irregularity on surfaces, thus improving their vividness and real look and feel. Final retouching only consists of color adaptions, contrast adaptions plus a very slight soft focus filter.

Postproduction process screenshots — Photoshop
Very often, during long periods of working on an image, the eye turns blind to minor adjustments. It helps tremendously to mirror the image frequently while working. Because our premises are at a fictional site, the direction the house is facing was of no importance. More important was how we liked the image, which is why at the end, we kept it mirrored.

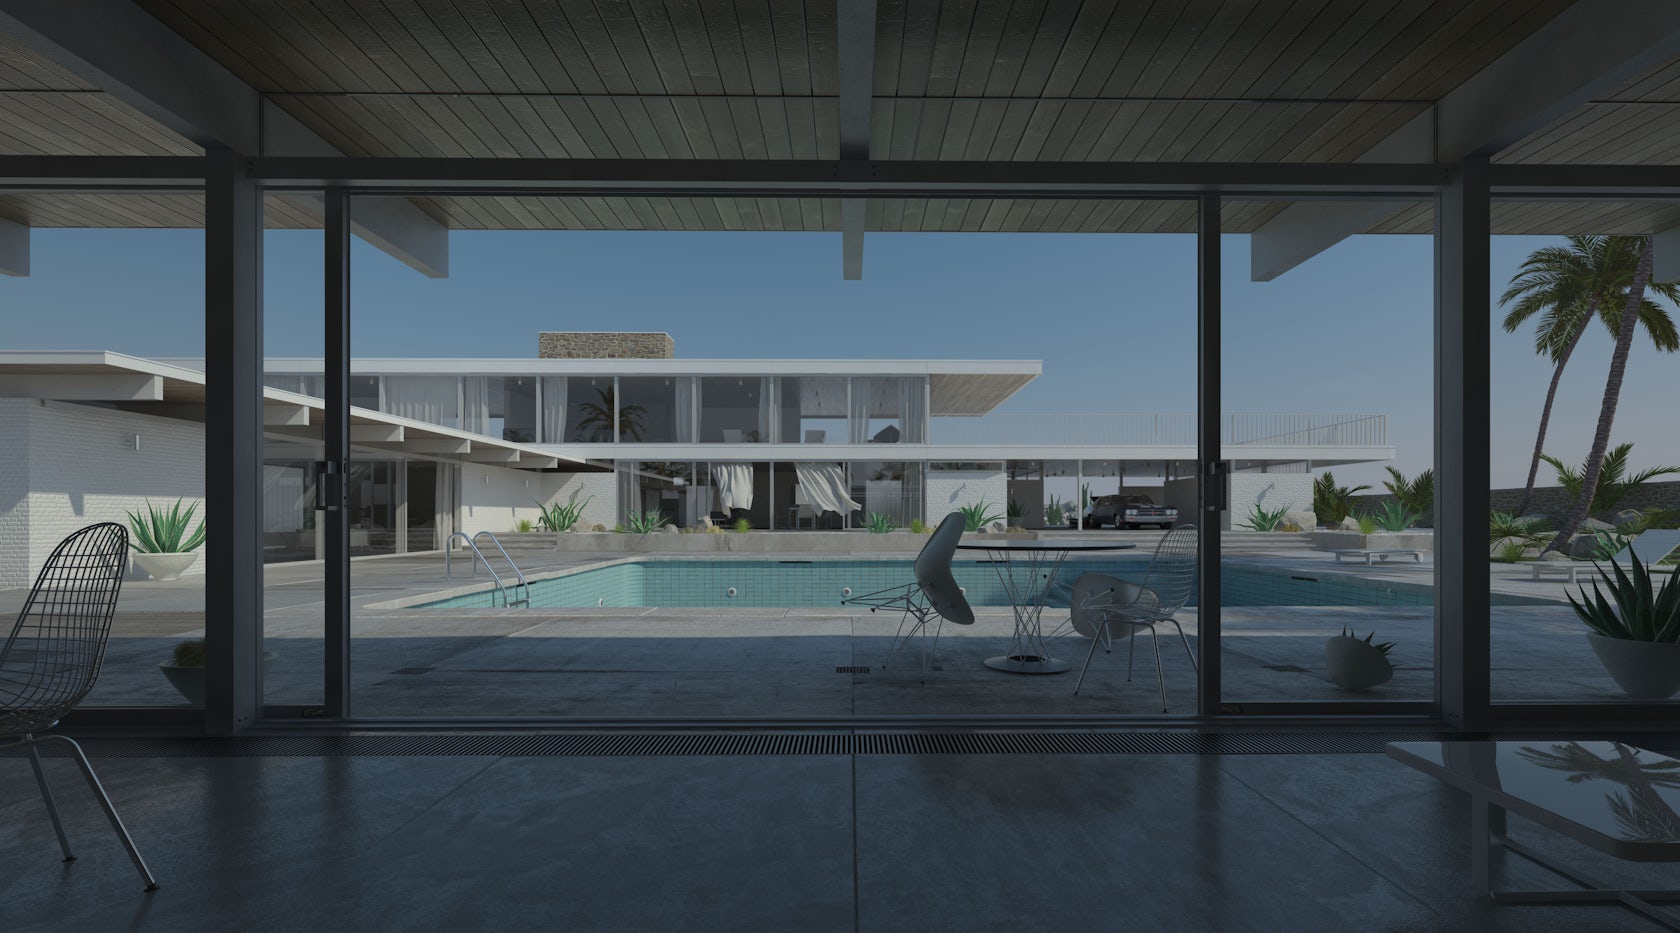
Final image
Sometimes it’s hard to let a project go. “Arrival” was one of them … It was great fun working on it, but now the time has come to say goodbye. Here is the last shot from this project that was posted on the forums:

Thank you very much for taking your time to reach this point. We do hope that this tutorial has been of help to you, and of course we look forward to your comments and criticisms.
They help us to learn and improve! See you soon.
Bahadir (Nookta)
This article first appeared on Ronen Bekerman Architectural Visualization Blog.
Architizer’s Tech Directory is a database of tech tools for architects — from the latest generative design and AI to rendering and visualization, 3D modeling, project management and many more. Explore the complete library of categories here.


