

Michael LaValley is an NY-state registered architect, career strategist and blogging entrepreneur. His blog, Evolving Architect, helps creative professionals to channel their passion for architecture into successful careers.
“I think it’s fair to say that personal computers have become the most empowering tool we’ve ever created. They’re tools of communication, they’re tools of creativity, and they can be shaped by their user.” — Bill Gates
Finding Your Workflow
When I think of all the late nights trying to work on a project here or there, the one thing I’m grateful for is that I have created a workflow that, well, works for me. As a designer, there are countless different software packages you can use to realize your concept. The trick is understanding what software works for you both from an individual program level and from an overall workflow.
If you’re really good at using a software program, but it doesn’t help you get directly from concept to product, something’s wrong. Hopefully by sharing my own workflow here, you can begin to understand a bit more about how I work and use my strategies as a precedent for your own way of working. I’ve kept the order of how I discuss the programs below in order of my typical workflow.
My Personal Software Workflow
Sketching — Concepts
AutoCAD — Drafting
SketchUp — Modeling
VRay — Rendering
Photoshop — Editing
InDesign — Layout

The Procreate app on iOS; via Akers Architectural Rendering (on YouTube)
1. Sketching
OK, OK, I know. Sketching is a process, not a program. I get it. But the thing you need to understand first and foremost is simply “What am I making?” You can spend hundreds of wasted hours tinkering on a computer drawing, model or final layout only to realize that what you’re making is nothing like you intended — in a very bad way. Don’t make that mistake. It’s not easy to recover from.
Instead, just sketch out a few ideas. See what happens. Let’s say you’re creating a building — What are the site restraints? What will the overall shape of the building be? How tall will it be? How many stories? Now, I’ve tried a few sketching programs with my iPad before. However, I’ve never had nearly as much luck with sketching as I have with just a piece of paper and a marker pen or pencil. It’s simple, it’s easy, and anyone can do it.
If you’re in the market for a sketch app, though, the best one I found by far was Procreate. It has a friendly user interface and a great library of brushes and has been constantly updated since it was released.
A word of caution: There are tablet apps out there that create dimensional drawings and use similar interfaces to drafting software. At this stage in your design’s development, do NOT use these apps. You’ll be trapping your work into something that is definitive and ‘hard’ rather than conceptual and ‘soft.’ You need your initial thoughts to be clear, concise, but malleable. If you go the other route, you might just find that you’re worried more about the software than the design (trust me, I know). I’m a bit partial to sketching notes to myself in a sketchbook or on small notepads, but as long as you sketch somewhere before moving to the computer, you should be able to work out a lot of the issues you can avoid later.

Via Autodesk
2. AutoCAD
This is in some ways the most useful software program there is. I’ve been able to create fantastic drawings and presentations from this alone just by manipulating and controlling line weights layout and print settings. The first thing you need to do is adjust the user interface to your liking. Take a look around and adjust the screen and your tools as necessary. Make sure that you have the basic drawing tools, manipulation tools (move, array, etc.) and layer tools at your disposal.
From a sketch, I’ll take the concept into AutoCAD and transpose the ideas as best I can into a hard lined drawing. It’s in this stage that the inevitable realities come to light in the design. Maybe the sketch was a bit too generous in relation to the overall size of the building. Maybe the grid I had initially intended doesn’t really work over the entire site. AutoCAD is the tool that will help you test some of your ideas. The trick is to stay organized with your layers, sheets and other drawing conventions. As soon as you begin to deviate from the initial standards you’ve created, the drawings you create will become muddied and aggravating for you later.
When utilized properly, though, AutoCAD will provide you with a two-dimensional drawing that you can either manipulate further in a presentation program such as Adobe Photoshop or Adobe InDesign, or you can export it to a 3D software package such as SketchUp.
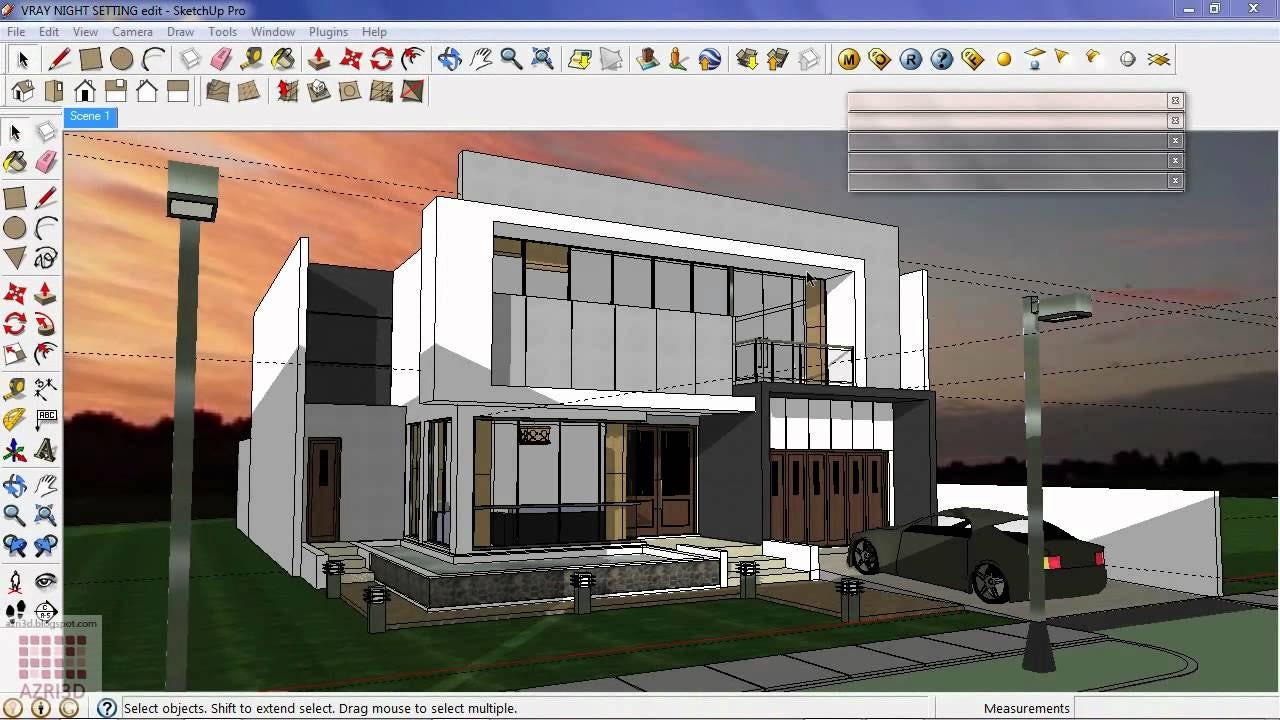
Via Azri3d Tutorial (on YouTube)
3. SketchUp
Is SketchUp the greatest 3D software program out there? Well, yes and no really. It’s probably the easiest program to understand, interface with and learn. But you won’t find SketchUp (without very advanced plug-ins) creating algorithmic, amoebic models in the same way that a Rhino, 3DS Max or Maya might. And that’s perfectly OK.
SketchUp is best used when you have a 2D drawing to work from. From that point, you can extrude shapes and quickly realize a 3D representation of that drawing. The simplicity of SketchUp is its true strength. It’s learning curve is much shallower because of it. The result is a much quicker path from knowing almost nothing about 3D programs to generating a full-fledged model in no time.

Via Randi Isk
4. VRay
SketchUp has very real limitations when it comes to rendering. The only image SketchUp can export is basically a screenshot of your model as is. And unless you want to spend 100 hours retooling each image in Adobe Photoshop (I sure as hell don’t), you may want to find a plug-in that can be integrated directly into your workflow. EnterVRay.
VRay is a powerful plug-in that basically has the capability to turn SketchUp into a rendering powerhouse. While it’s not exclusive to SketchUp (you can basically integrate it into almost all of the major 3D packages), it will definitely benefit SketchUp the most if you don’t want to spend thousands of dollars trying to acquire some of the bigger names in 3D.
You can create lights and add realistic textures to the model in ways that allow you to keep working nearly the same way as you manipulate the model and then basically push a button when you’re ready to render the scene. Now, it’s not THAT simple, but in my experience, it’s definitely one of the easier packages to manipulate without being an advanced 3D modeler. From there, you can bring your raw rendering (an image before additional software manipulation) to such a program as Photoshop.

Via Pinterest
5. Photoshop
I think of Photoshopas the magic program of them all. It has the ability to hide or show whatever you want it to. It can manipulate literally every pixel in your image, effectively creating an entirely new image altogether if that was your desire. But be wary. If you’re not careful about how you set up your file, you could lose everything and have to start over.
However, Photoshop won’t leave you in a lurch if you don’t want it to. Its system of layers is very straightforward but provides a wide variety of additional functionality if you’re looking for more advanced image manipulation.
I personally use Photoshop with a file structure that allows me nondestructive formatting. This means that if you set up your layering management properly, you can use additional layers to carry all of the changes while your original image remains unscathed. The next time you use Photoshop, I suggest you consider all of the ways you can ‘build up’ the image rather than ‘tear down’ what you’ve already created.

6. InDesign
Unlike Photoshop, InDesign is intended purely as a layout program. This doesn’t mean that you can’t manipulate objects, but rather that you have other programs that do it better. As you create your own workflow, make sure that each program has a fundamental purpose. Once that purpose has been served, move on to the next until the product you’re creating is complete. InDesign is meant to arrange objects into presentable forms. These objects can vary from text boxes to shapes and images.
You can’t take the final rendering from Photoshop that you’ve created and place it onto a sheet complete with title block, project information, additional notes, etc., until you feel that the product is presentable. I have personally used InDesign for document creation, including my own résumés and portfolios. I have been able to make entire books by creating page templates that can be associated and copied around. It is truly a powerful tool that can put the finishing touches on your own work.

Via V3wall
Why Use a Program Workflow?
So you may be asking yourself, “OK, these programs are great, but why do I need to have a standardized workflow?” In my own experience, the advantages of workflow come down to three key principles: efficiency, consistency and ease.
Efficiency
Have you ever tried to just to just ‘wing it’ when you’re working on a design project? I wouldn’t advise it. One of the benefits of having a workflow you can count on is efficiency. If you’re efficient in your work, you can spend other time doing other things. Now, what you choose to do with your extra time is up to you; it’s not up to the project you’re working on. You could go for a walk, spend time with friends or even put that time back into your project for something else you meant to get to.
In any case, having a workflow cuts down on the time that you would otherwise be spending trying to figure out the best way to do something. I won’t lie, finding your personal workflow is tricky, but if you keep it to the simple functions you need — drafting, modeling, rendering, editing, layouts and so on — you should be able to find some combination of software that both suits your needs and gives you the structure you need to succeed.
Consistency
Another workflow benefit you’ll gain is consistency. When you’re consistent with a task, you’re more likely to do it and ultimately do it well. Over time, you’ll build up a way of working that teaches you advanced techniques. As you get better, you’ll naturally want to know more about the program you’re working with in order to test its limits and understand exactly what it can do for you.
With consistency comes positive development of your project. You can almost run on autopilot for the tasks that you need to do every time. Consistency will inform your efficiency and create synergies between the programs you use. For instance, if you’ve done a task a hundred times, you’re probably familiar with every aspect of it. You might even be able to recite the instructions by heart to someone who’s never performed the same task. This ability — garnered from direct experience — will make you more proficient, and it will do so in a much shorter time than if you bounced around from program to program without a clear direction.
Ease
As you get better at creating and harnessing the benefits from your workflow, you’ll start to notice something profound. It gets much easier. You work best when you find your own groove, and the work is most enjoyable when you don’t have to worry about how to do something, you just know. This process will give youconfidence in how you’re working, which will in turn give you confidence in what you’re doing, as well.
You’ll likely enjoy what you’re doing more because it comes easy to you now. No longer will you be searching for the issue in online help chats; you’ll just know the answer yourself and be able to teach others. I hope you enjoy what you do. If anything, you should make the process you go through easier so that, at the end of the day, it’s just as enjoyable as when you first started. If it is, you’ll get more done and the products you’ll end up with will be that much better for it.

Just Remember …
The workflow I’ve outlined above is mine because it works for me specifically. There’s nothing wrong if you deviate from this list. In fact, I hope you’ll begin by trying lots of different programs. You’ll immediately find what your skill level is by testing them out and understand roughly how difficult it will be to utilize them in your own workflow. As you begin to explore each software package, I suggest you look at things like what formats the programs import/export in, the approximate price of each program and the overall learning curve.
Assuming you’re not yet a pro at all of the programs, you could begin with the one you know best and work your way out from there — adding programs as you go. Workflows create positive synergies in your process. Inherently understanding how each program can work with the next will dramatically increase your efficiency, make you much more proficient in each software overall and allow you to be more confident in your day-to-day work.
Enjoy this article? Check out more of our Young Architect Guides:
The 7 Secrets to Happy Interning
7 Tips for Getting Hired After Graduation
Building Great Architecture Models
5 Lies Told About the Profession You Must Ignore
How to Convince Your Audience With a Powerful Project Narrative
How to Write About Architecture
5 Specifying Tips for First-Time Architects
Architizer is harnessing the latest technology to create a better way for architects to research building-products. Sign up today and find everything you need to create amazing architecture.
Cover image via Fuse Technology Group


