Ronen Bekerman is an industry leader in Architectural Visualization who hosts in-depth tutorials on his specialist blog. Architizer is pleased to present a selection of these guides written by some of the world’s best rendering artists.
As a SketchUp user for many years now, it was a great joy for me to help bring Skatter to the SketchUp user community. Skatter is the brainchild of Architect and 3D Artist Thomas Hauchecorne, and he did a superb job developing it. Today I’m very happy to share this article by one of our early beta group users, Mads Bjerre from AART Architects. He first shared “The Meadow” in the Skatter Support forums, sparking everyone’s imagination as to what can be done with Skatter. Enjoy this article and know that “The Meadow” Scene file along with the assets are available for free in The ArchVIZ Shop.
Introduction
Welcome to this article whose purpose is to guide you through the making of “The Meadow.”
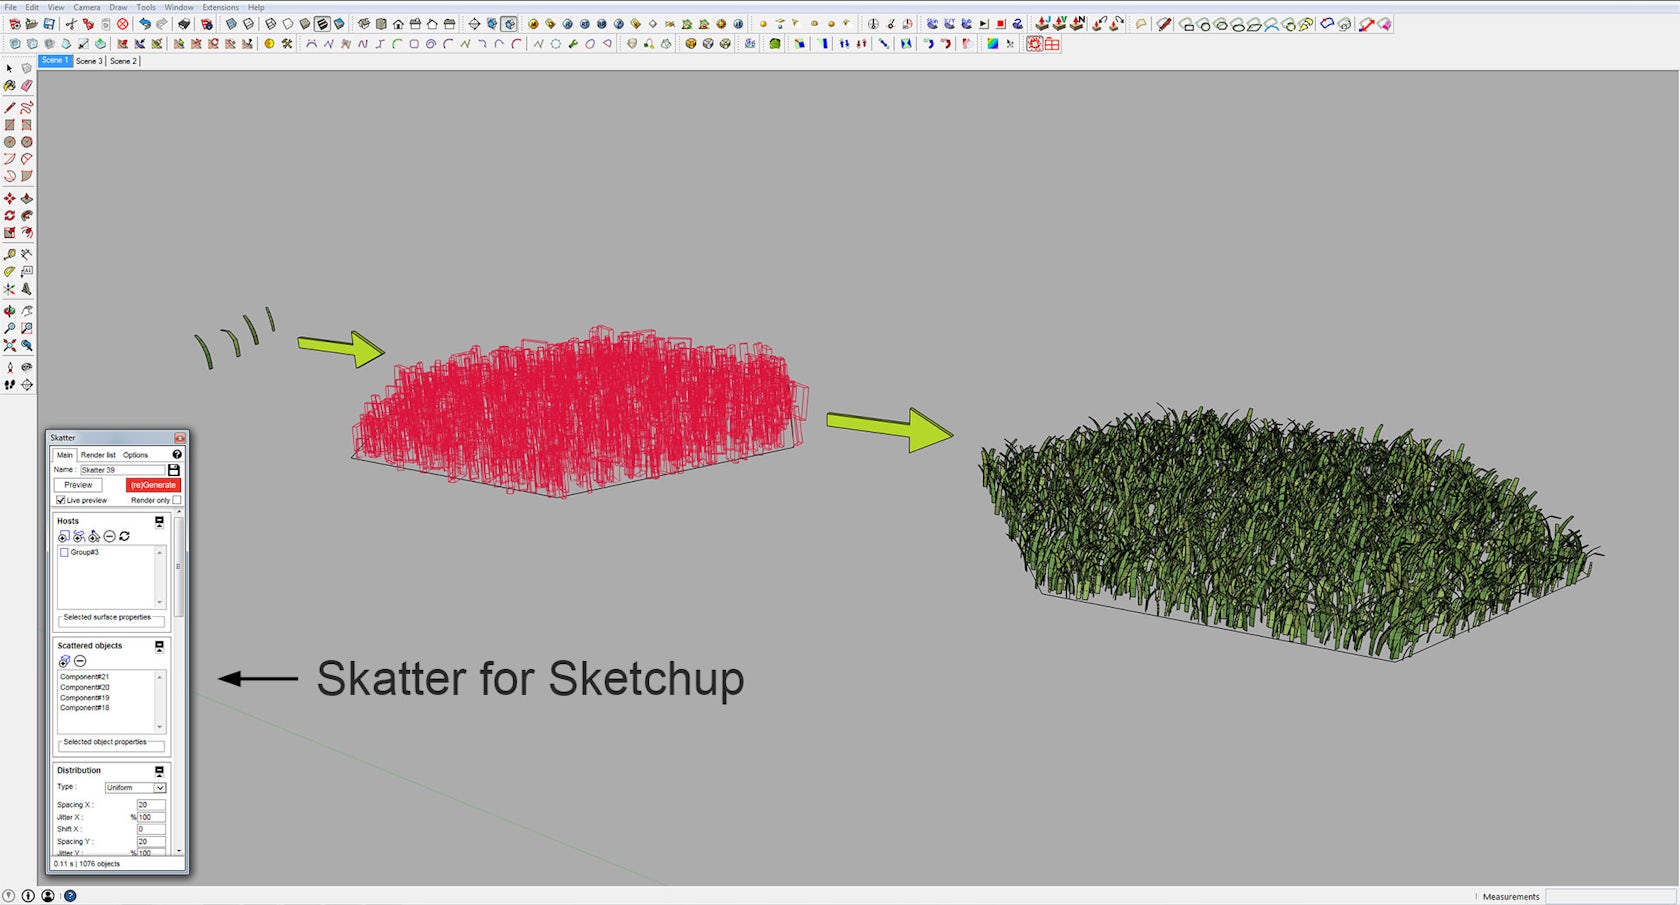
The Meadow was a project made especially for the release of Skatter, which is a brand-new extension for SketchUp. Skatter is a powerful new tool that makes it possible to scatter compound objects either as an array or over the surface of a host object/plane. This is particularly advantageous when working with 3D vegetation like grass, trees, bushes, etc.
I think that many SketchUp users will agree with me that this has always been a major challenge, especially at the rendering stage. There have been previous attempts to make scatter plug-ins, and these plug-ins roughly did the job, but with some limitations. Consequently, many have to rely on other programs like Photoshop in post-processing.
Nevertheless, I think many of us love SketchUp. When working as an architect as I am, time matters almost every time. In my case, it always depends on what I am able to accomplish in a very short time. That is why I chose SketchUp. It is fast, intuitive, flexible and easy to use. Thanks to the many serious developers of SketchUp extensions out there, more and more opportunities are opening up, and every time, the gap between SketchUp and other more “sophisticated” and advanced 3D programs narrows.
With this small introduction, I will continue to tell a bit more about the scene “The Meadow” and how I’ve used Skatter for SketchUp as one of the main tools.
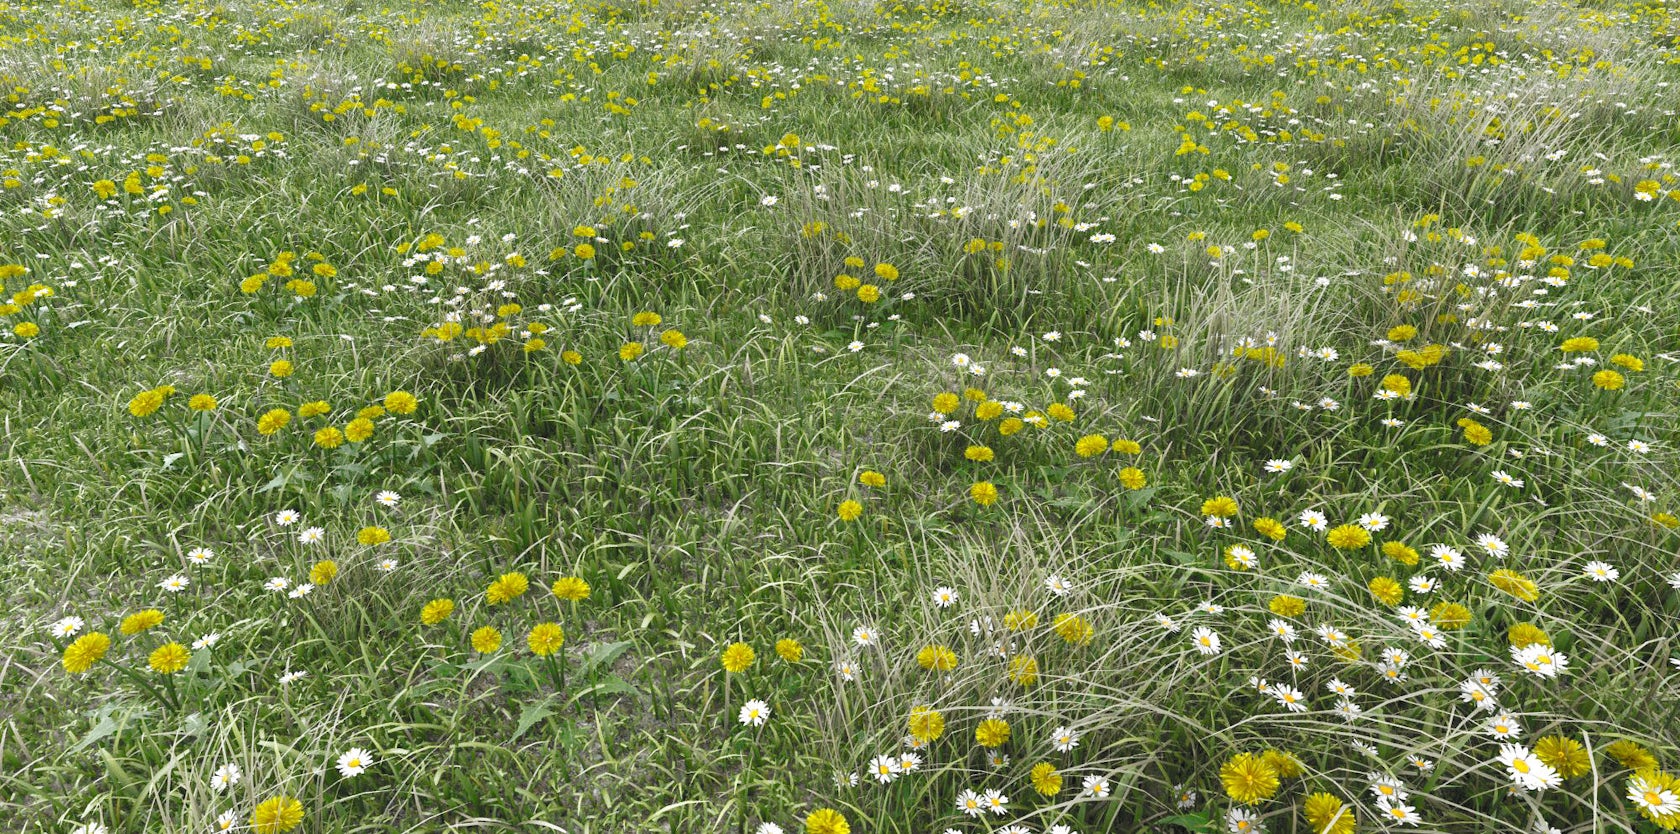
The scene was created to test the capabilities of Skatter for SketchUp. Therefore, I chose to work with a landscape scene, without buildings! Something I never do. I like the idea that I control everything in my workflow, so I decided to make everything from scratch, right down to each single straw of grass.
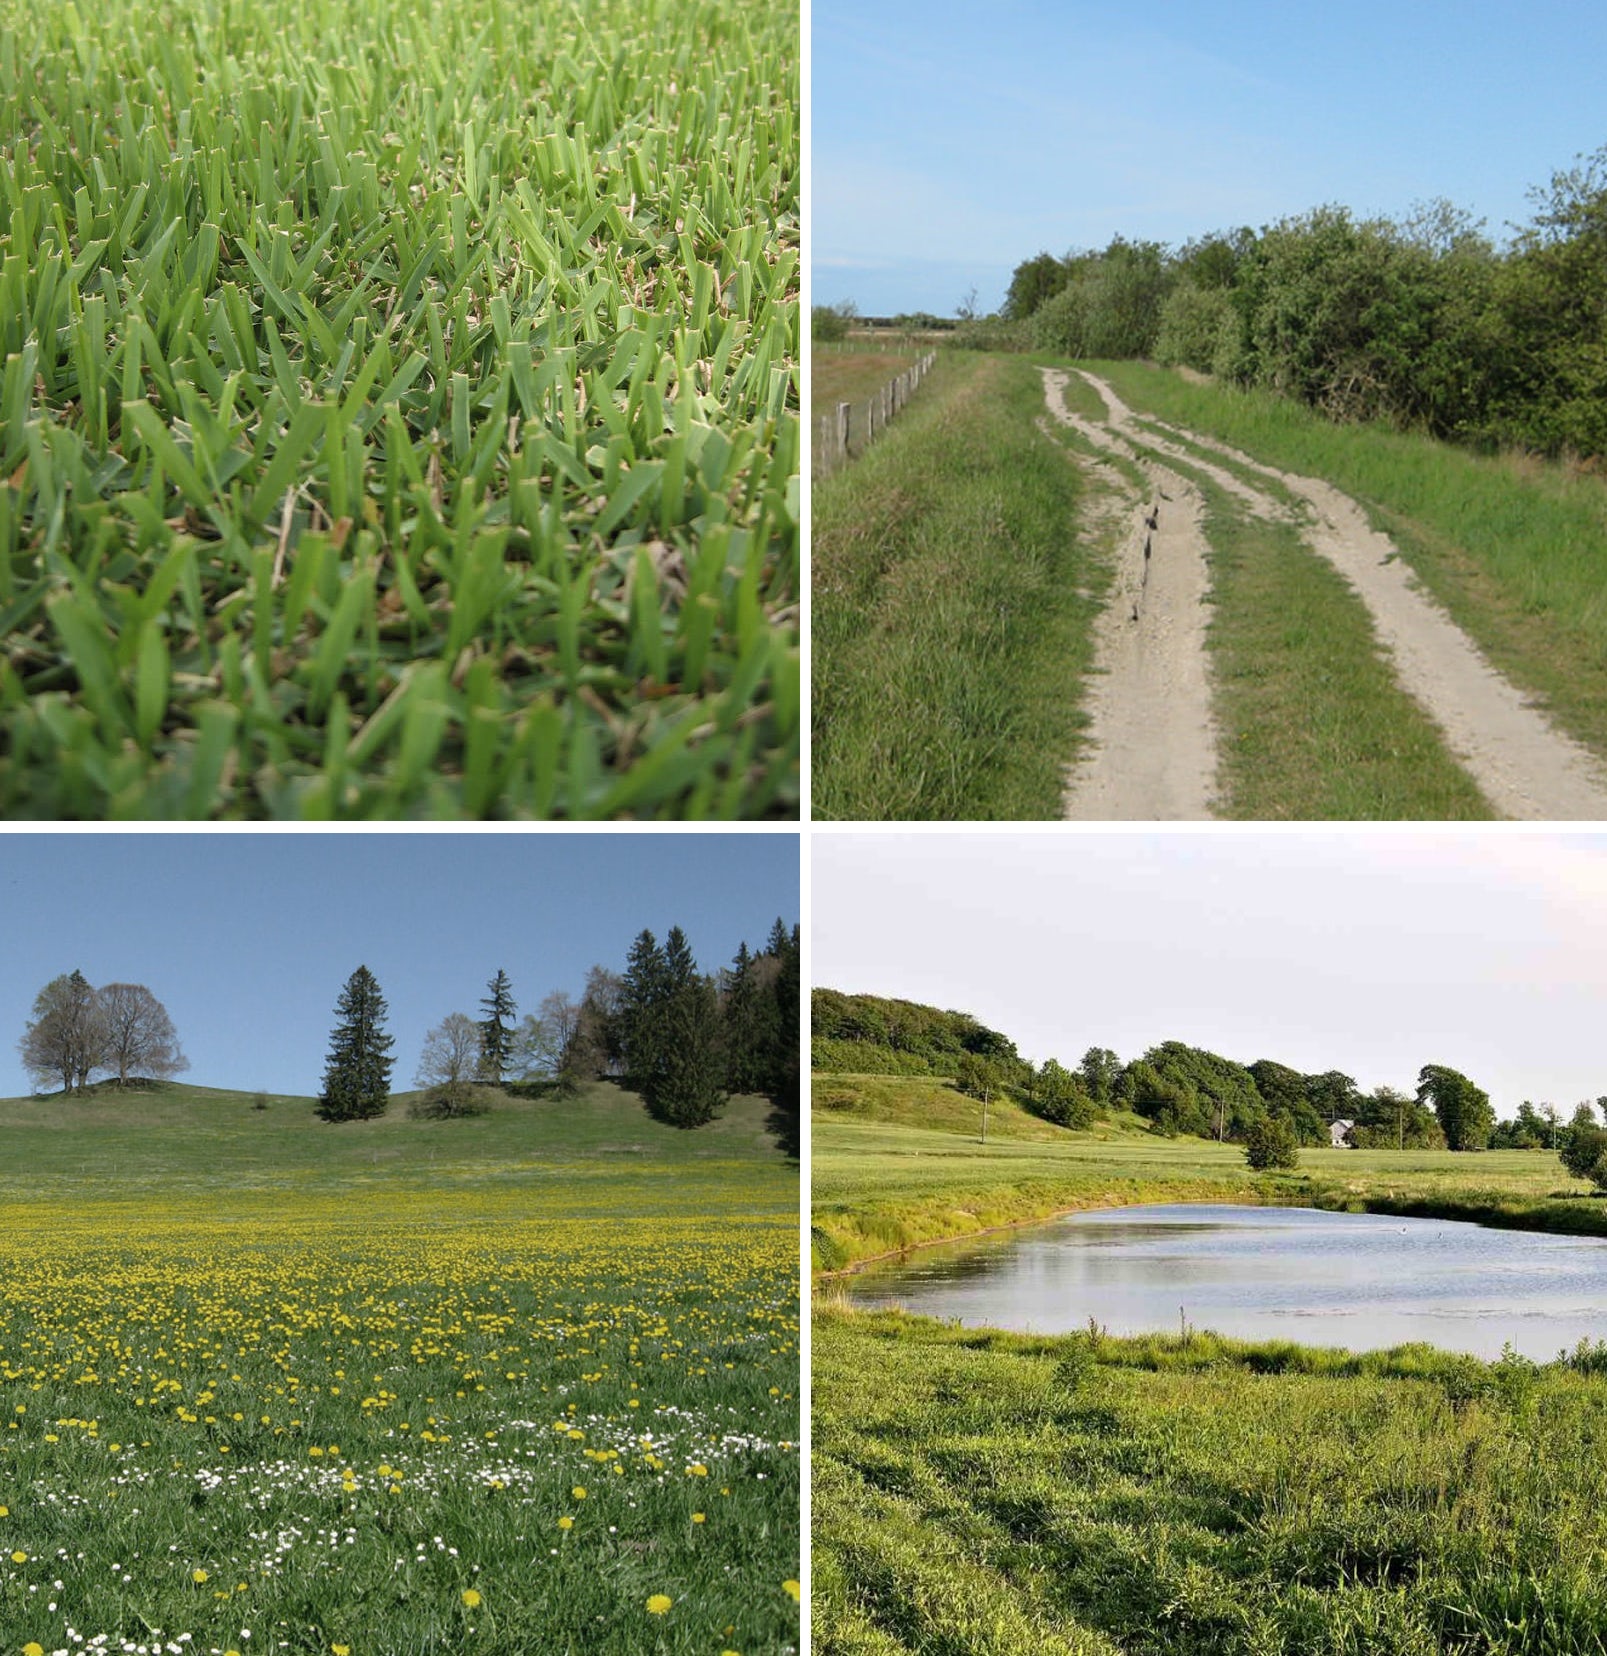
I searched the net for some reference images, to see how the distribution of natural grass looked like. I also found some landscape images for inspiration and to help me mentally visualize the project.
3D Grass-Making
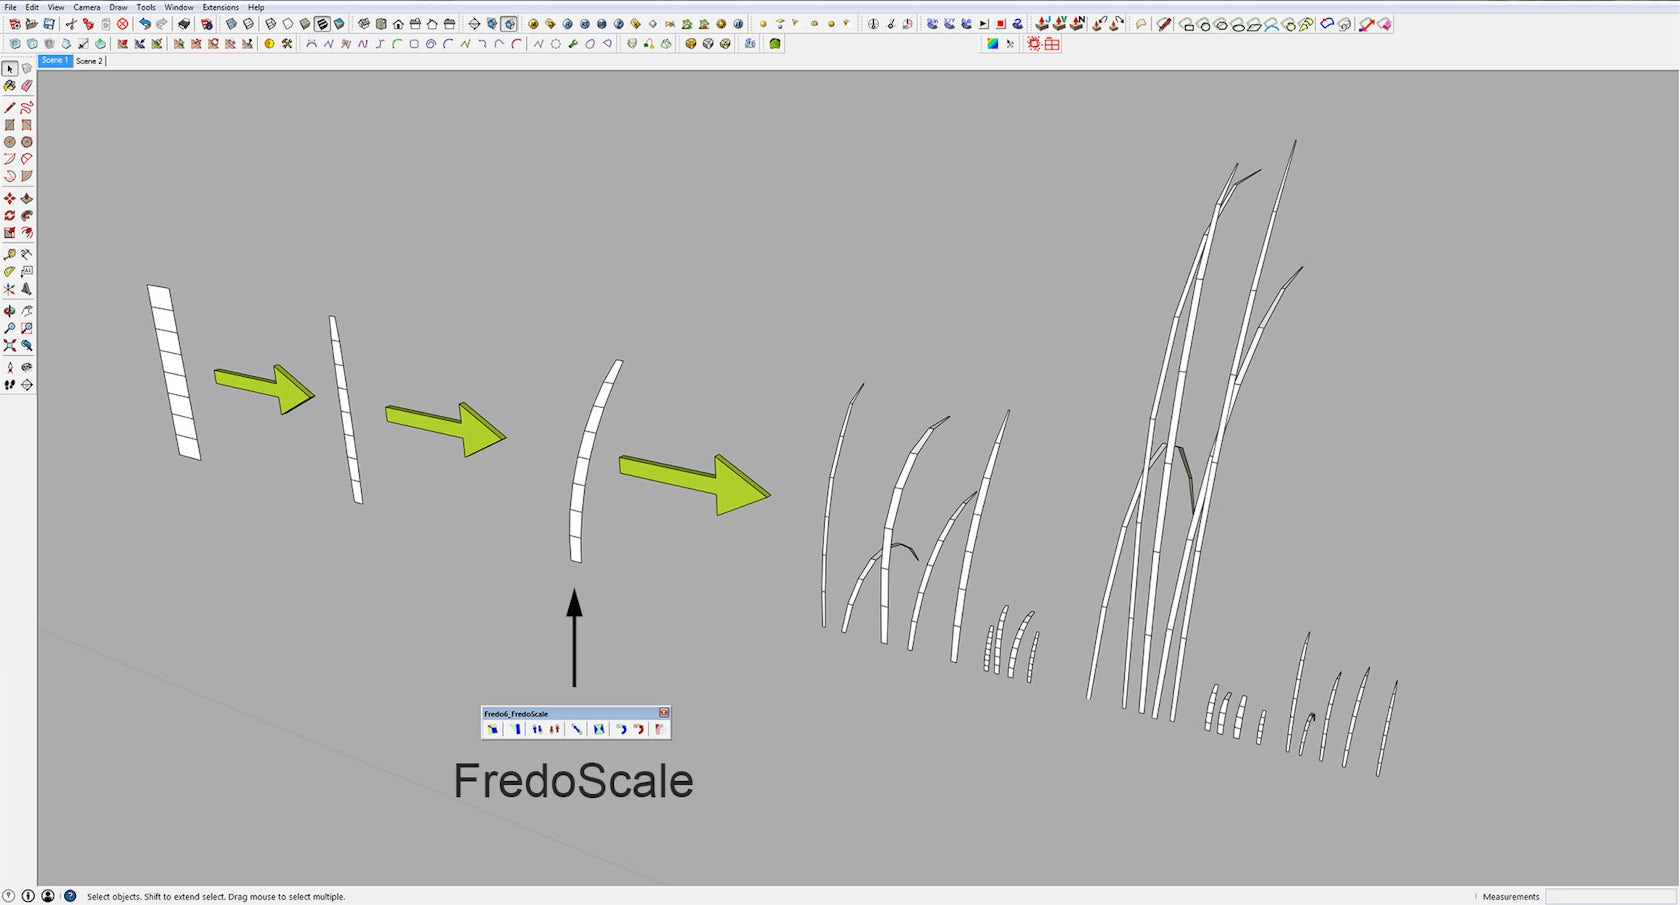
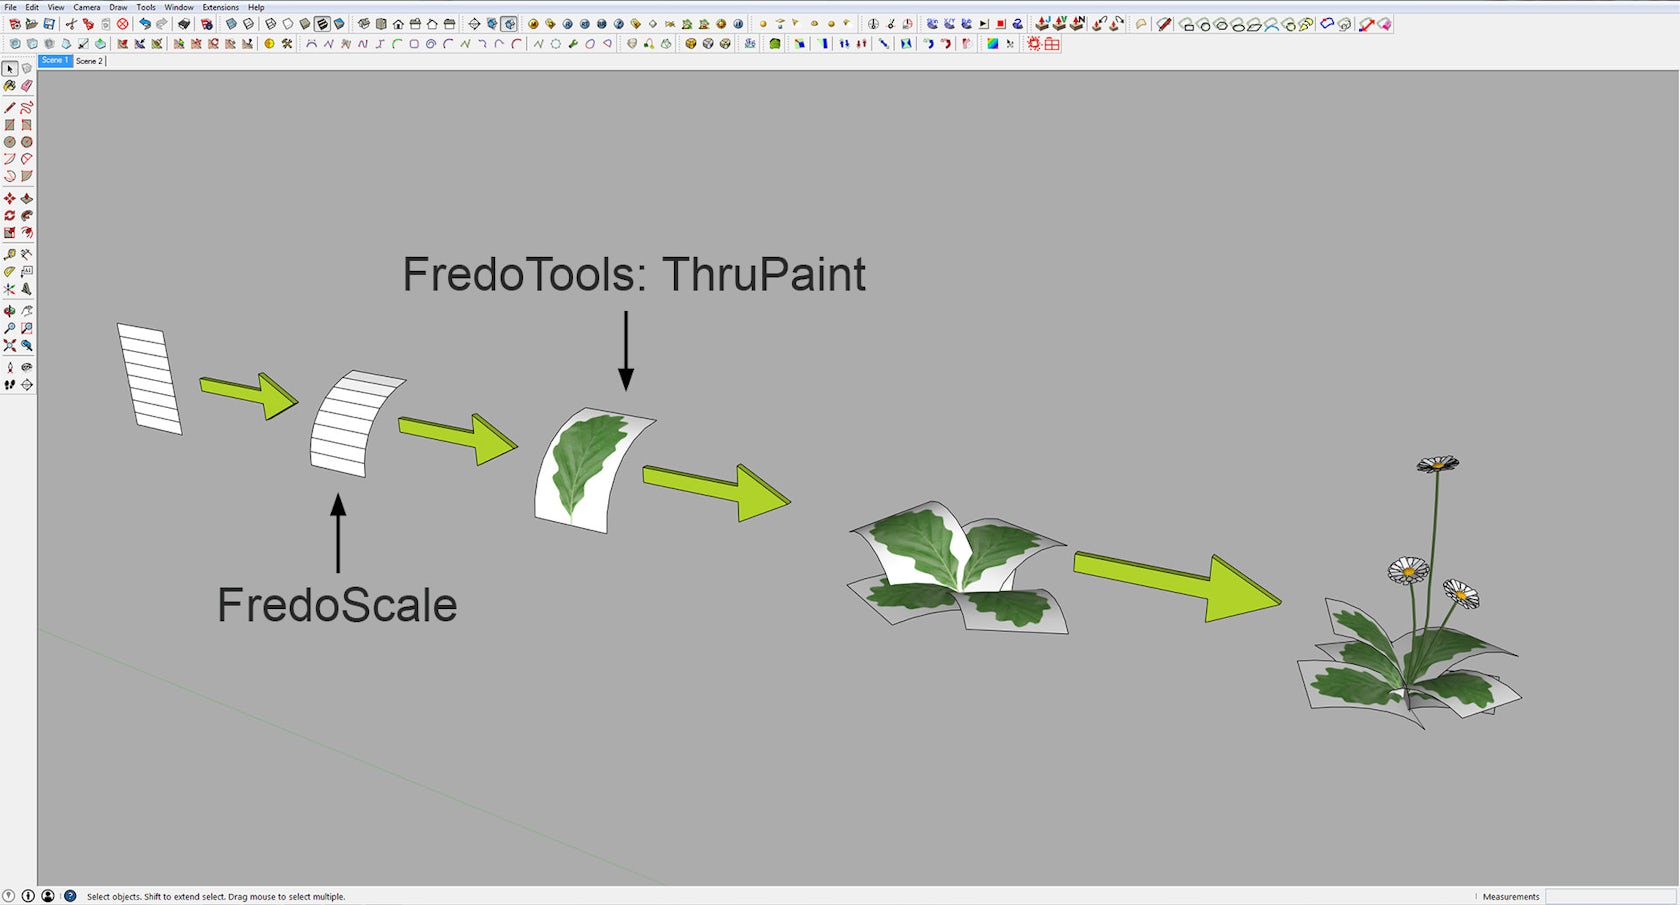
Before I continue, I need to say that the work would have been less easy without some other great SketchUp plug-ins. To make the grass, I used Fredo Scale and Fredo ThruPaint. For the terrain, I used Artisan for SketchUp. Fredo Scale allows you to twist and bend your geometry, and Fredo ThruPaint is a great tool for UV-mapping your textures on challenging geometry without any distortions.
I started out by using Fredo Scale to bend the grass components in different angles. I then used Fredo’s ThruPaint to map the grass texture. I made a single grass texture in different shades of green and mapped it on every single straw. Then I moved the position of the texture to catch the different green shades. In this way, I had only one material to control in V-Ray, which I think is an advantage when you are working with complicated scenes.
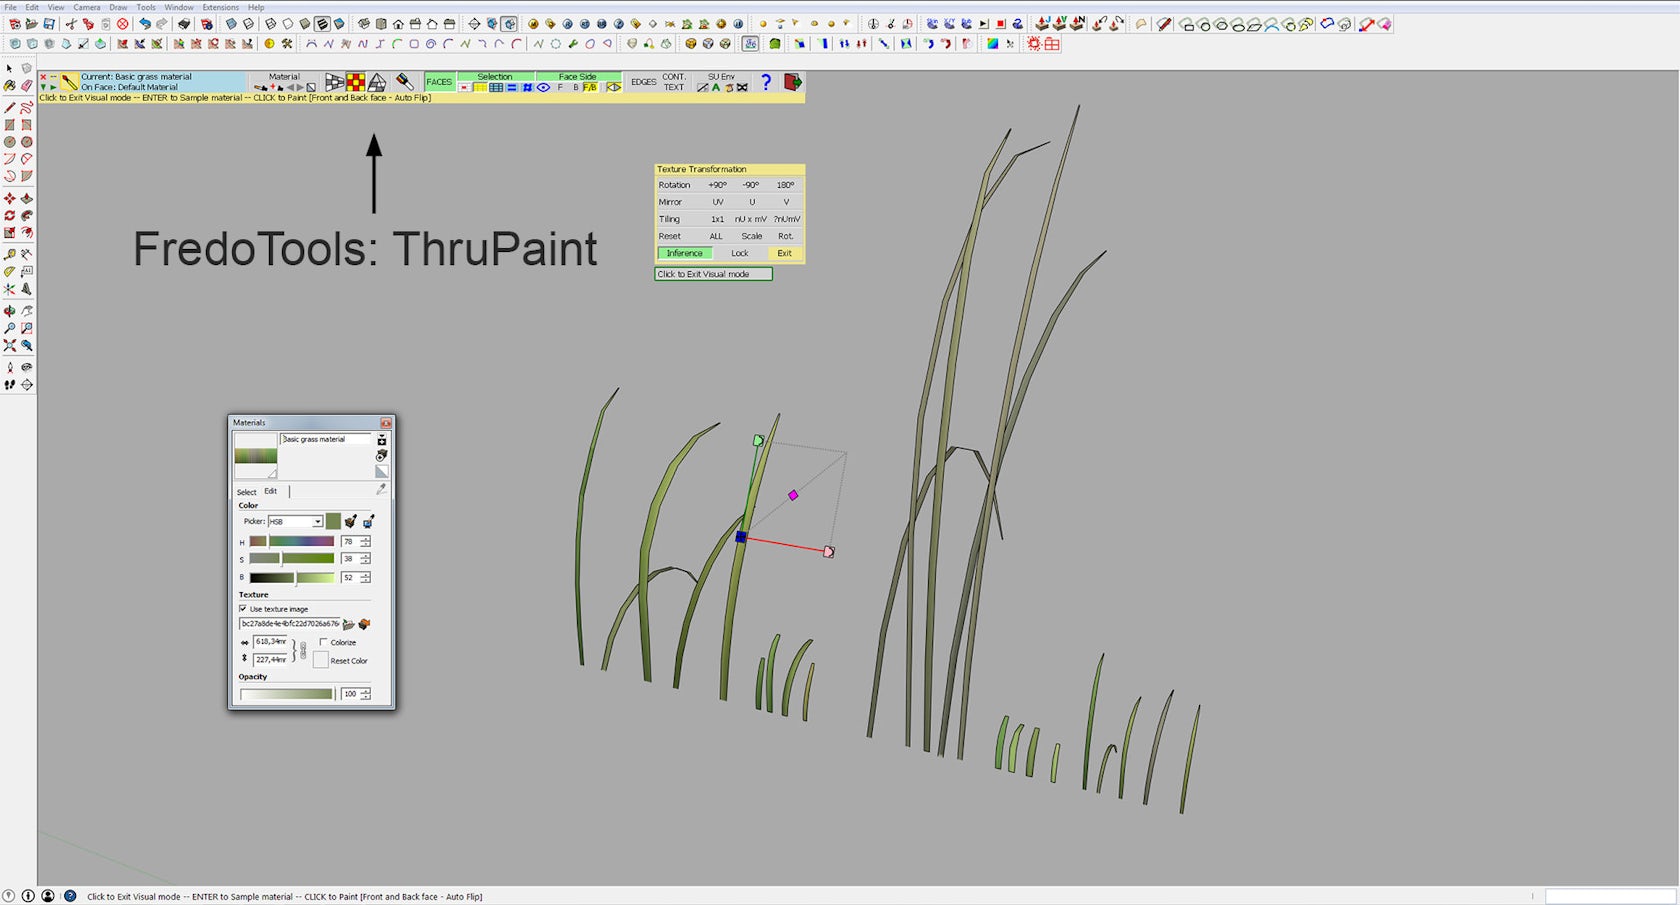
Basic grass material:

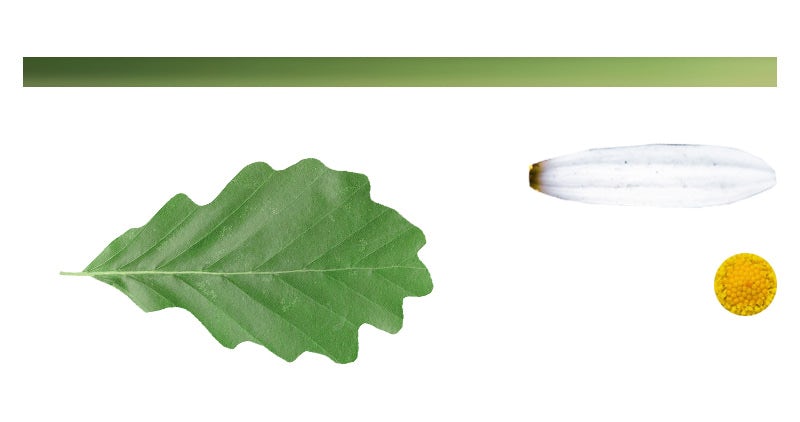
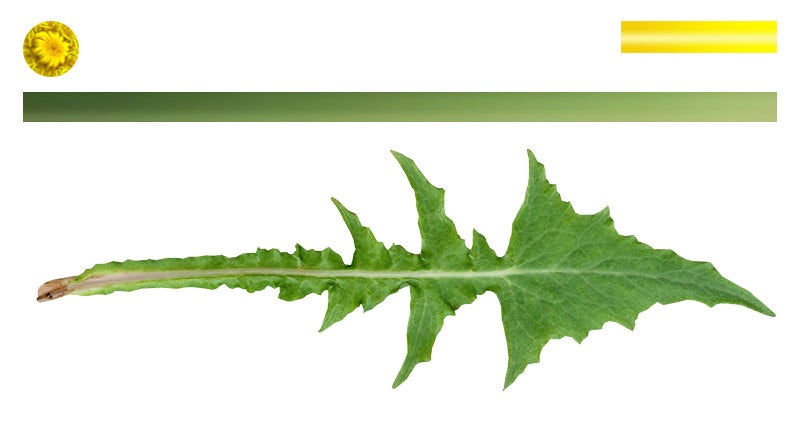
I made the flowers in exactly the same way. I made an all-in-one flower texture and used ThruPaint to move the position to fit the geometry.
All-in-one flower materials:
Now I had to make the grass bundles.
This is the part where I used Skatter for SketchUp for the first time in the process. I made a simple hexagon shape as my host object and selected four of my previously made grass components to be scattered. I used different settings for the different grass tufts, but for the most part I used Uniform as my distribution method and enabled the Random Transform feature. Skatter offers endless possibilities to control your distribution, but these simple changes gave a pretty good result.
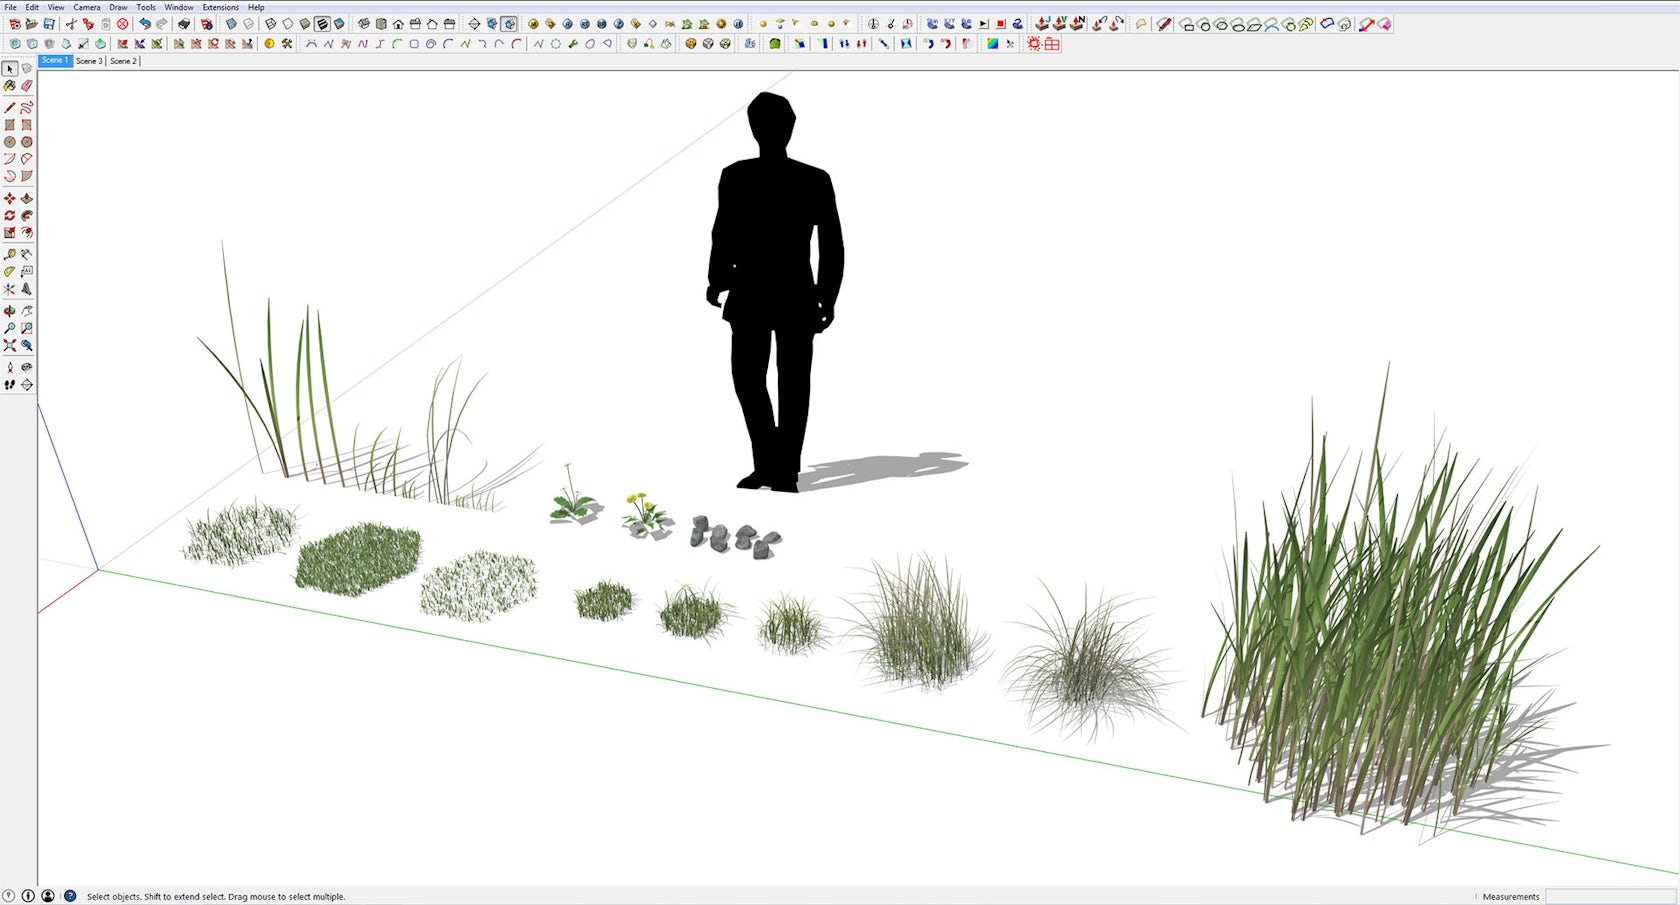
Eventually, I ended up with some different grass tufts, starting from low grass and ending up with reed.
Using V-Ray
This is pretty straightforward. I used a reflection layer and a two-sided material for a translucency effect. For the flower leaves, I also made a transparency map and a bump map. The bump map was overkill, though.
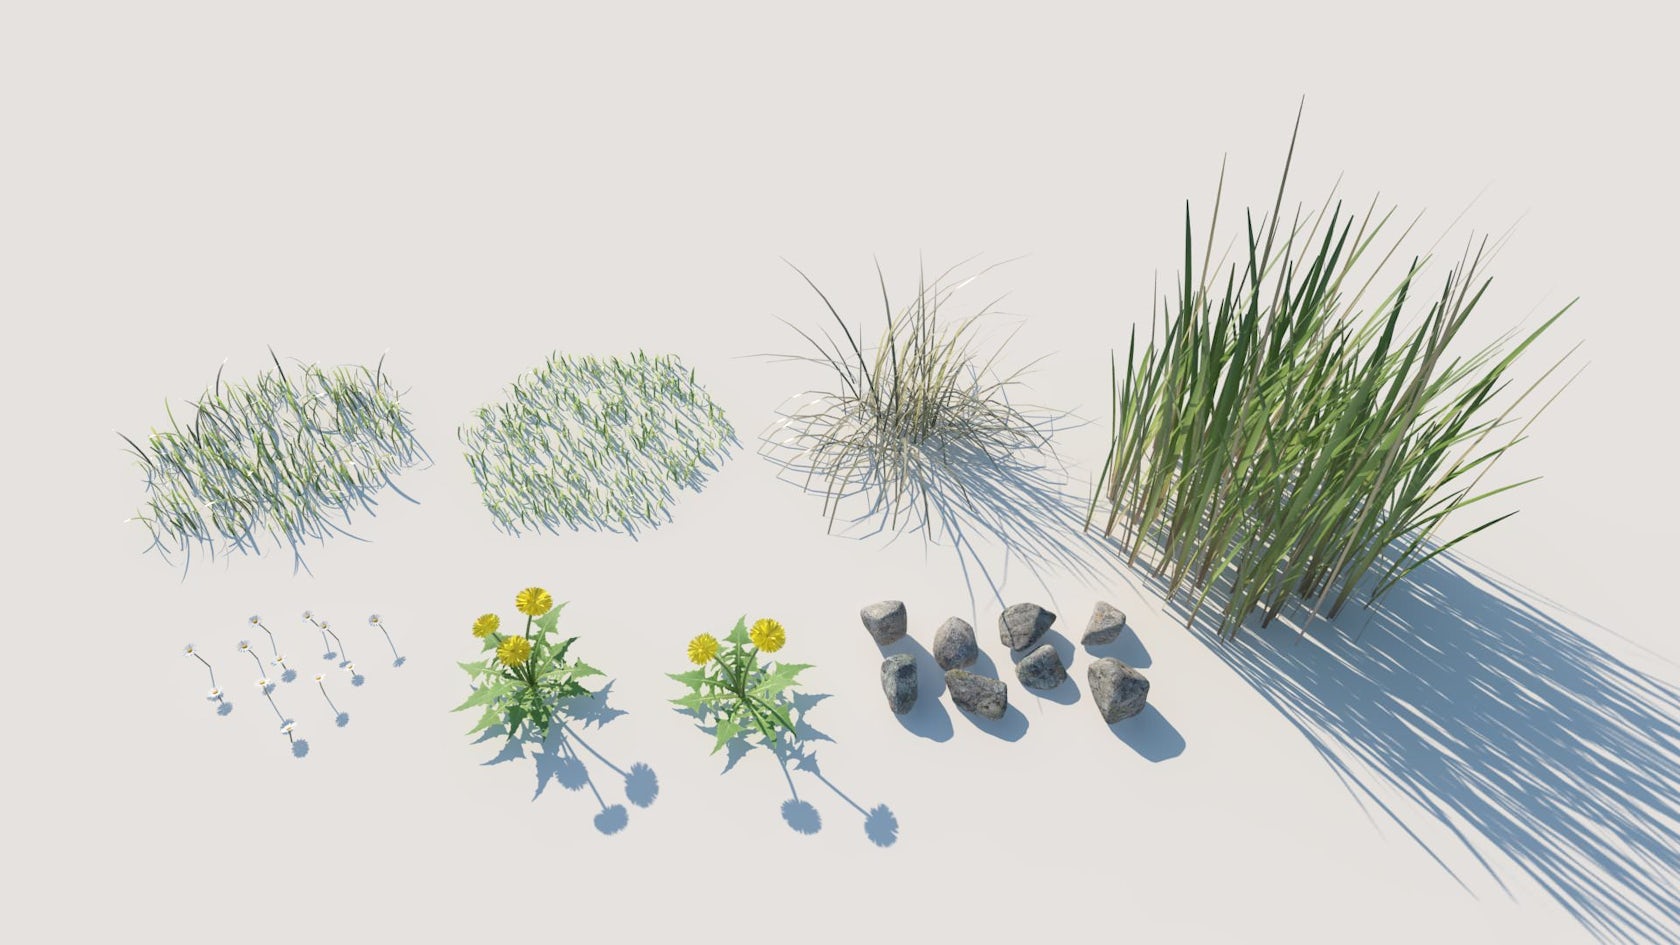
Below is the bundle I decided to use in my final scene:
Modeling the Terrain
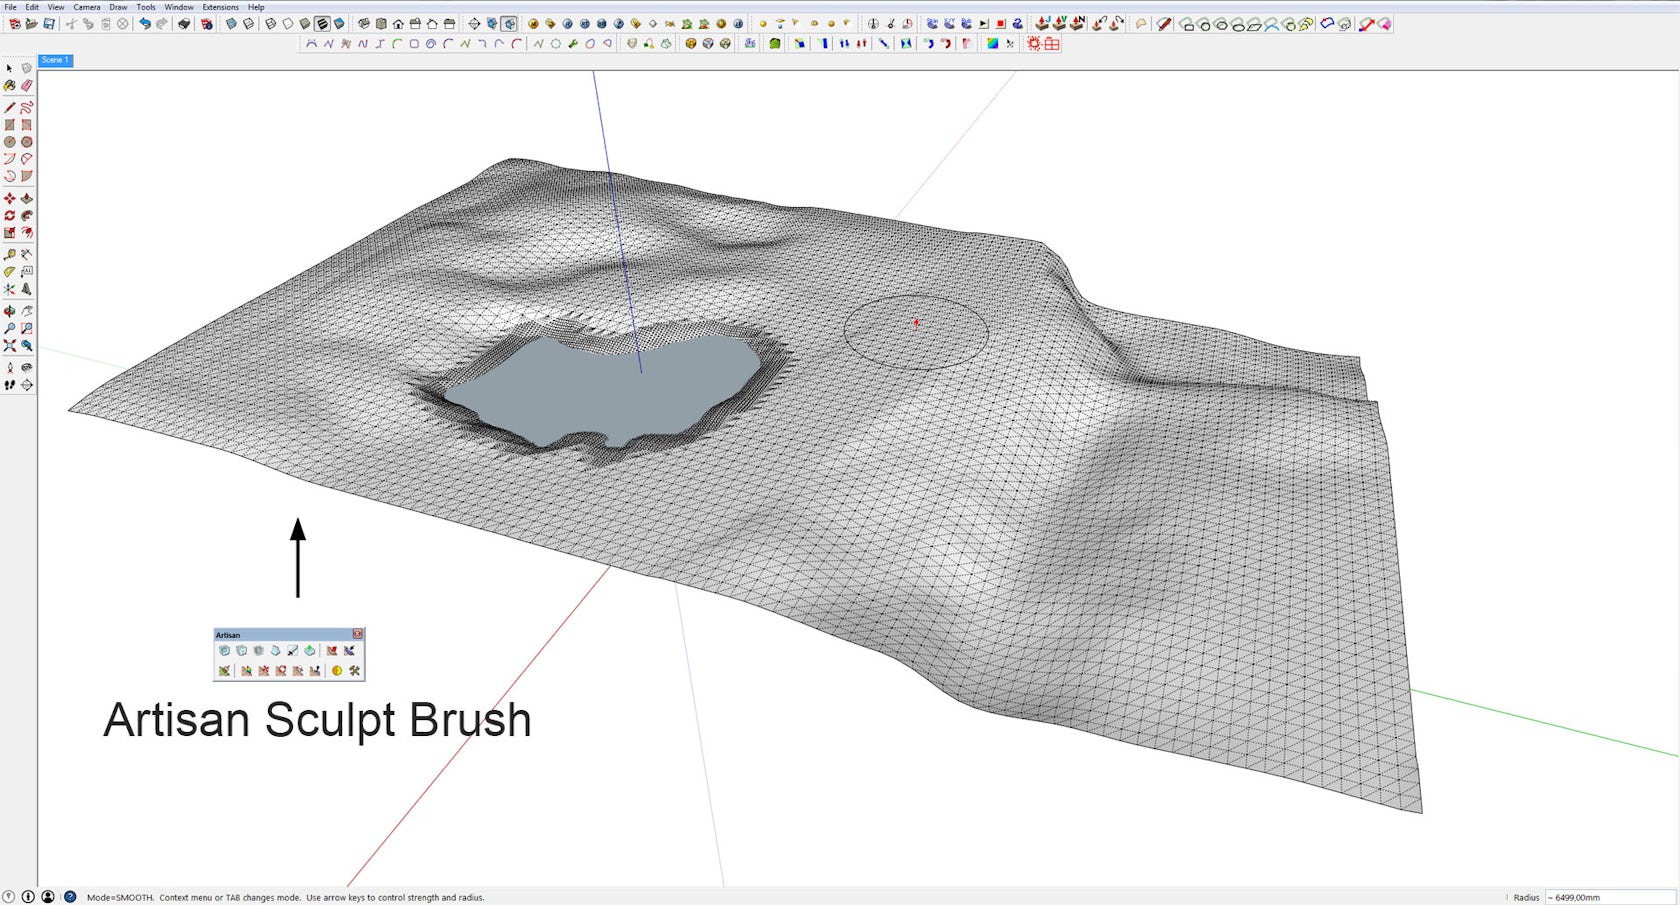
As I mentioned earlier, the terrain modeling was mainly made with Artisan for SketchUp — another great plug-in. If we are to be fair, Sandbox could probably do the job, but Artisan provides some great additional features, which are hard to do without when you want things to go easy and especially if you want to control your scatter distribution. More on that later.
I started out with a simple sandbox plane. I then used Artisan Sculpt Tool to form the terrain.
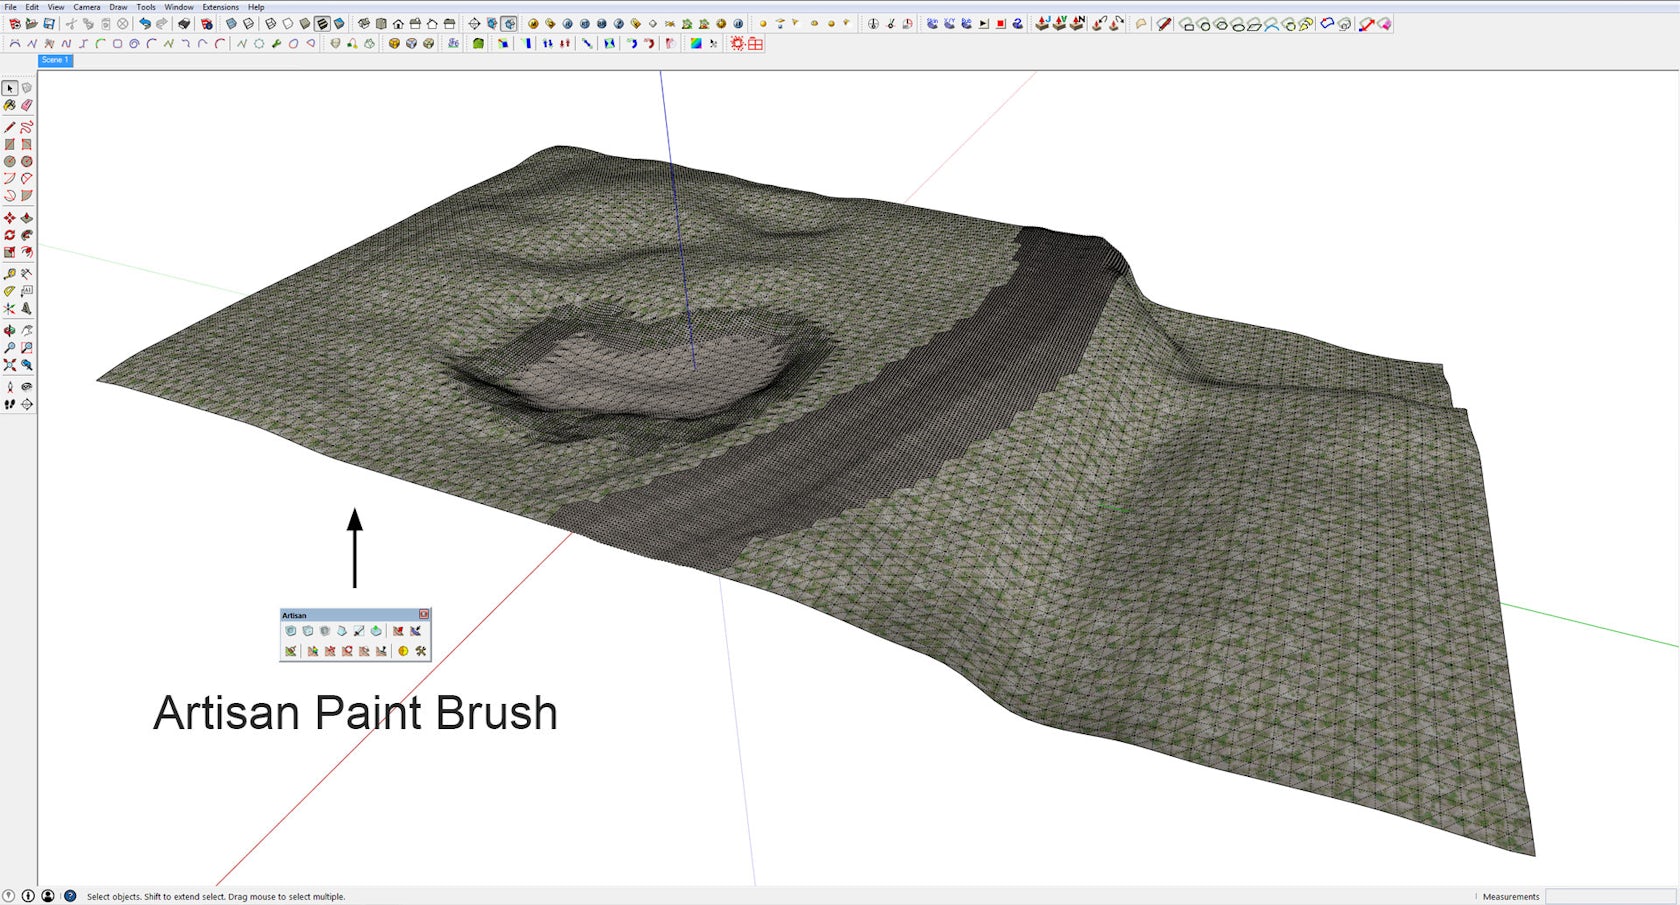
When I was pleased with the final design, I used Fredo’s ThruPaint tool to project my ground-cover textures to the terrain without any distortions. I went back to Artisan and used the Paint Brush Tool, which allows you to paint a new texture on top of the existing ground-cover texture by clicking and dragging. I painted the road area and the bottom of the lake using this method. Artisan also does this without any texture distortion.
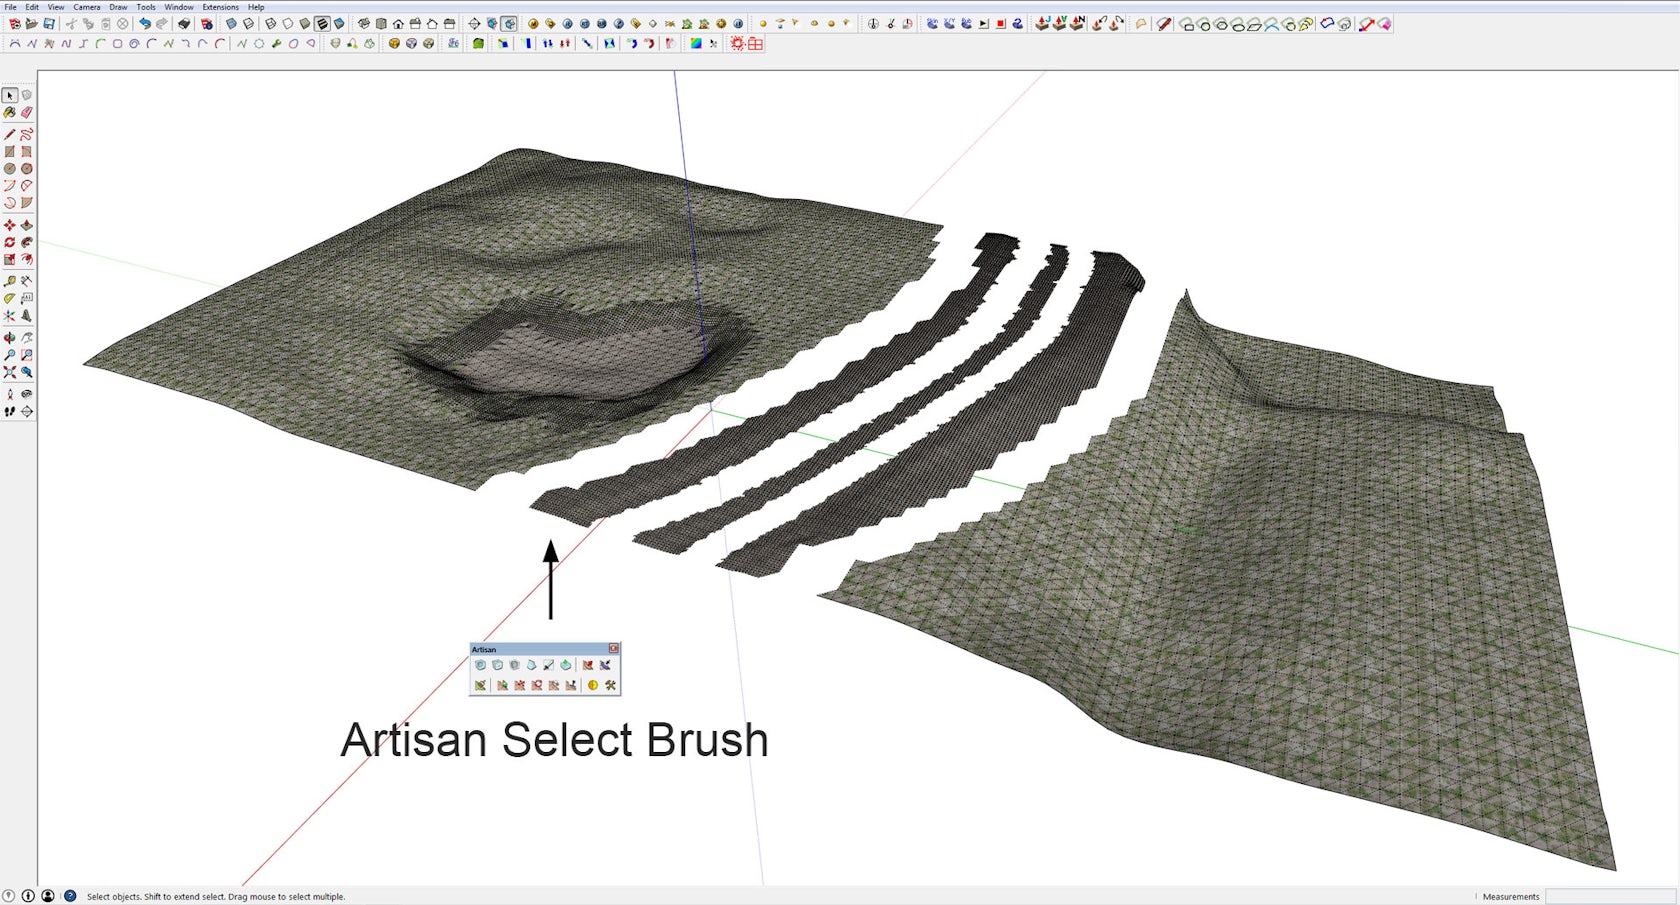
Now I could prepare the terrain for Skatter using Artisan’s Select Brush. By clicking and dragging the brush, I could select specific areas, especially in my road area, where I needed more control with my scatter distribution. I grouped the areas and placed my camera in the scene.
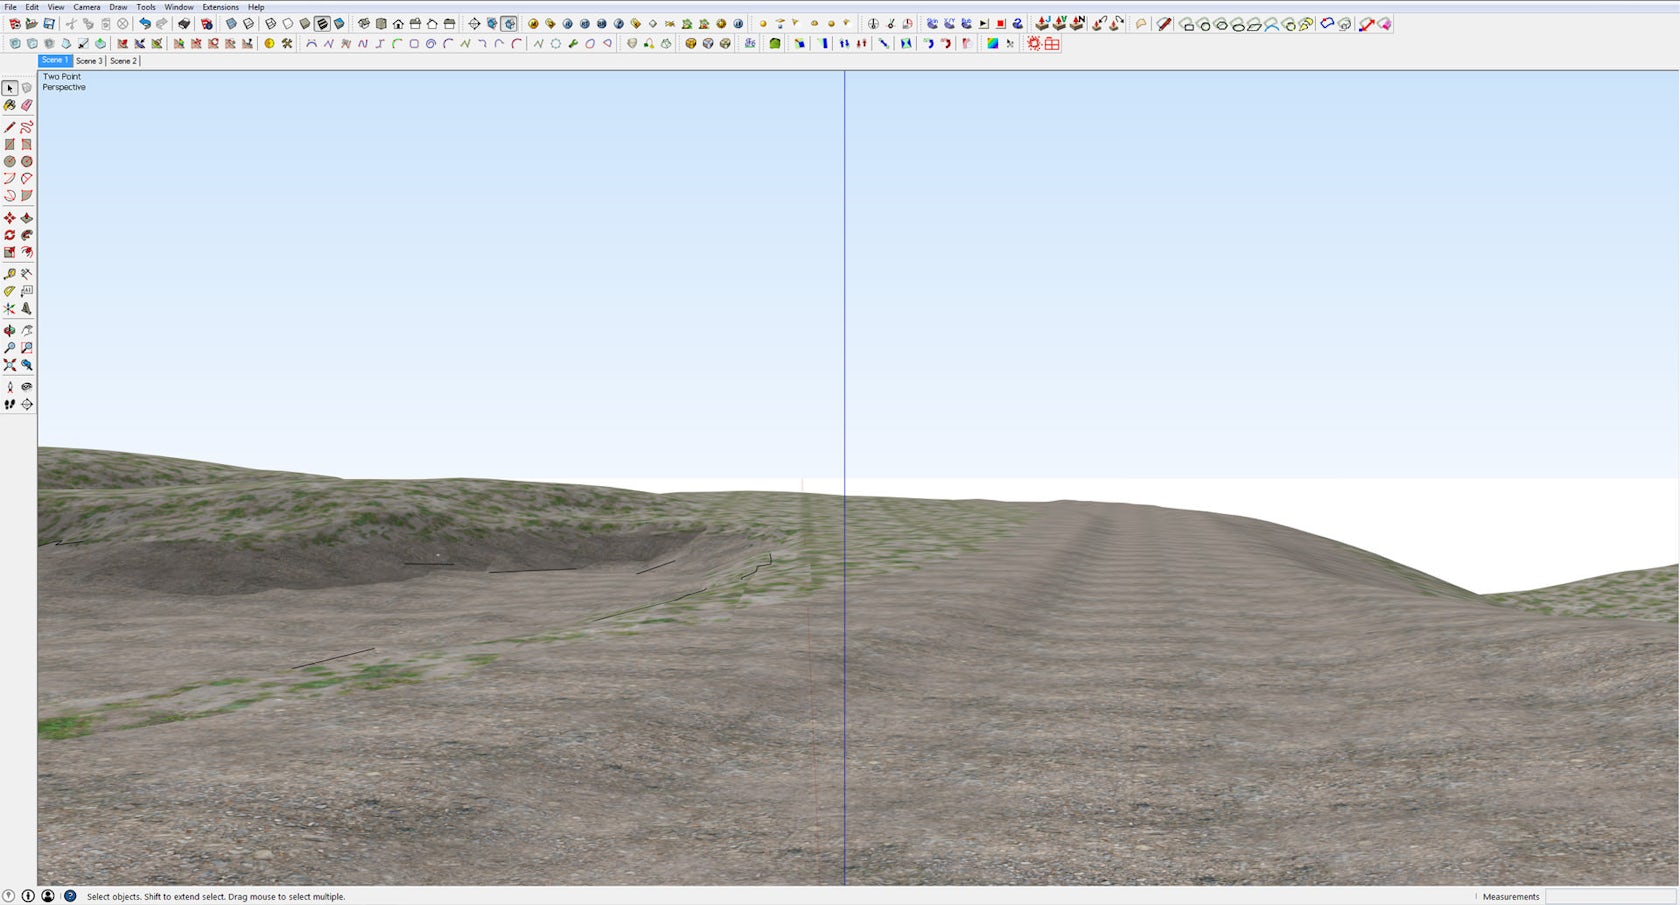
Now, I was ready to use Skatter. Below is the final camera position:
Using Skatter With the Terrain Model
It’s Skatter Time!
Now the fun part begins, namely, to use Skatter on some larger areas.
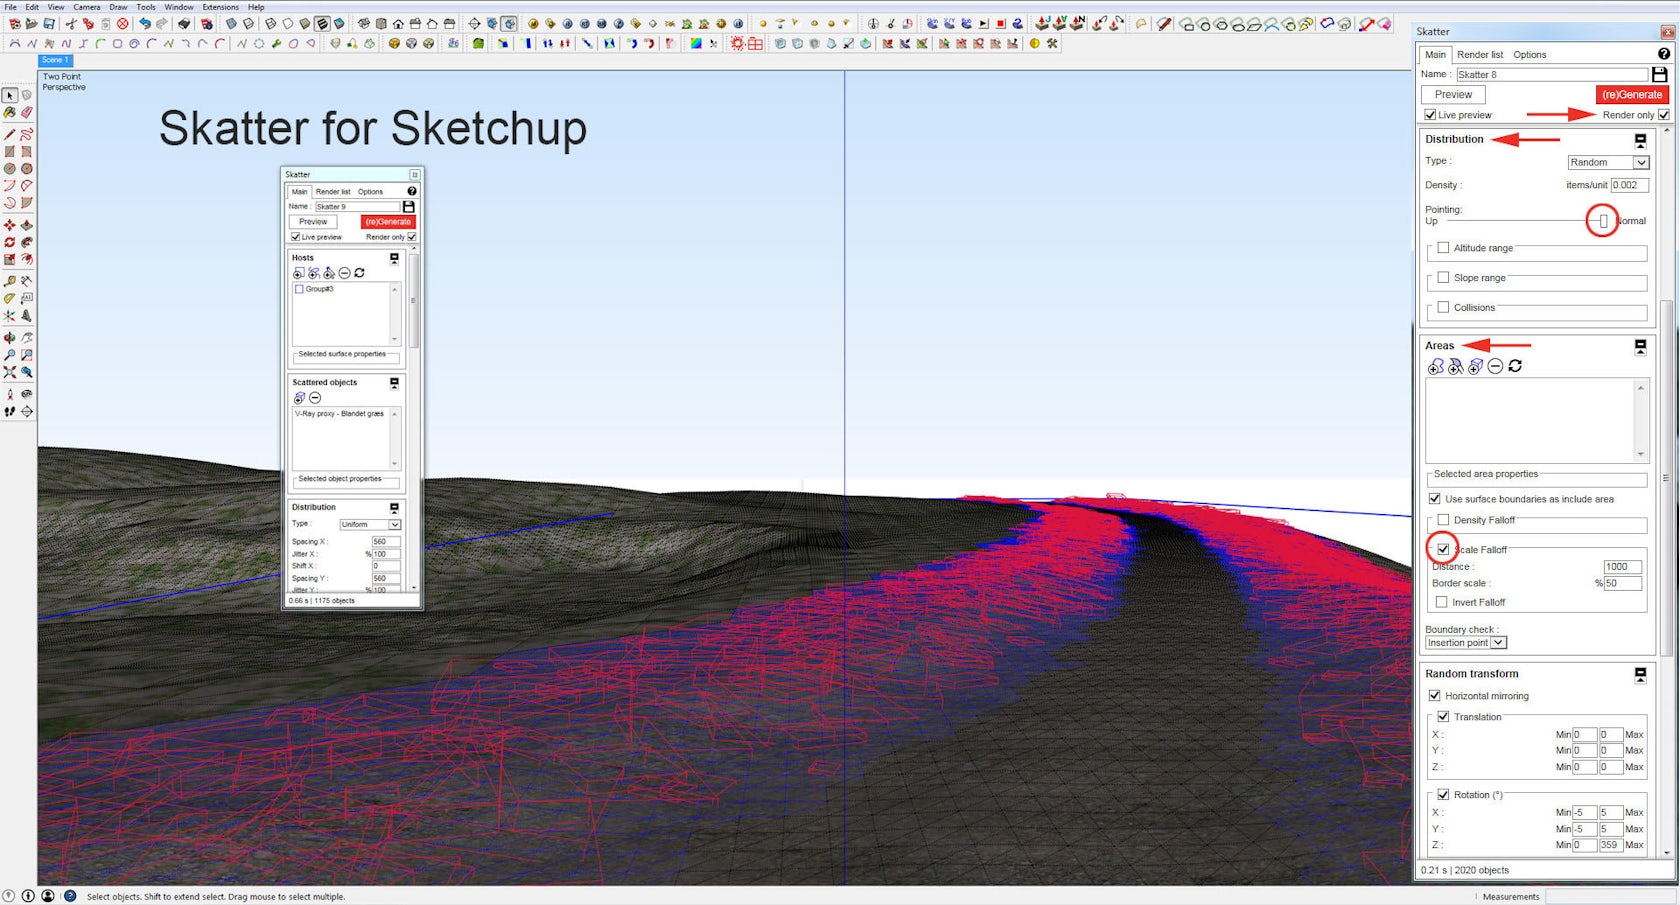
I imported my grass tufts into the scene and made them into simple V-Ray proxies. I first scattered the road. It was my intention to get the road to look old and rarely used, with grass in the center and on the sides with some vague bumpy tracks. Because I grouped the road areas earlier, it was much easier to control the scatter parameters to get this look. In this situation, it was necessary to use some other Skatter features.
Because I worked with sloped terrain, I needed to get my scattered objects to follow the surface. I did this with the Pointing up slide bar, which was set to normal. I also used Scale falloff in the Area section to make a sliding transition toward the tracks. Because I worked with proxies, and not visible components, I enabled the “Render Only” feature so I could control future editing in the Render List.
For the road area, I used six layers: one for each of the grass bundles, one for each of the flowers and one for the stones. I also scattered some stones manually, which together with a simple bump map on the ground-cover texture did the trick.
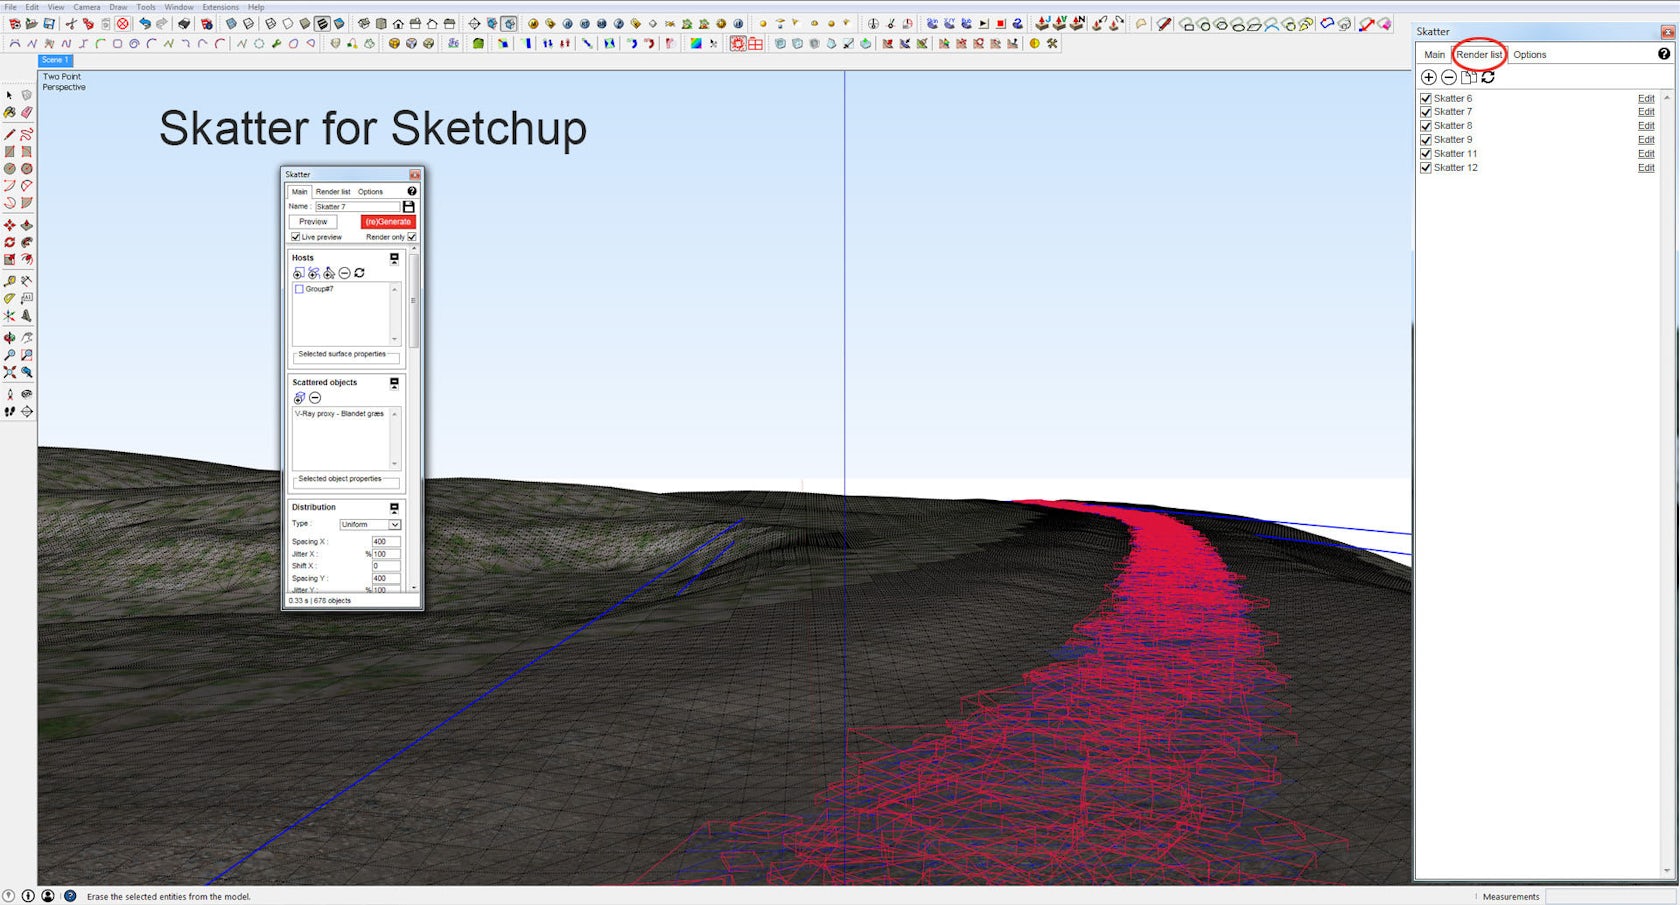
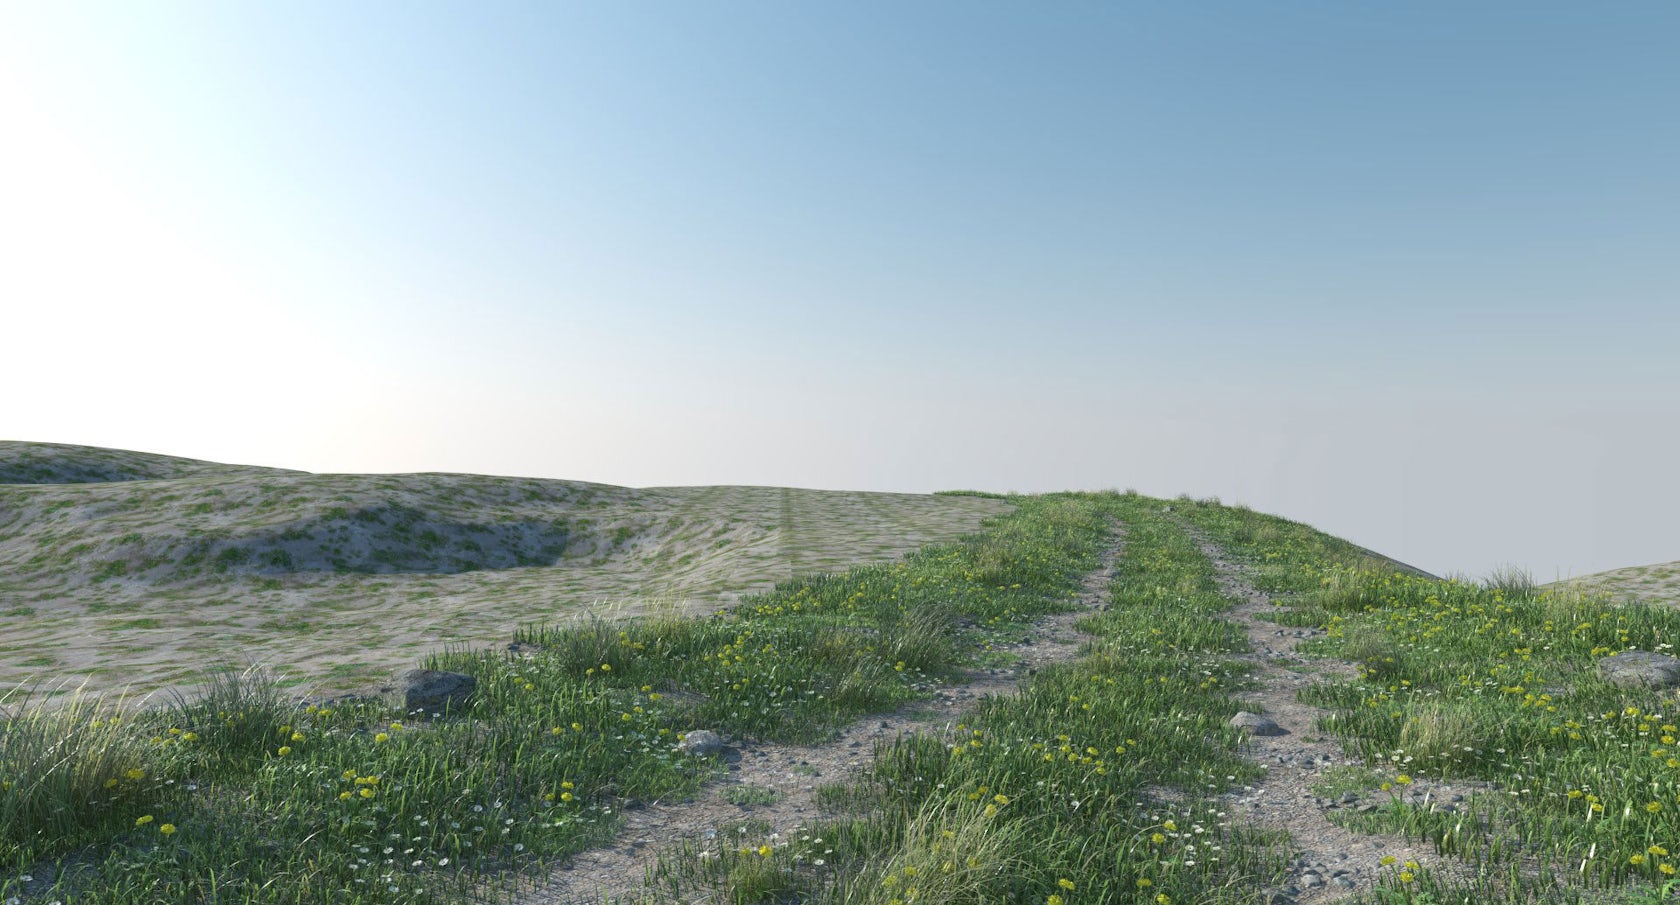
Below is the first render test of the scattered road area:
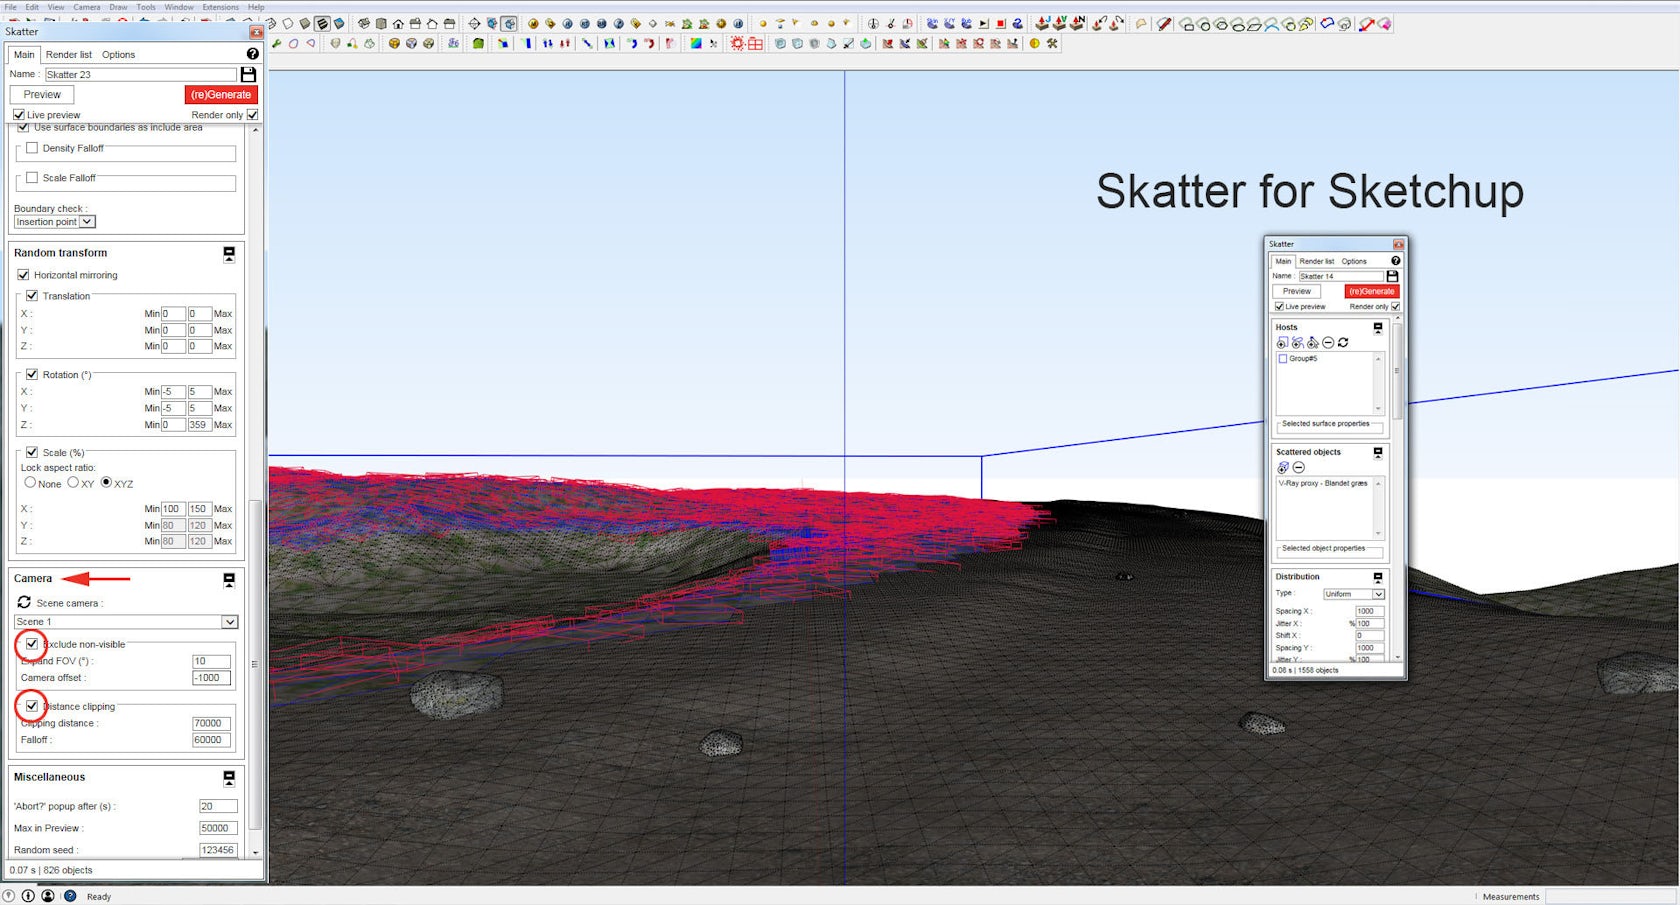
The rest of the scattering was made in the same way, but because much of the remaining vegetation was far away from the camera position, I used the Camera feature and enabled Exclude non-visible to remove every scattered object outside the viewport and Distance clipping because it was not necessary with such high levels of details in the background, where your eyes cannot see it anyway.
Finally, I placed some trees and made a water material for the lake. I chose not to spend a lot of time doing too many lighting adjustments, as I did not have time for it. So the scene lightning is just a good old V-Ray Sun and Sky. I used an HDRI in the water reflection, though. My final V-Ray settings were just an exterior preset in a medium quality.
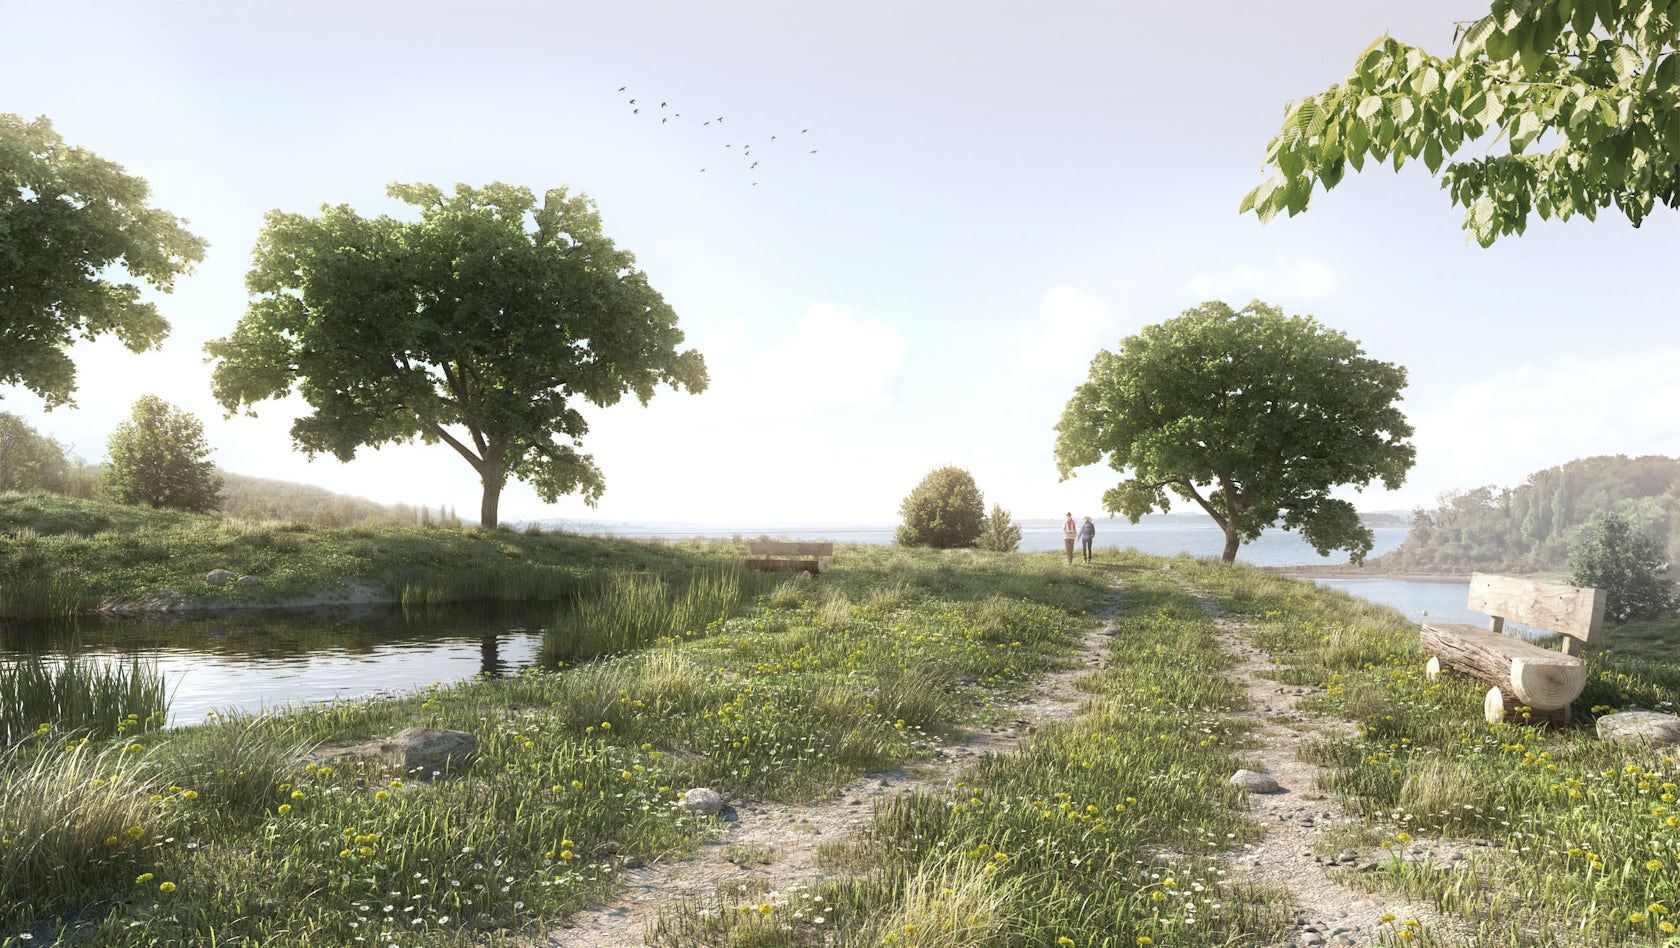
The image below is the final raw render:
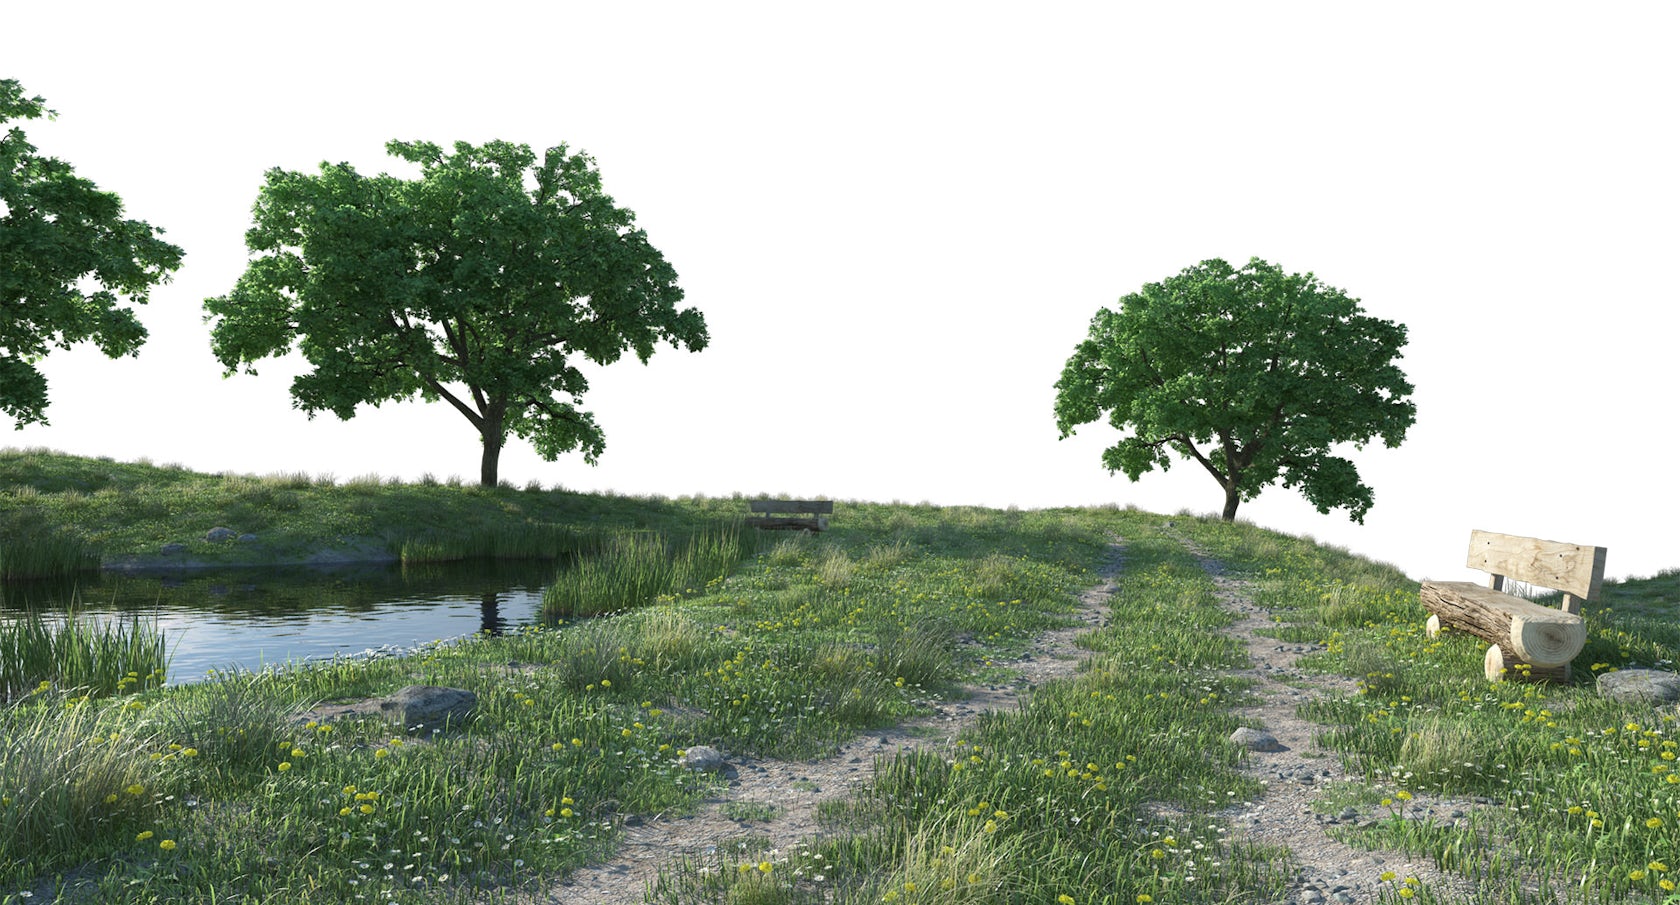
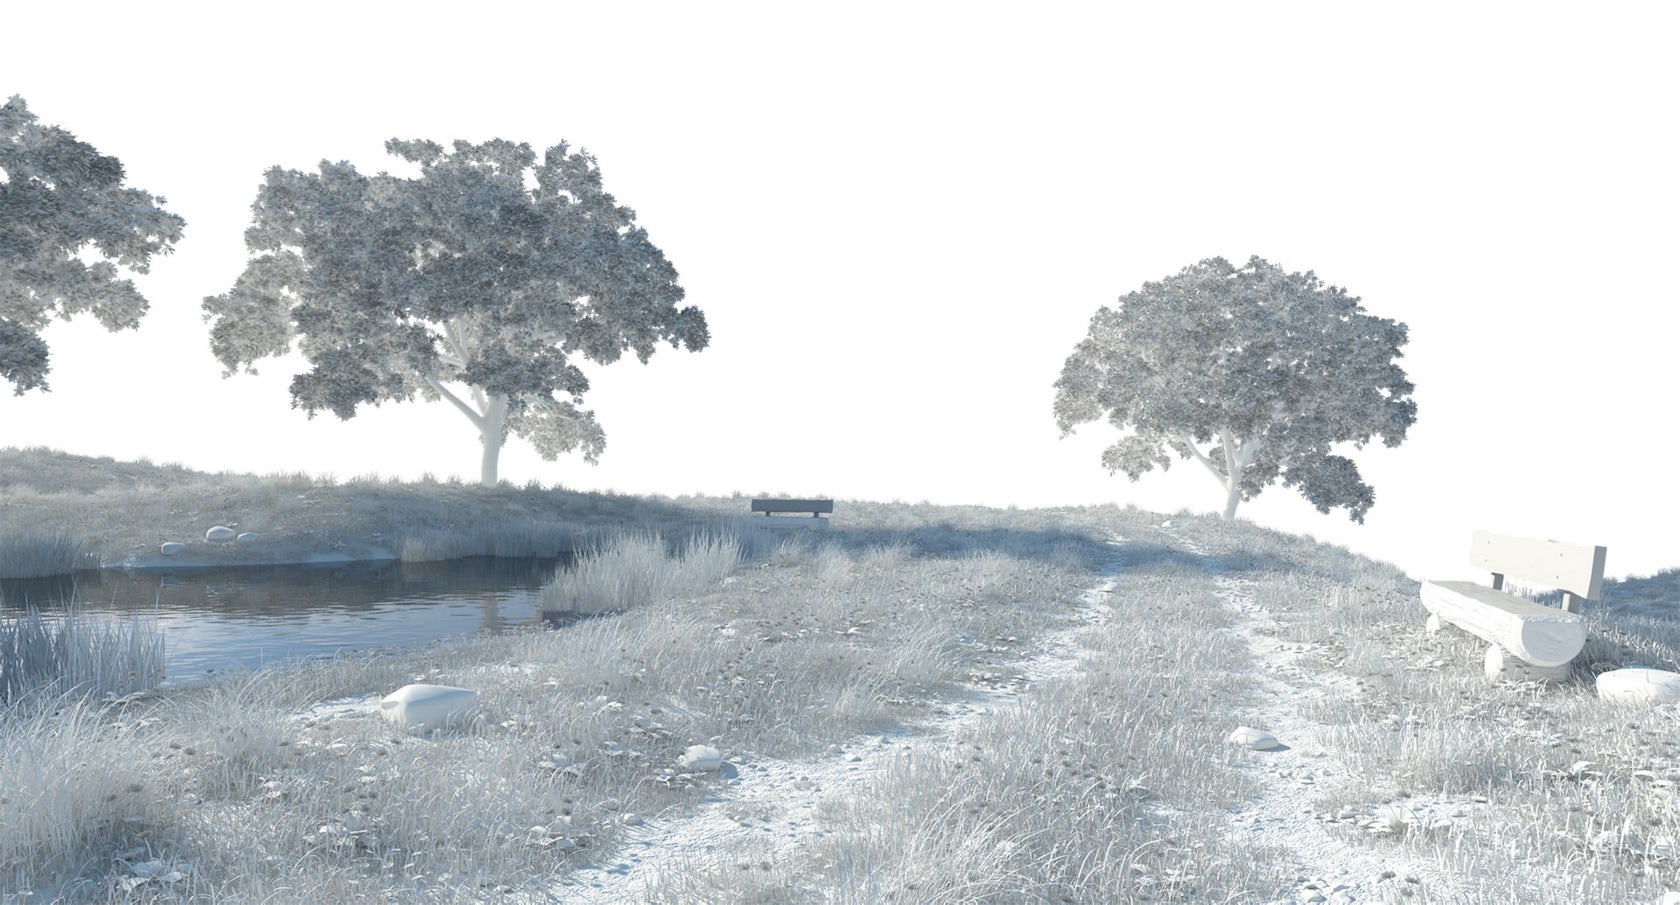
This is the image with a white override material:
I spent less than an hour on the post-processing. I had already found the background images and my background trees, so I used the time adjusting light, contrast and color balance.
I hope you got something from following this tutorial. Keep in mind that this was just a small part of the many great possibilities Skatter for SketchUp offers.
For this tutorial, I have added the model of the terrain and the used components (grass, flowers, etc.) to Ronen’s ArchVIZ Shop for free, so feel free to experiment with them in the 3D model or in your own projects.
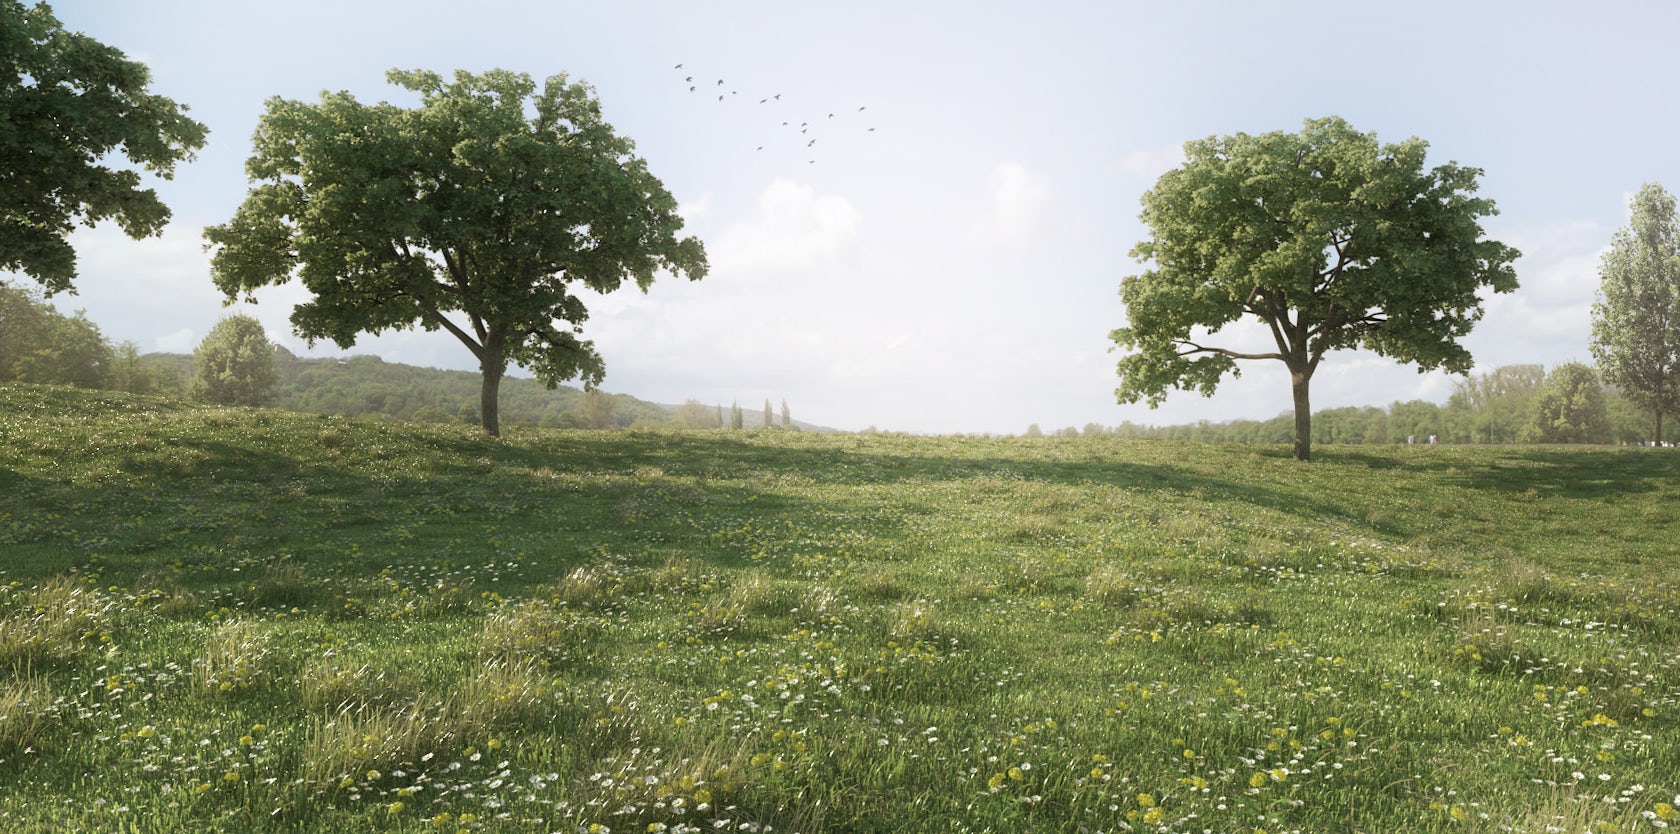
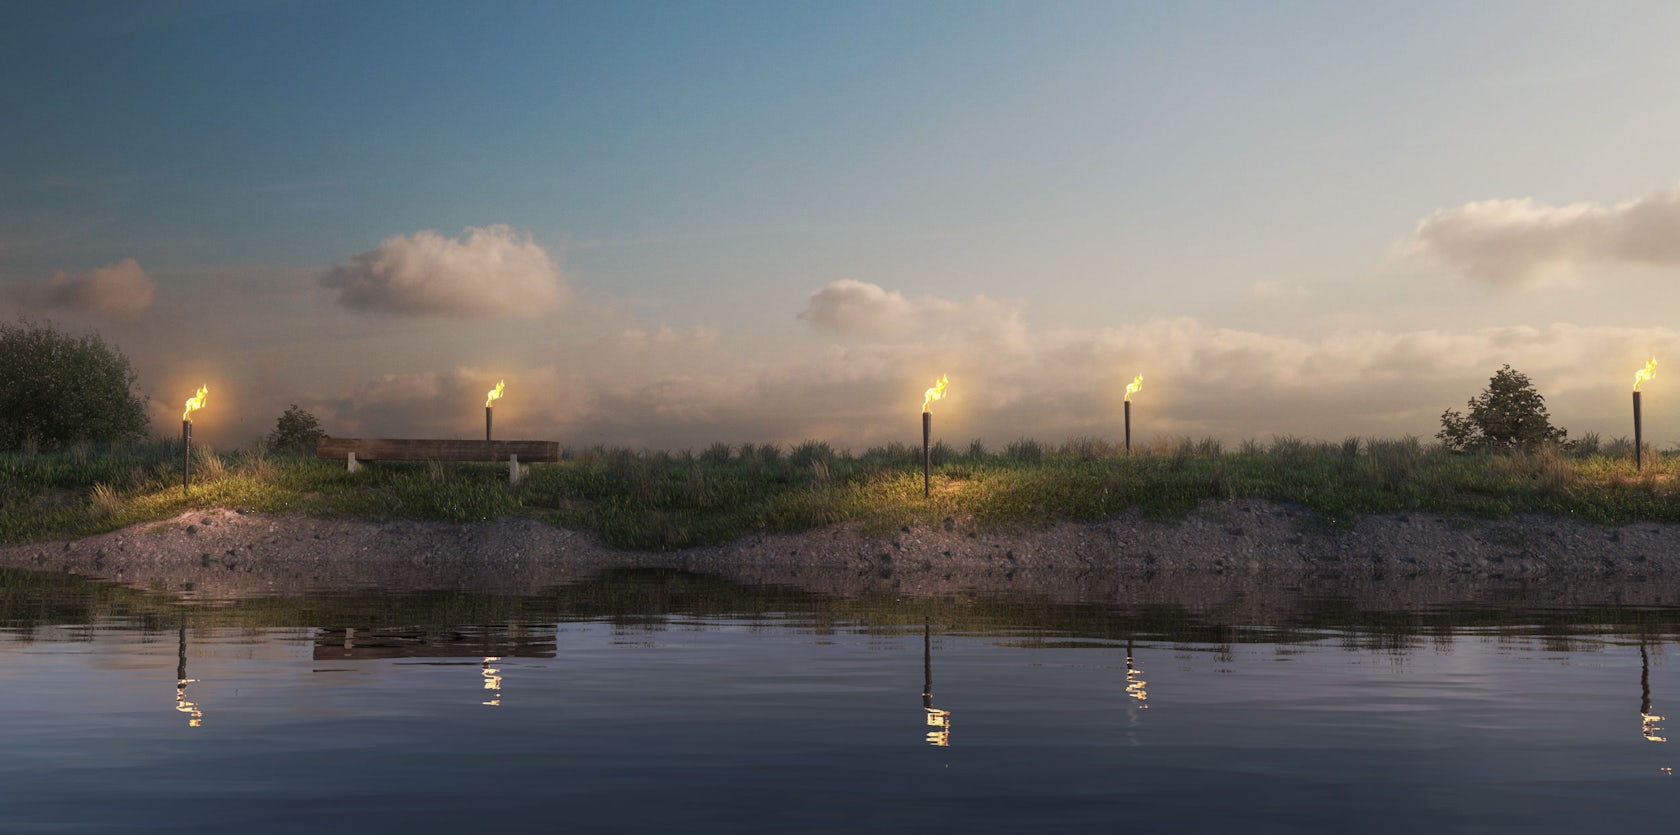
Below you can see some other render tests I made earlier:
So, that’s it! I hope you enjoyed it.
Mads Bjerre
Architizer’s Tech Directory is a database of tech tools for architects — from the latest generative design and AI to rendering and visualization, 3D modeling, project management and many more. Explore the complete library of categories here.
 25 Best Architecture Firms in Germany
 30 Best Architecture Firms in Ireland
 How an Award-Winning Architectural Visualization Studio Is Evolving in the Age of AI
 Southern Hospitality: 6 Charming Examples of Georgia’s New Class of Single-Family Homes
 The Future is Modular: Factory-Built Architecture is the Way Out of the Housing Crisis