
Alex Hogrefe is the creator of Visualizing Architecture, a blog dedicated to educating people in the art of architectural visualization. He is also part of rendering studio Design Distill, generating unique and compelling illustrations for architects around the world.
One of the very first tutorials I created described a workflow that generated a night scene only using Photoshop. That tutorial used a very simple base image exported right out of SketchUp. The workflow is easy to implement and is especially useful if you are not comfortable setting up night scenes and lighting in an external render engine such as Kerkythea or V-Ray. However, that same workflow is equally useful with more complex and developed scenes, and this latest post is my attempt prove it.
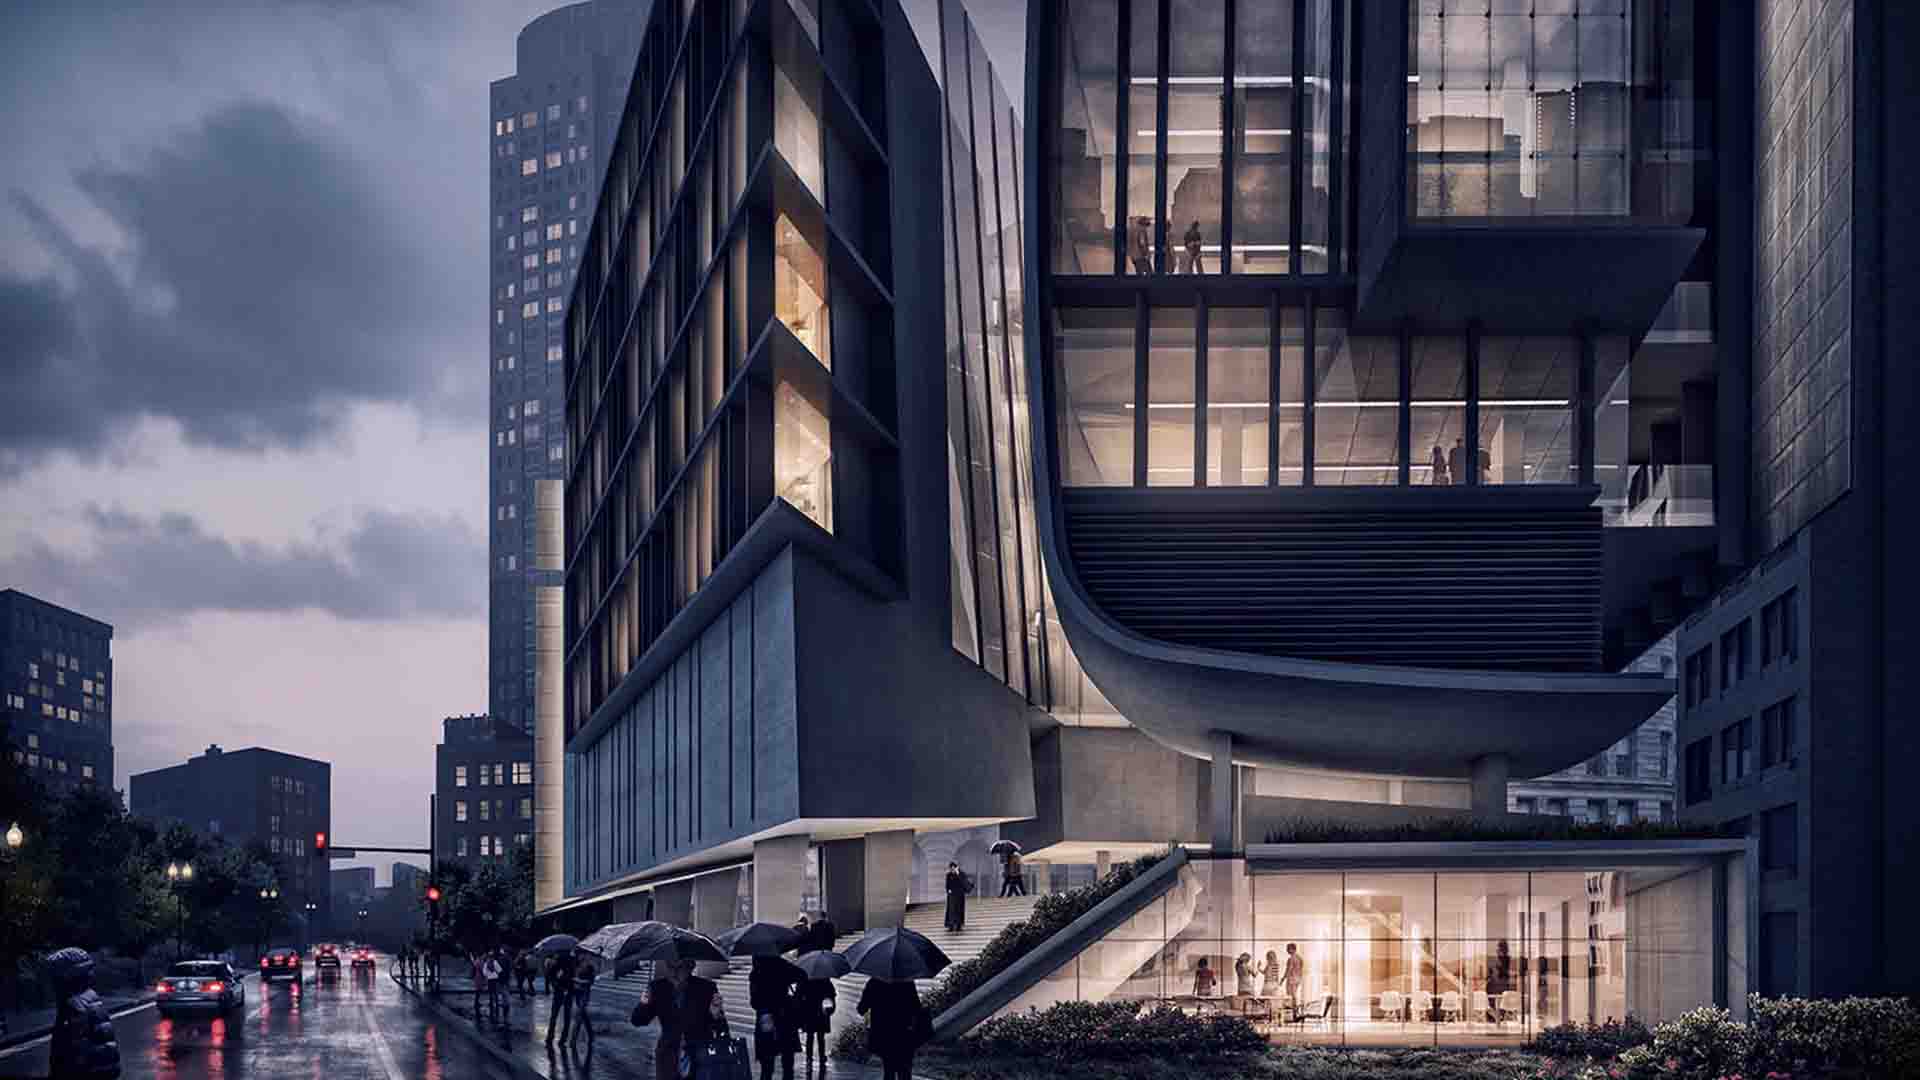
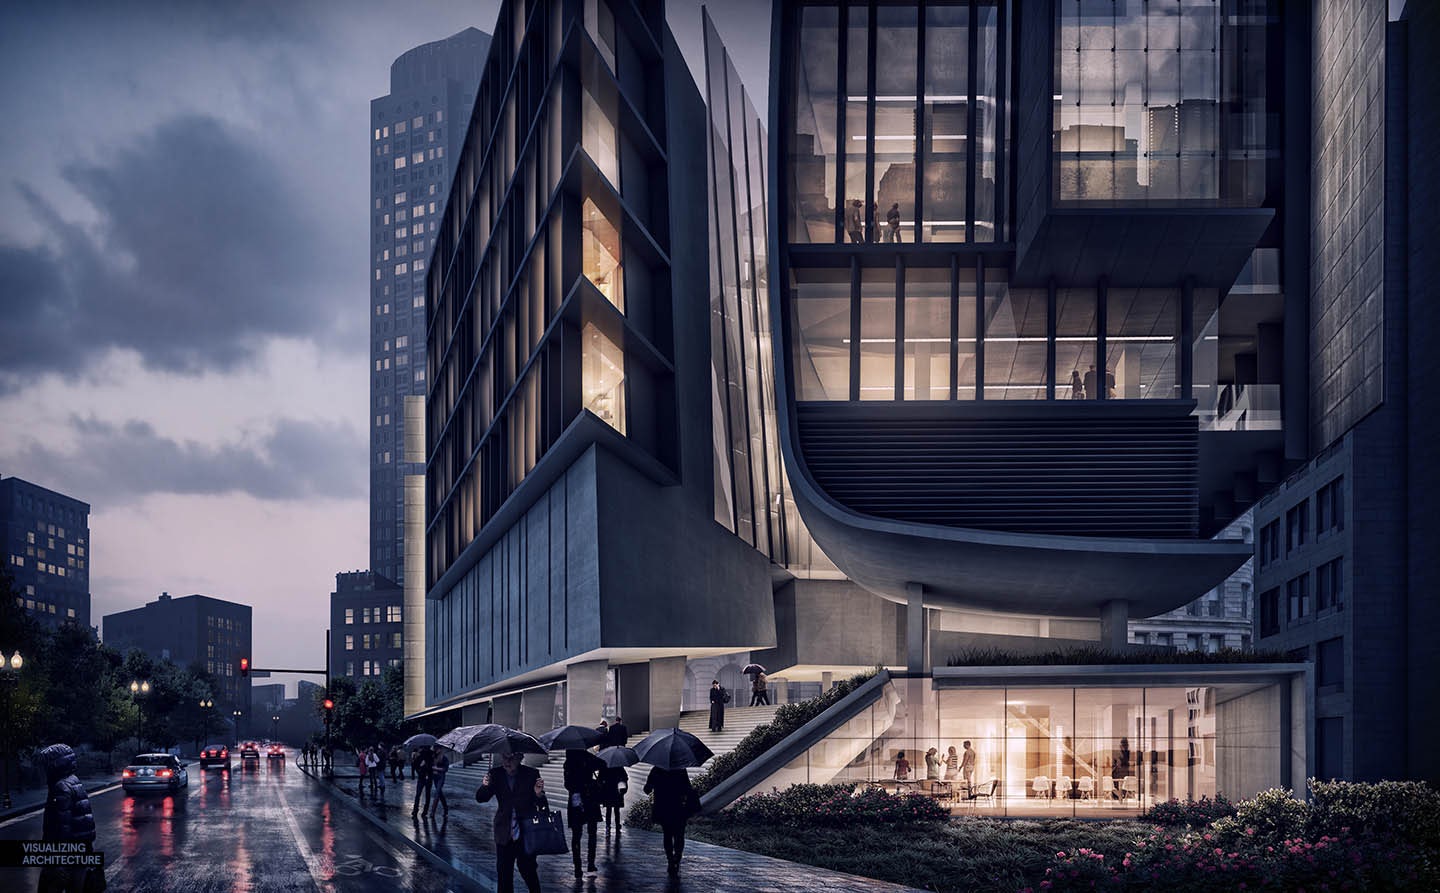
As I was working on the previous post, I realized the daytime scene could easily be shifted into a night scene to generate a more compelling image. Everybody likes a good night illustration, but they also tend to be the most intimidating to master. The steps below will walk through how I take a fully rendered daytime scene and turn it into a night scene using an easy Photoshop workflow.

1. Turn Off Layers in the Original Illustration
The first step is to get rid of some layers in the original daytime scene that don’t belong in the night scene. These layers include the HDR effects, warm color overlays and fog. I also turned off the cars and people layers.
2. Remove All Sharp Shadows
Probably one of the more difficult steps is editing out all of the sharp shadows created from the sun. In most situations, I used the “Clone Stamp Tool” to edit these out. The tree shadows were on their own layer so I could simply turn those off. This is an important step because leaving these sharp shadows in the scene will confuse the viewer and give the appearance that the sun is up even though we are trying to say that this is a night scene and the sun has already gone down.

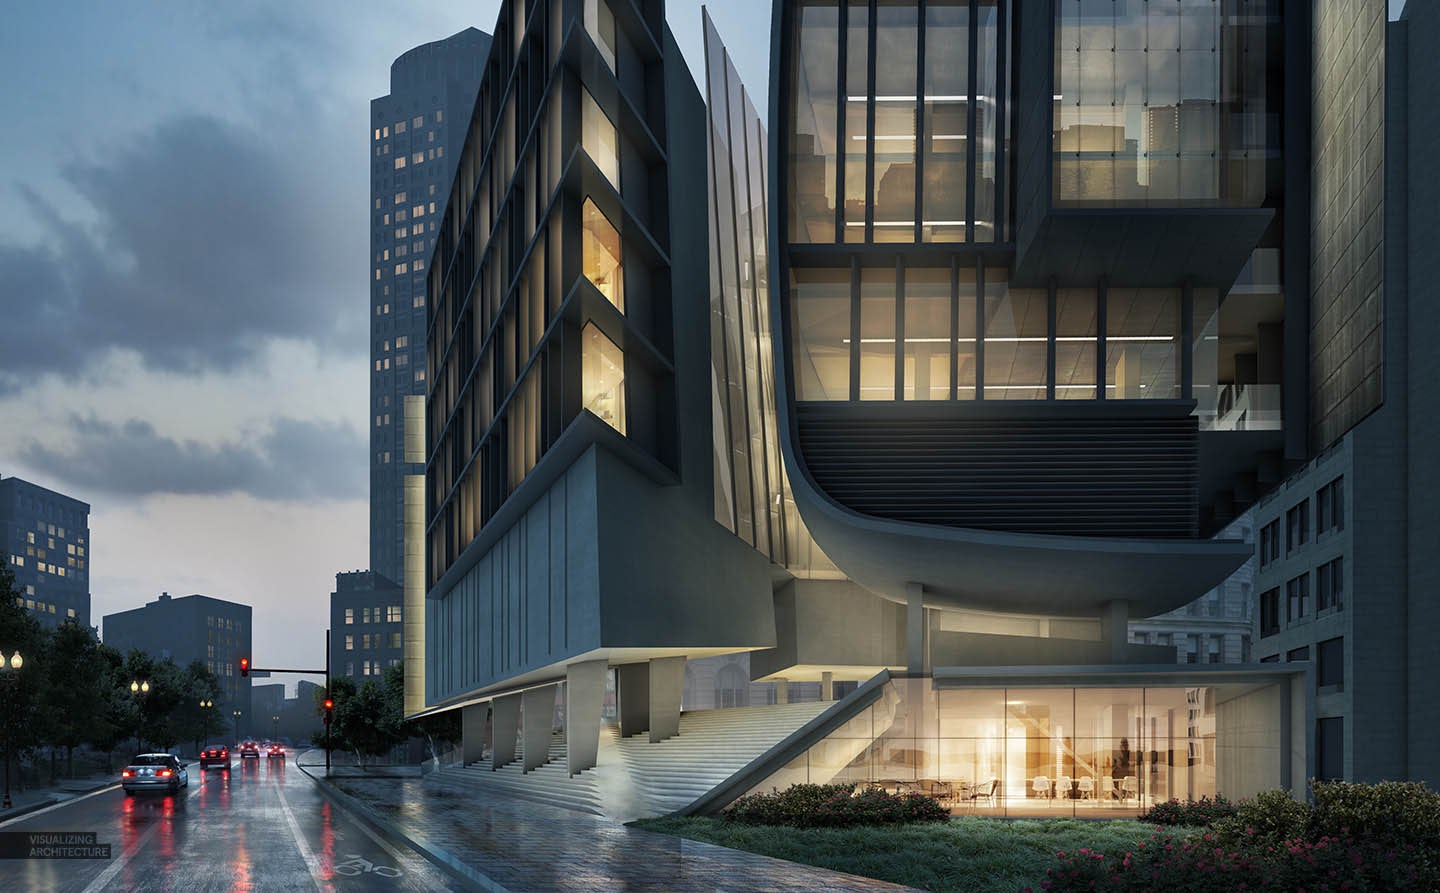
3. Darken the Image
This is the heart of the workflow. The image needs to get darker, and an easy way to do this is by filling the canvas with blue paint and setting the layer blend mode to “Multiply.” Once this is done, I then go back and mask out part of the blue so that the sky and interiors show through. This quickly sets up a decent-looking night scene base image.

4. New Sky
Sky is important in shifting the mood from day to night. You will notice the night sky isn’t much darker than the daytime sky. The only difference is that the clouds darken a little. It’s fine to go with a darker sky, but I like the contrast of the light sky with the dark buildings. I also have plans to drop in reflections on the road, and a brighter sky will help increase the drama with this effect.

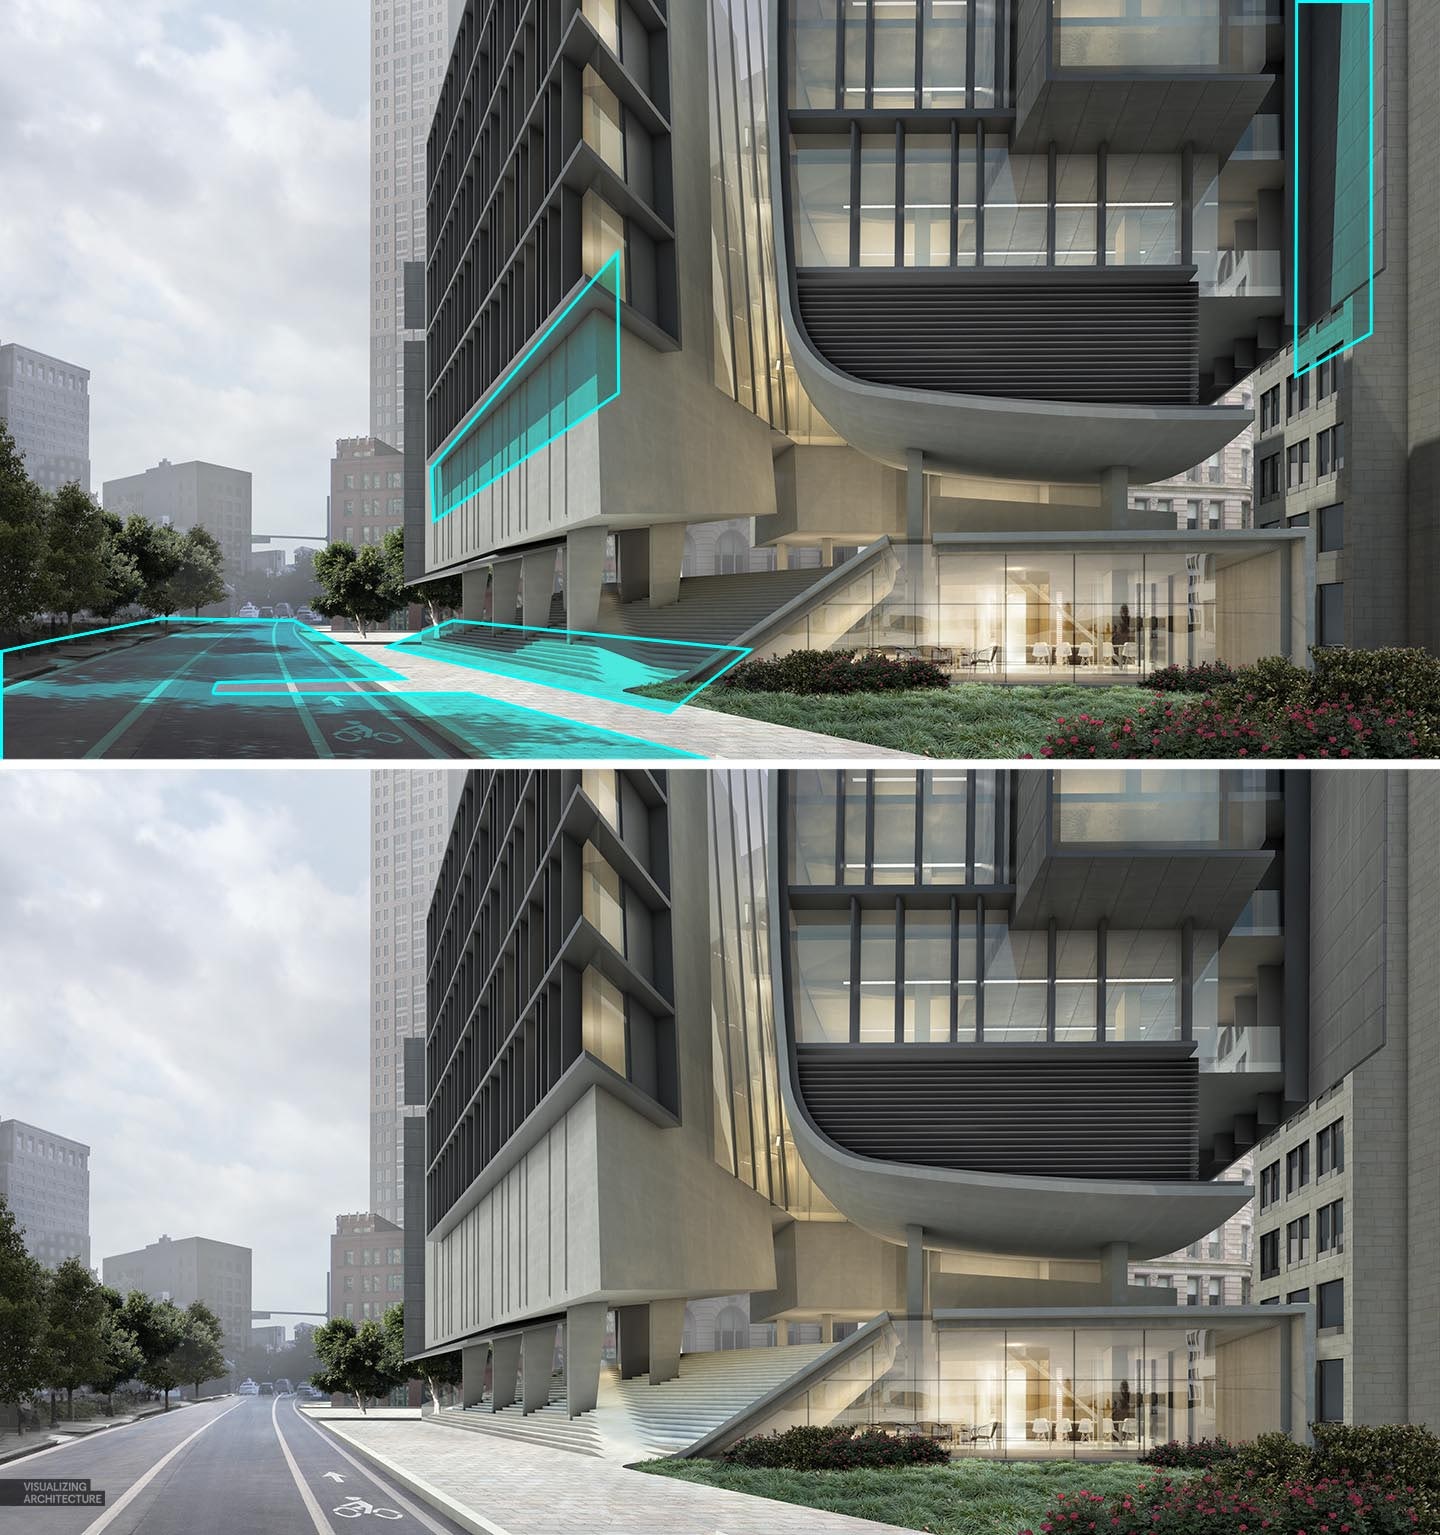
5. Lighting
Time needed to be spent manually painting in light throughout the scene. My focus is on punching up highlights underneath the building as well as giving the appearance of light in the large curtain wall in the center of the image. I also added accent lights on the large metal fins and painted the windows in the surrounding context buildings. I put together a tutorial a while back detailing how to light up windows, seen here.
6. Wet Ground
A move I like to do with night scenes is to give the appearance that it just rained. The workflow is simple, and the effect is very dramatic. It also adds another layer of complexity to the illustration that better engages the viewer. I put together a video tutorial a while back seen HERE explaining how this can be done, though my technique has since changed a little. I may break this out into its own mini tutorial later if I have time.
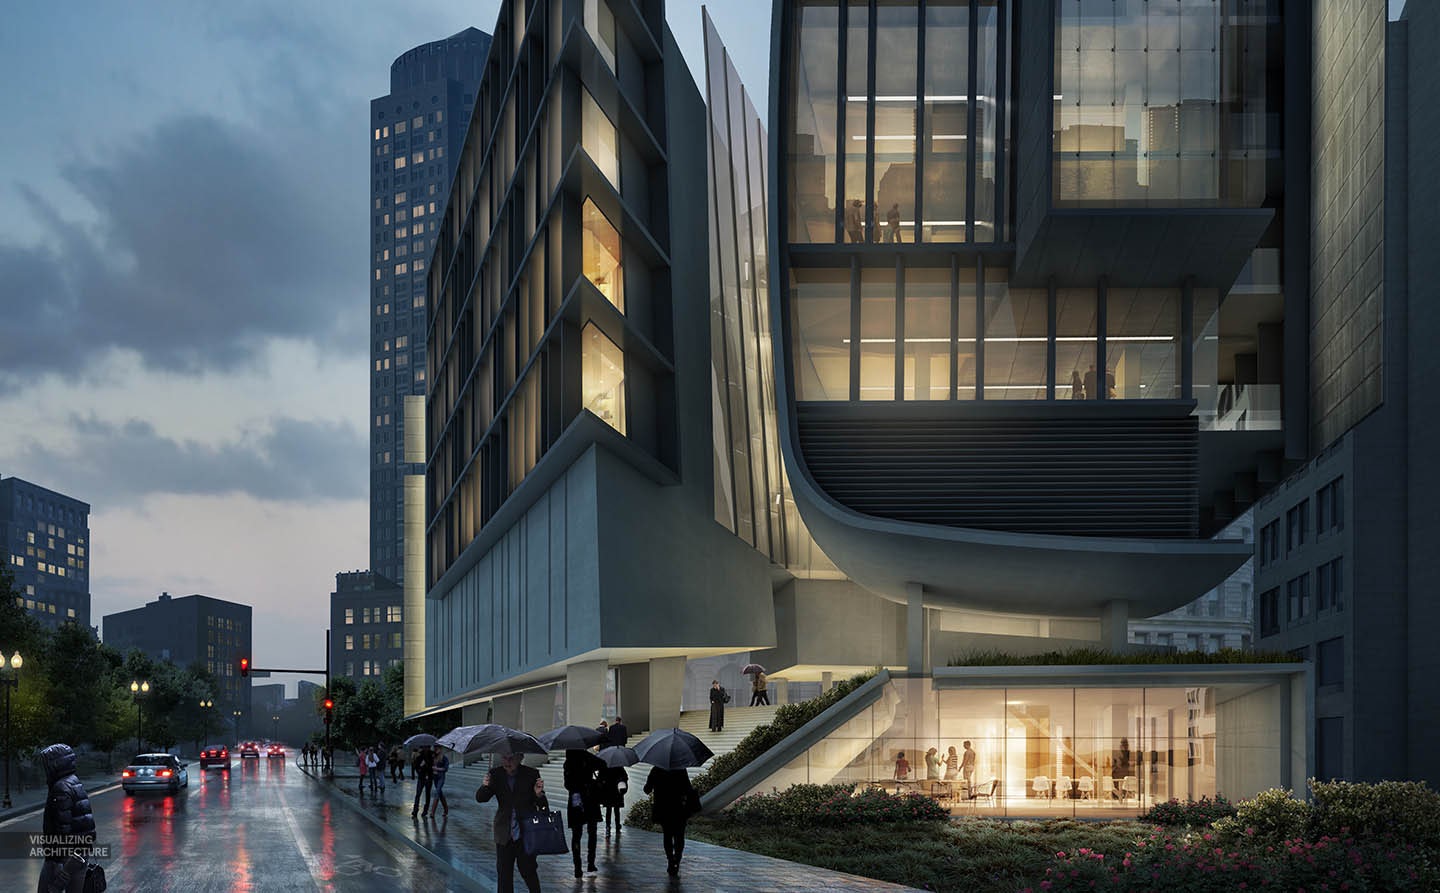
7. People
To help bring home the idea that it just rained, I inserted a bunch of people with umbrellas and rain gear. I didn’t want the people in the foreground to be too distracting but instead read more as silhouettes. I therefore desaturated and darkened them and edited the umbrellas to all be black. This put the emphasis back on the architecture but still activates the street life.
8. Color Editing
For the last step, I did some color editing in Topaz. My goal here was to pull out some more detail and contrast, darken the image a little more and shift the entire image to a similar range of colors.
If you haven’t already, check out my “No-Render Night Illustration” for a more comprehensive breakdown of turning a daytime illustration into a night scene and to get a better sense of the principles at work.
All images by Alex Hogrefe. This post first appeared on Visualizing Architecture. Enjoy this article? Check out the other features in our series on “The Art of Rendering”:
We are thrilled to announce the winners of Architizer's inaugural Vision Awards, the world’s biggest awards program dedicated to the art of architectural representation. Sign up to receive future program updates >
 25 Best Architecture Firms in Germany
 15 Best Architecture Firms in Malaysia
 How an Award-Winning Architectural Visualization Studio Is Evolving in the Age of AI
 Southern Hospitality: 6 Charming Examples of Georgia’s New Class of Single-Family Homes
 Natural Wonder: 10 Examples of Arkansas’ Elaborate Institutional Architecture


