
This article was written in collaboration with Archi Hacks, an online resource for architects and students.
Animation allows designers to add an extra dimension to the conventional architectural representation methods and enhance communication throughout the design process as well as marketing the project. Despite its inherent benefits, creating animation used to be difficult for many architects.
Previously, animations could only be produced with the use of powerful computers by artists who specialize in visualization. As computers have become more efficient over the years, more accessible software like Twinmotion has been introduced to the general public. Now, anyone can make a fully fledged animation of their own.
This article will walk you through how you can use animations created in Twinmotion to breathe life into your own projects.
What you’ll need:
- 3D software (SketchUp, Rhino)
- A 3D model
- Twinmotion (download trial for free here)
Step 1: Set up your scene
If you aren’t familiar with Twinmotion yet, learn how to set up your scene in this video. You’ll be surprised at how quickly you can set up an organic scene!
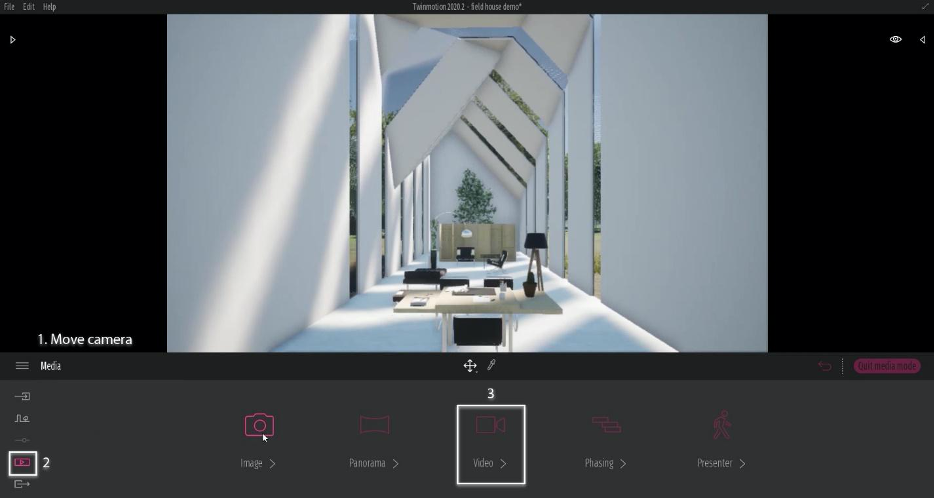
Step 2: Camera and fog
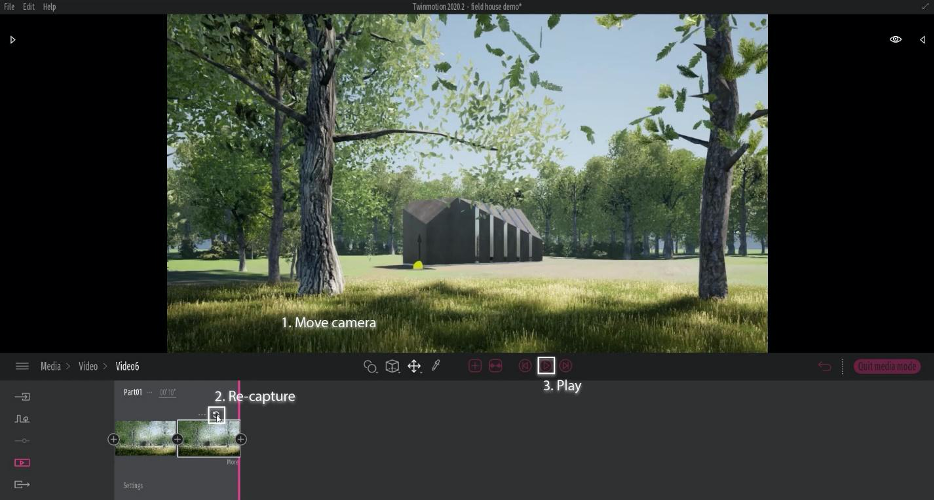
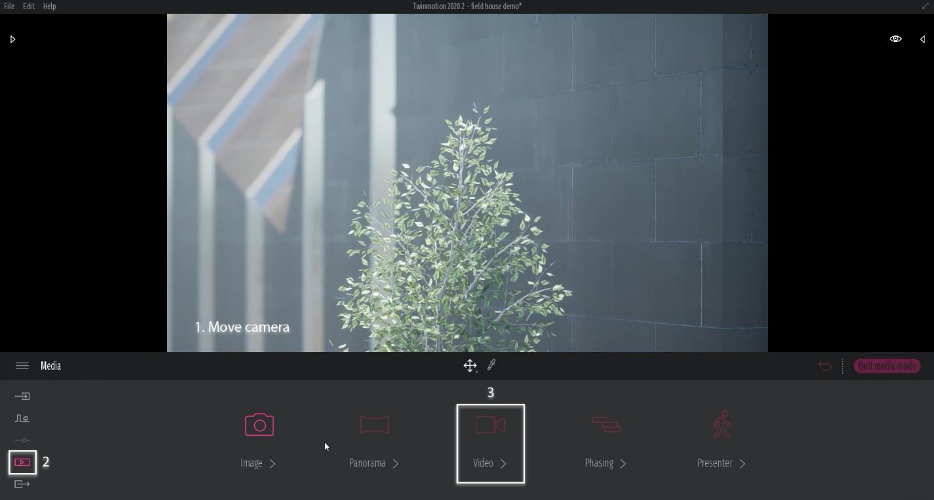
First, move your camera to the starting point of your animation and open the video tab:

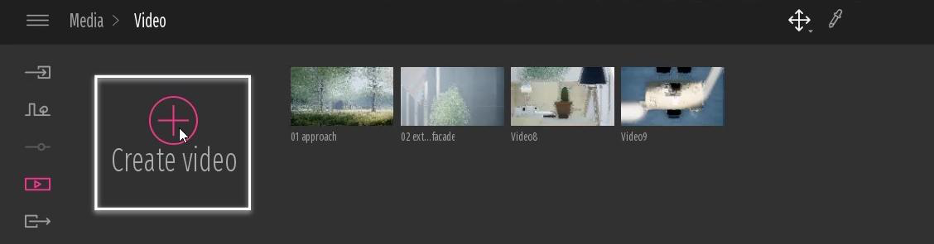
Create a new video clip:

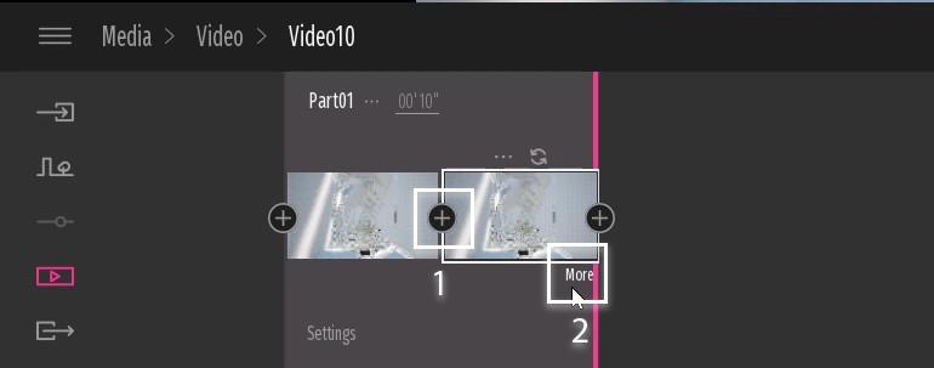
Click the plus icon to create a new keyframe. Keyframes are snapshots of moments that can be animated to and from:

Move the camera to the second position, and re-capture to the second keyframe. You can now preview the animation:
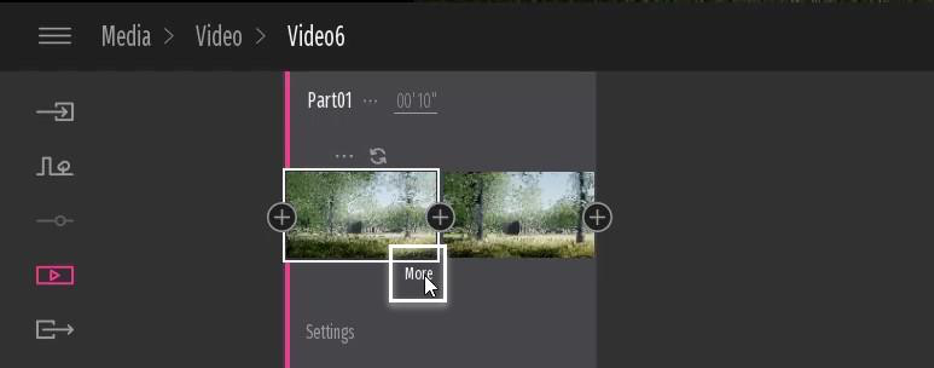
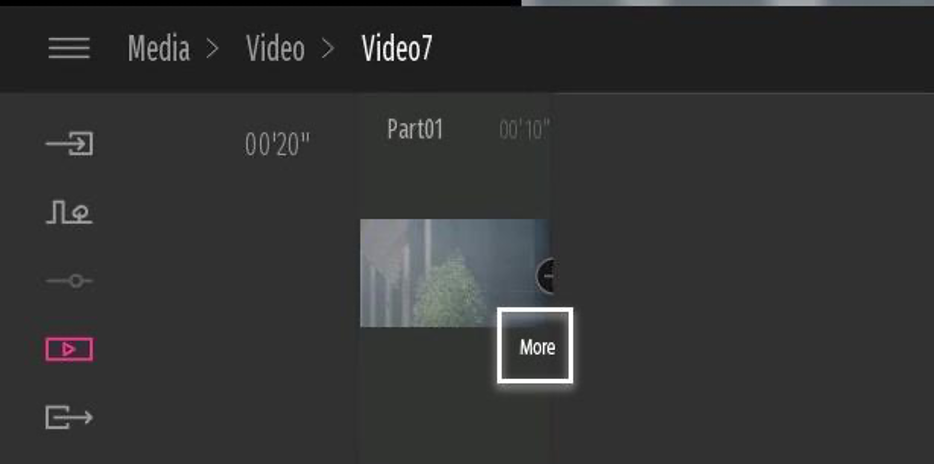
Let’s add fog to our scene by going into ‘more’ options in the first keyframe:

Set the smog level to 100%:

Repeat the same steps for the second keyframe, except set the smog level to 50%:

Preview the animation and you will see the camera smoothly moving around while the smog dissipates.
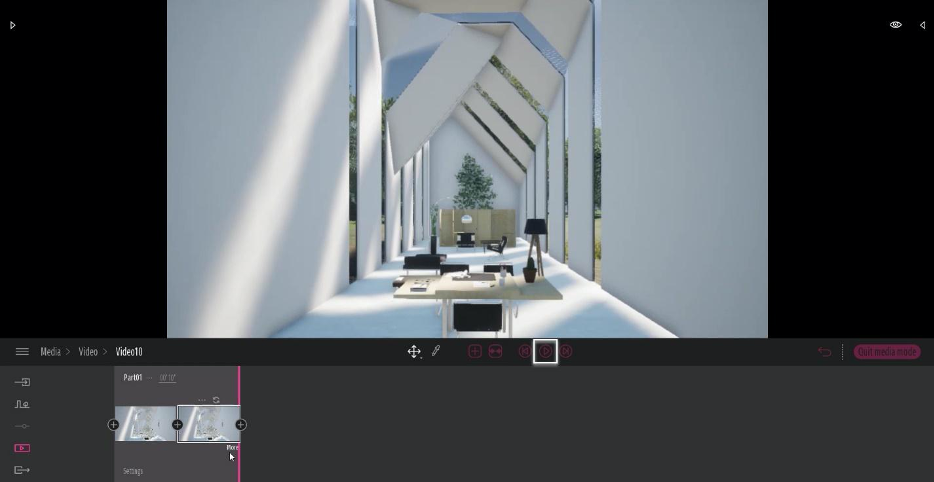
Step 3: Depth of field
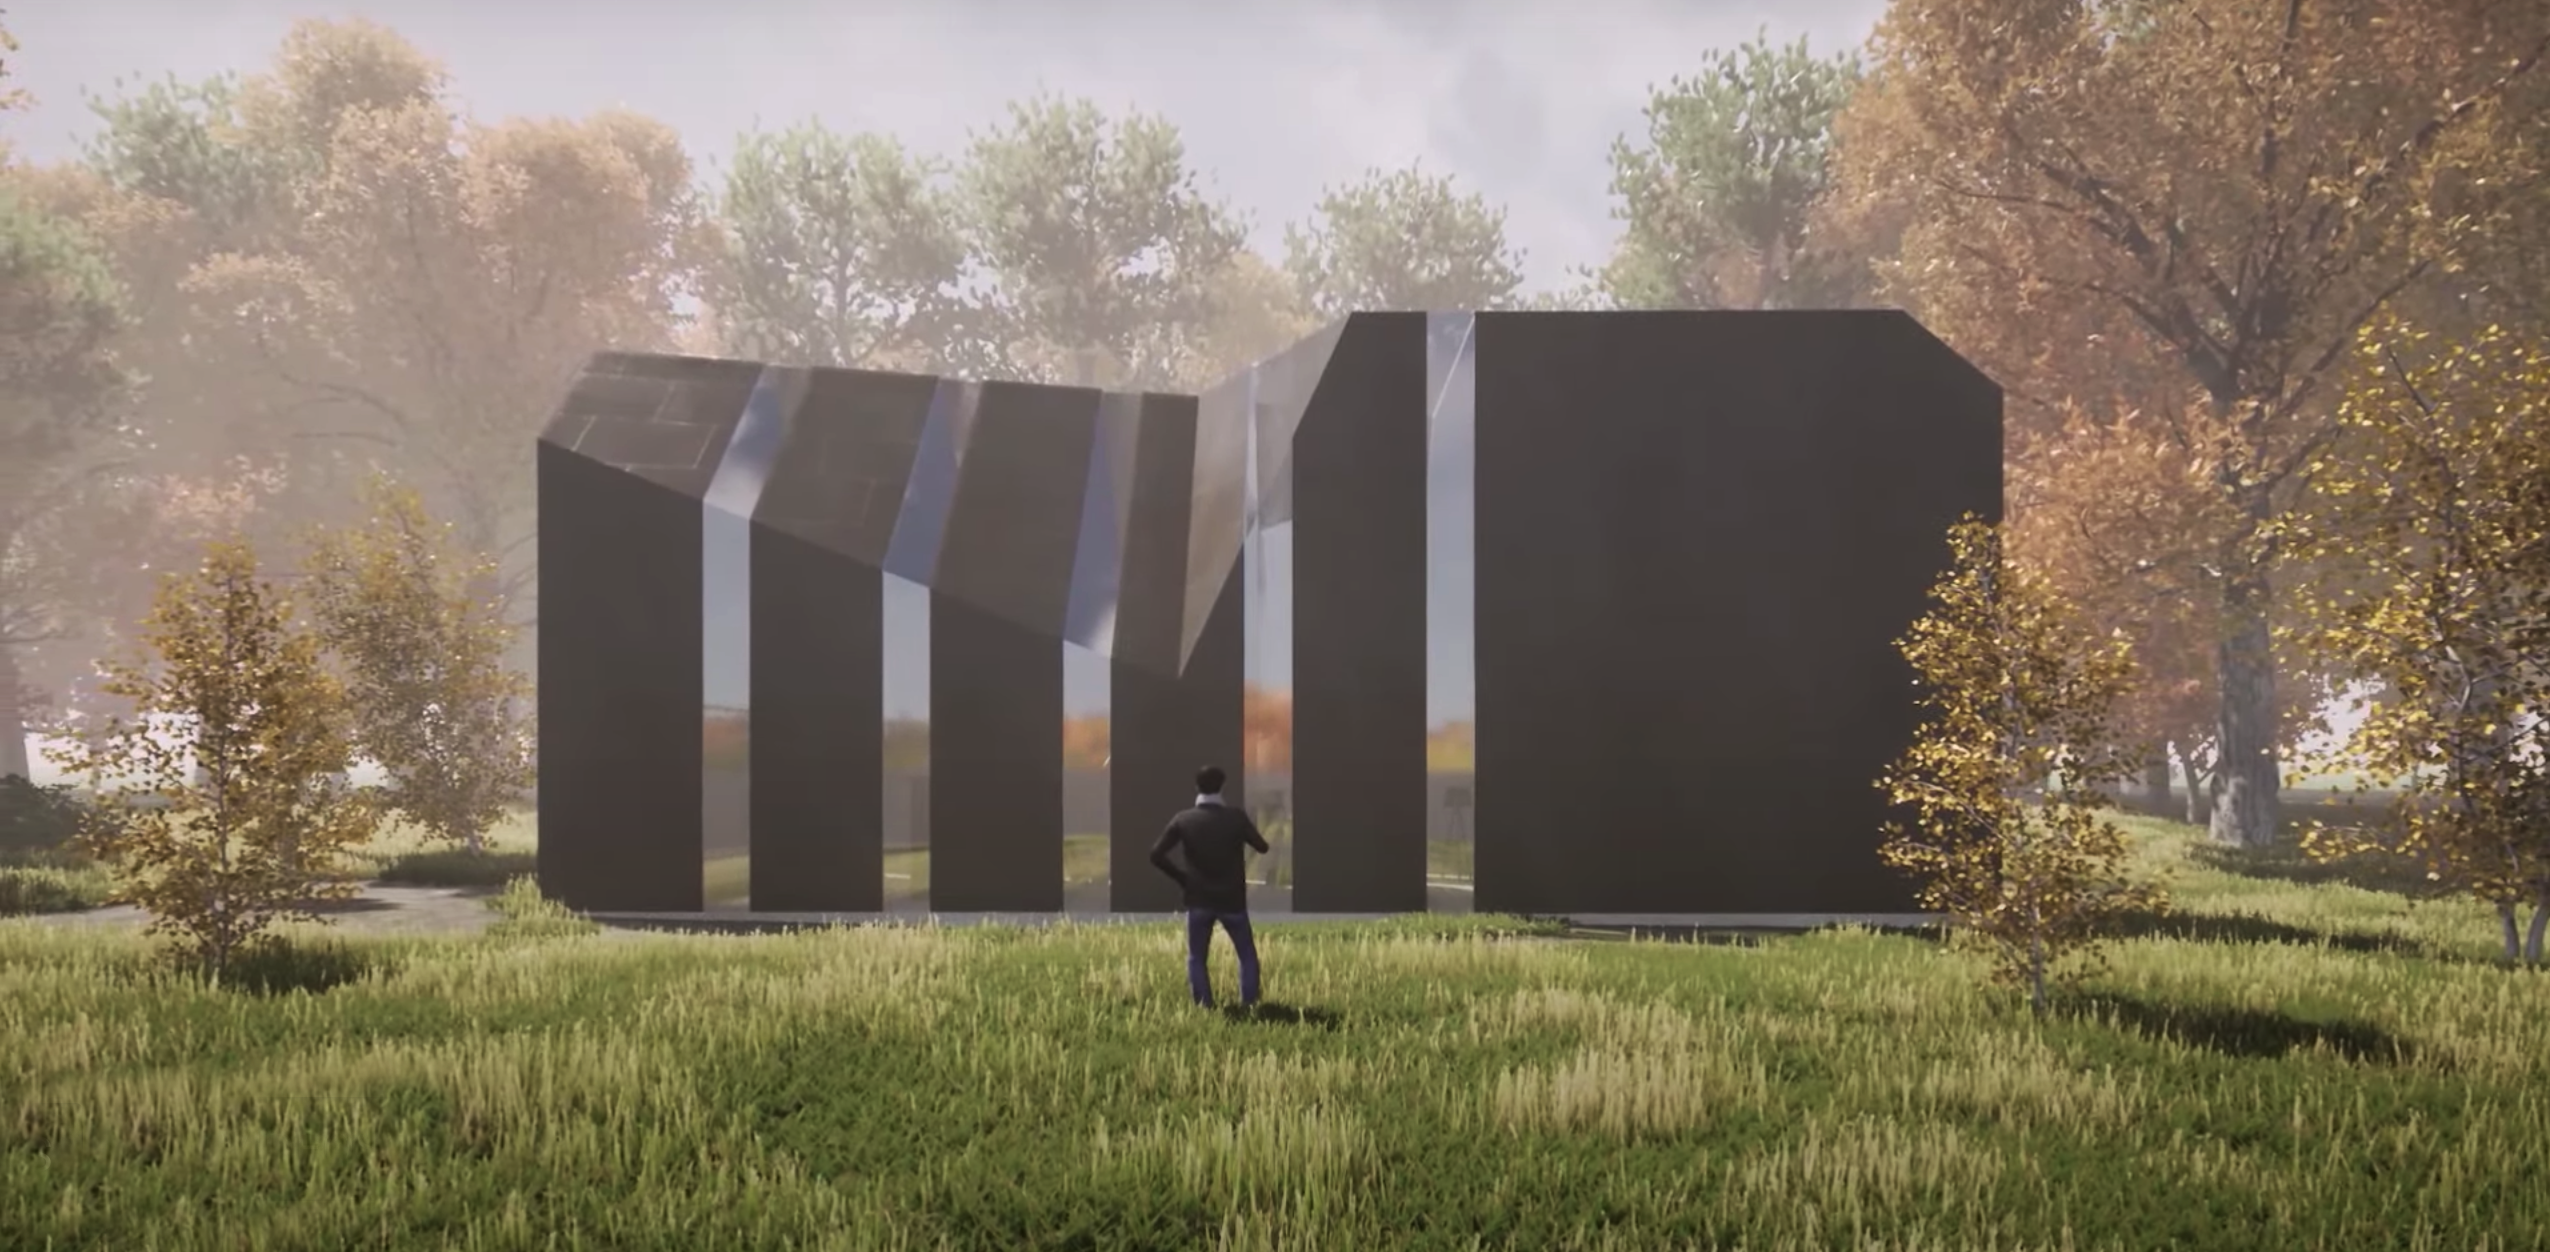
In the second scene, we’ll be focusing on the exterior façade:
Move the camera to the desired location and create a new video.

Click on ‘more’ to enable depth of field:

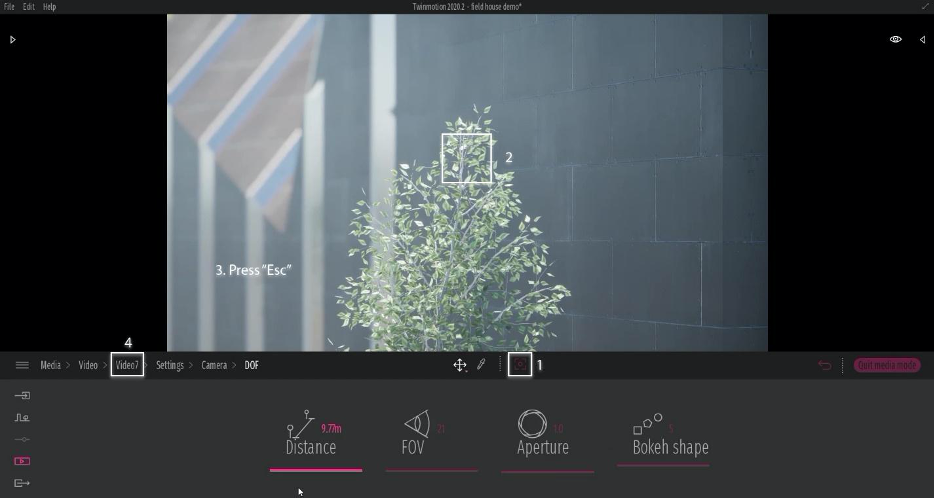
Enable depth of field (DoF), and click into more options to set the focus:

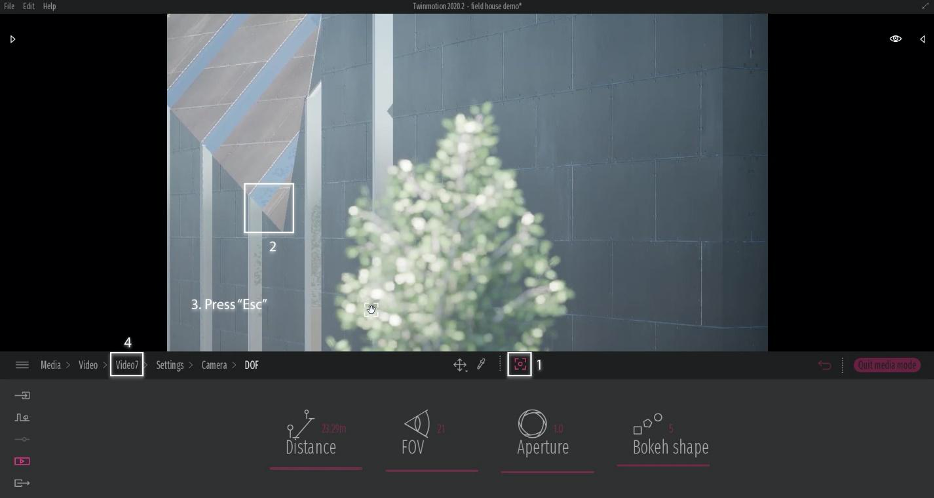
Use the focus widget to choose a point of focus. We’ll start with the foreground tree. Make sure to ‘esc’ when finished:
We’ll create two more keyframes and move into the third keyframe options:

Repeat the steps above and choose the second point of focus:
Create one more keyframe and edit the duration of the animation to six seconds. Press play to preview:

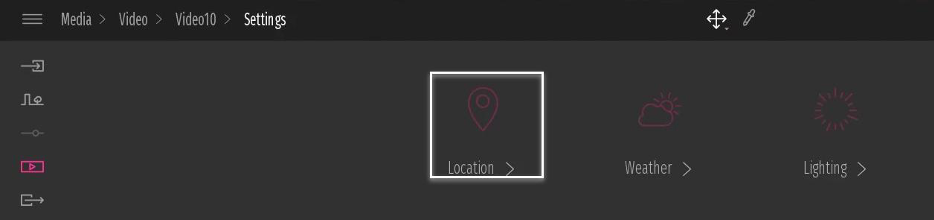
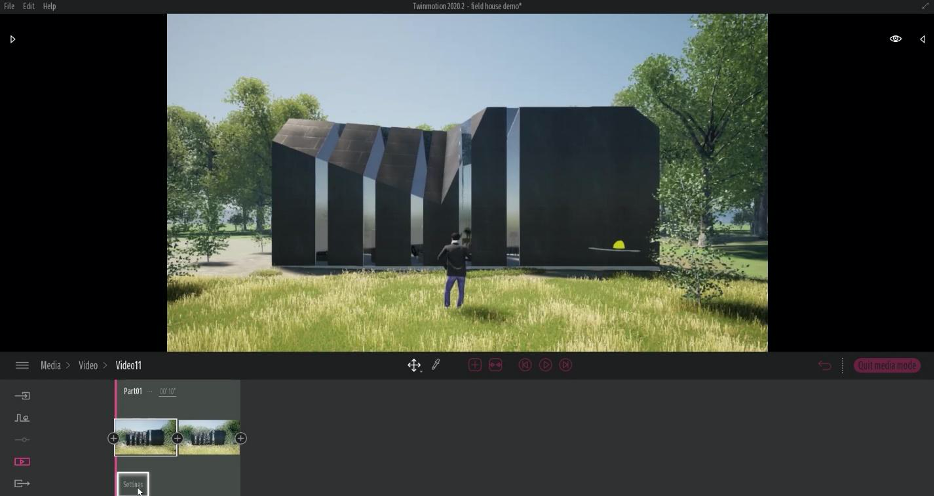
Step 4: Sun Path
You can animate virtually all the settings this way, including the sun. Let’s try with a new scene.
Create two keyframes and go into the second frame option:
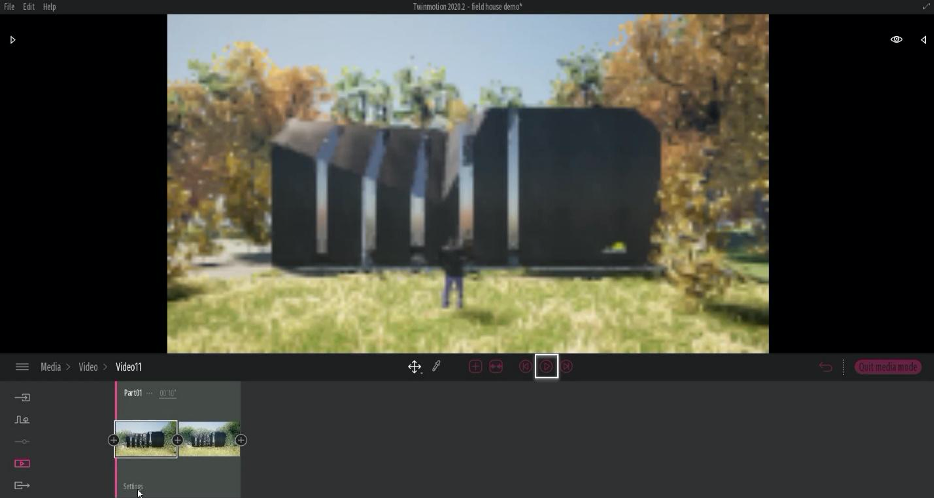
Move the time of the day to animate the sun. Make sure the second frame is set to a later time of the day:

Click preview to watch the lights move:
Step 5: Global Settings
There will be times when you want to adjust a setting across the whole animation such as weather, growth, and season. For this, we should take advantage of the global settings found at the bottom of the video timeline.
We’ll edit weather in this example, but this applies to all other settings as well.

We’ll move the season slide just enough to make the leaves turn yellow, and let the vegetation grow fully:

The settings above stay consistent throughout the animation:
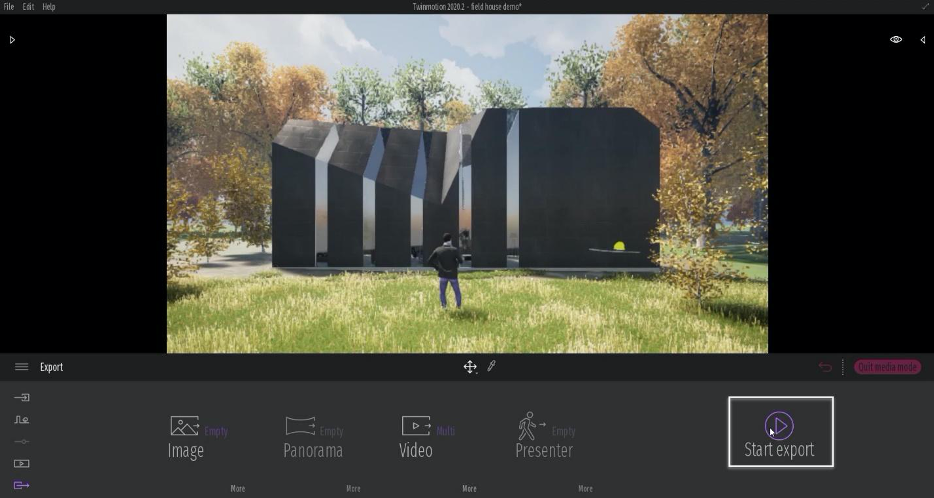
Step 6: Export
Now that you have an amazing animation, you have to show it off to your clients, coworkers, and friends! Head over to the Export tab and add videos to the queue.
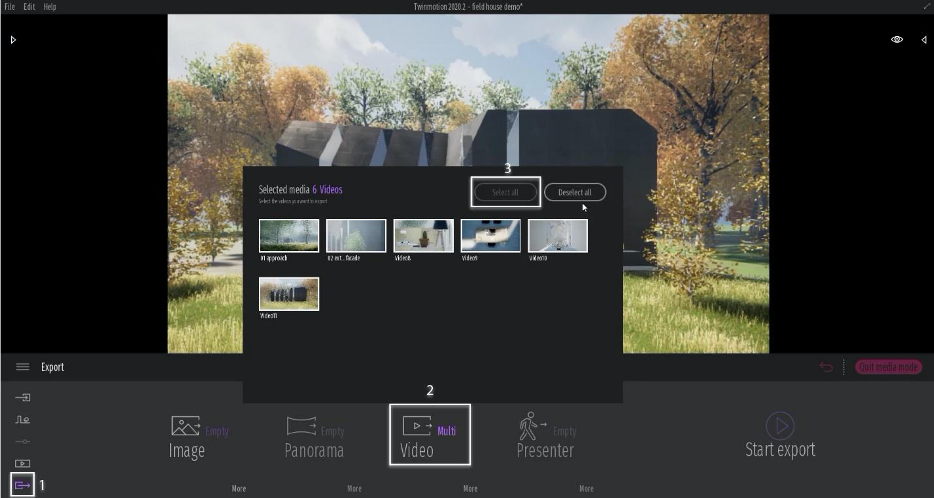
When you’re ready, choose your destination folder to start exporting. That’s it!
The Completed Animation
Here’s the end result after following all of the above steps:
There we have it—a cinematic trailer for your own project. I hope you found this tutorial helpful, and that you took your presentation to the next level. Feel free to share your animations with us on social media. We’ll be looking forward to seeing more beautiful presentations in the near future.
This article was written in collaboration with Archi Hacks, an online resource for architects and students.